| 002-espnow2mqtt_receiver | ||
| 002-espnow2mqtt_sender | ||
| README.md | ||
ESPnow/LoRa to MQTT Gateway for Home Assistant
[[TOC]]
Idea:
- Build universal sensor device (ESP32 based) equipped with temperature, humidity and light sensors, that can live long on 1 battery charge.
EDIT: added possibility to measure battery status (Volts and % remaining) using ADC and GPIO instead of LiPo Gauge
EDIT: added "motion only device" that has only motion detector - PIR (temperature, humidity and light sensors are OFF) - Clone/deploy it to as many sensors as needed (indoor, outdoor etc.) without changing the software or reconfiguration (beyond what is specific to the device i.e. GPIO connection etc.)
- Build gateway device (that is always powered ON) that transfers data from sensor devices to Home Assistant and automatically creates devices/entities on Home Assistant (no configuration needed). Building multiple gateway devices (and locating them in various places) allows widening the range, without loosing the data when RSSI is very low (extending the range).
EDIT: added "push buttons device" that has only push buttons (1 or many)
Tasks for the devices:
- Sensor devices: (battery powered) wake up, measure the environment and battery, send to gateway over ESPnow, go to sleep, wake up after specified period and repeat
- Gateway device: (always ON) receive message over ESPnow from sensors, convert to Home Assistant auto discovery code and send to Home Assistant over MQTT/WiFi
EDIT:Gateway device, since it is always powered ON, got also motion detector (microwave) so it can be also a part of the home alarm system - REMOVED from gateway due to interferences with WiFi - see "sender-motion-only" folderEDIT: Motion sensor implemented in sensor device - it works great now
To satisfy the requirements I've chosen:
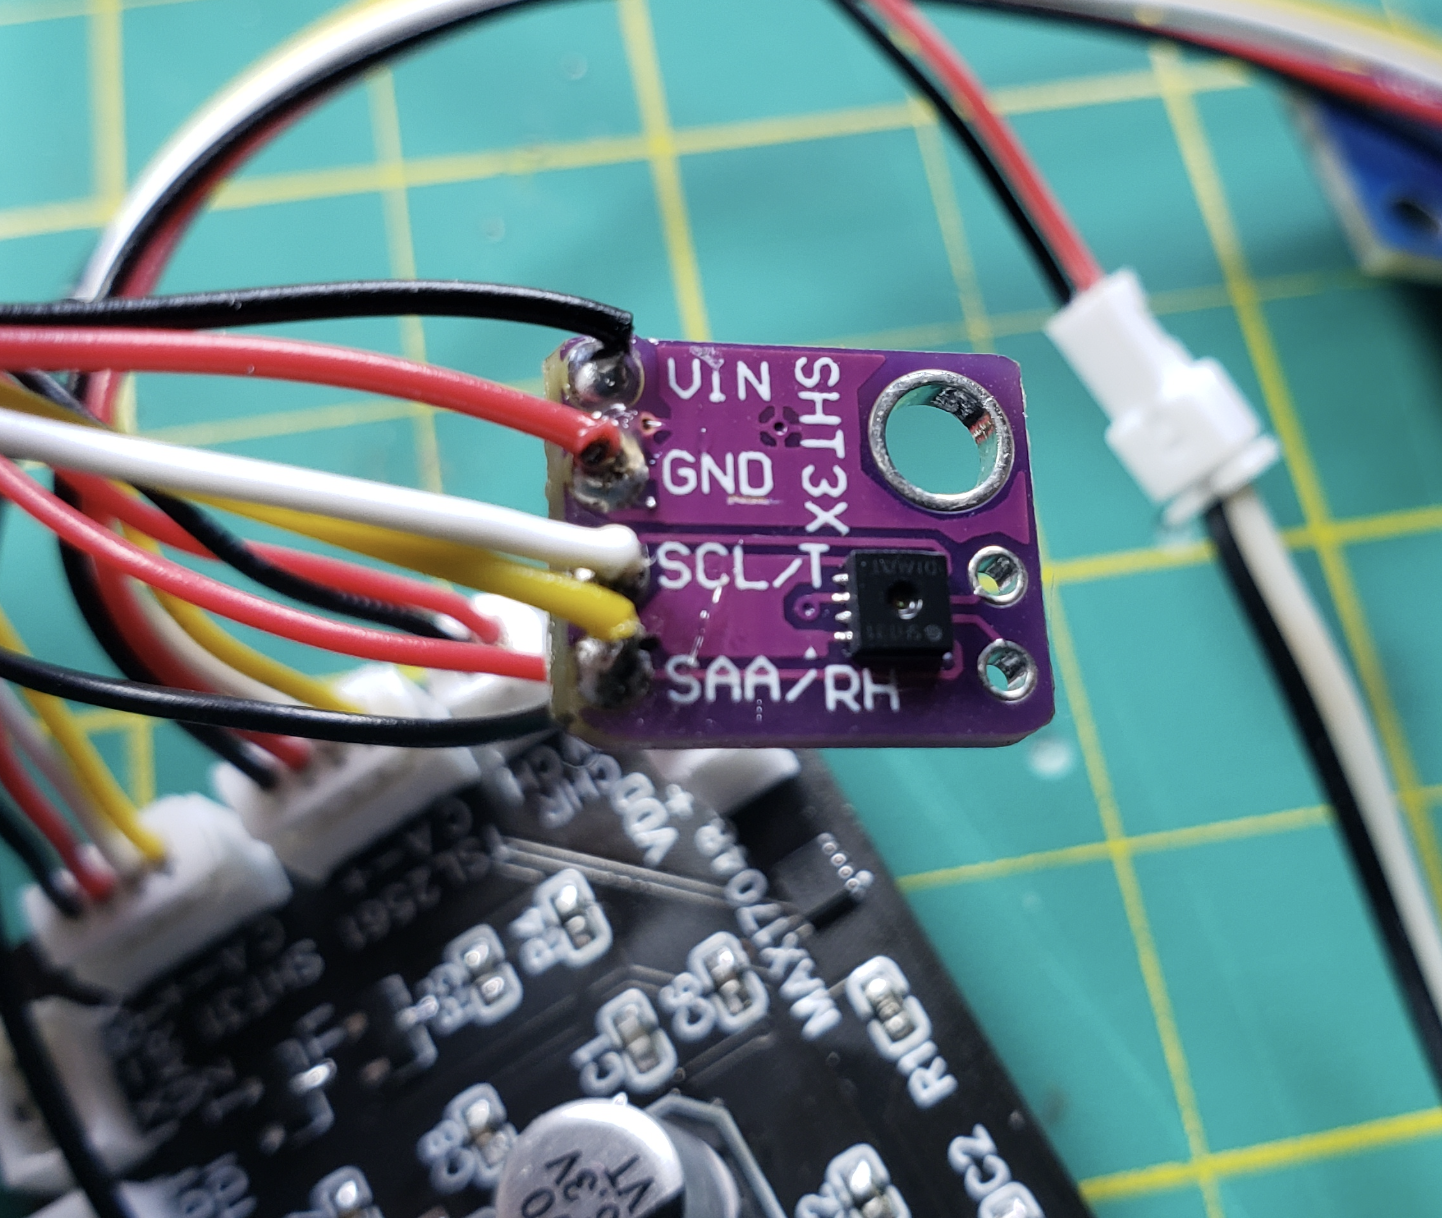
- SHT31 temperature and humidity sensor, I2C, around 1.5$ on Aliexpress (breakout) EDIT: alternatively DS18B20 or MAX31855
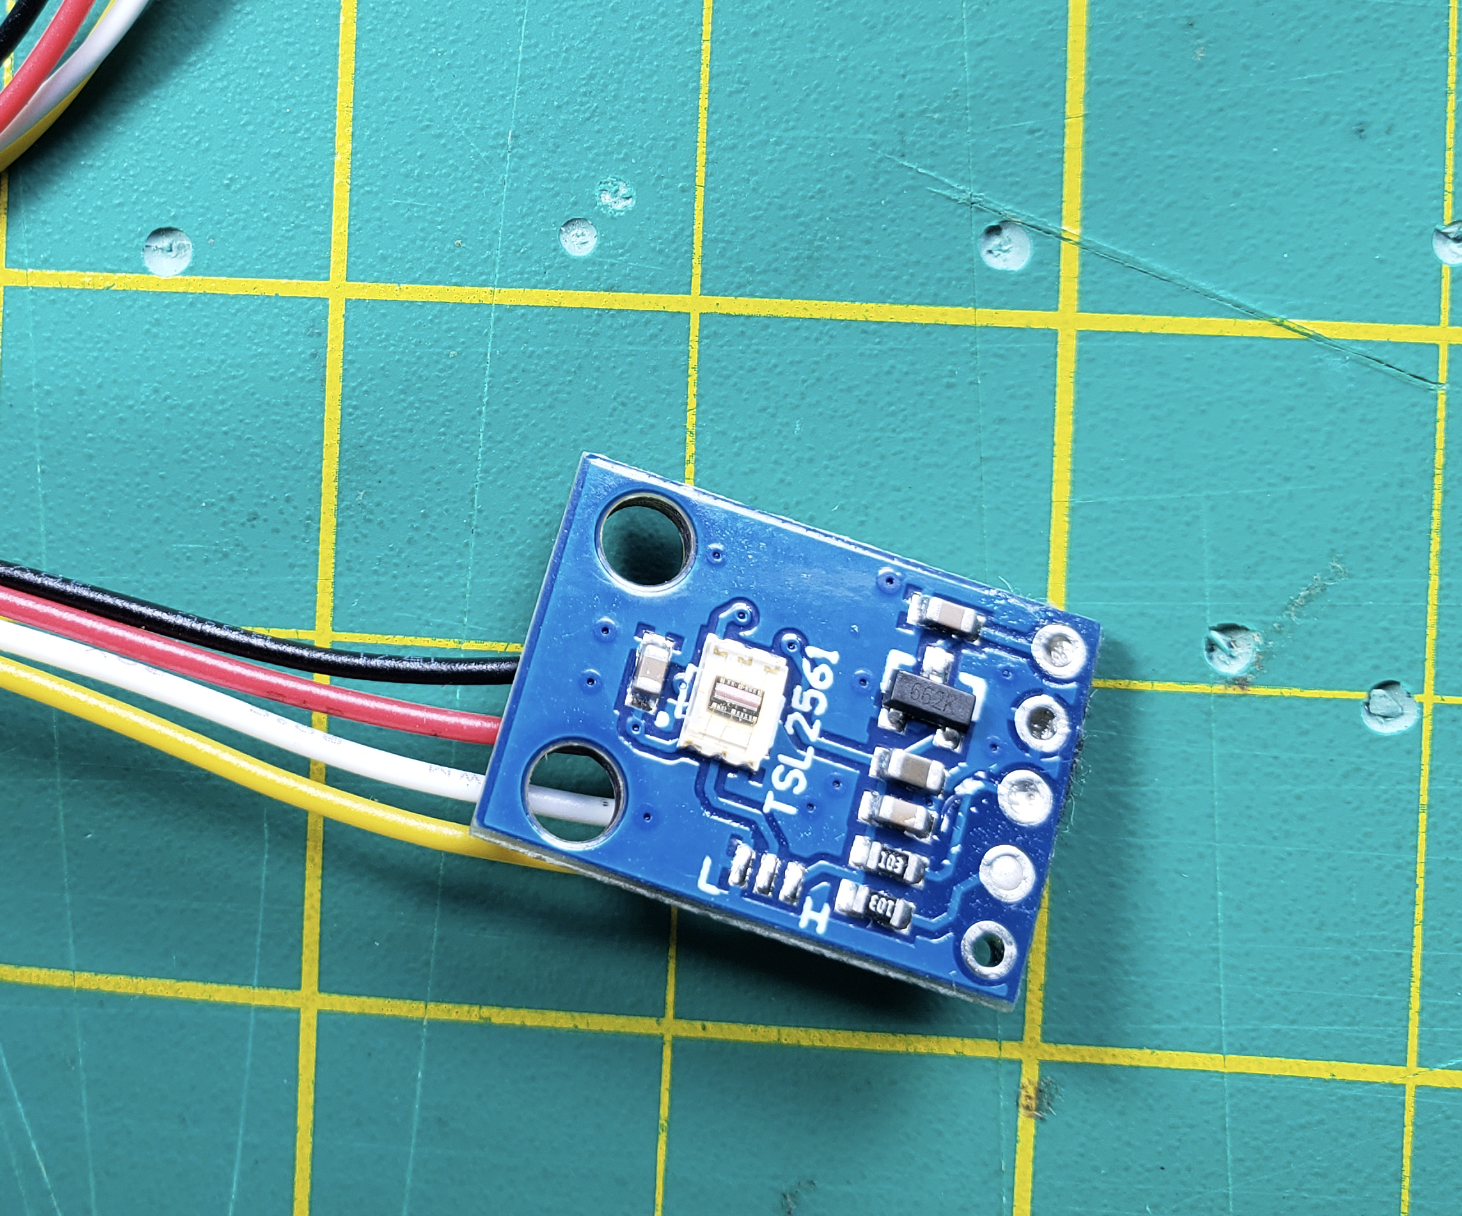
- TSL2561 light sensor, I2C, around 1.5$ on Aliexpress (breakout)
- MAX17048 LiPo battery sensor, I2C 1-5$ (depending if chip only or breakout) EDIT: alternatively ADC with resistors
- ESP32S-WROOM or ESP32-S2 WROOM, around 2$ on Aliexpress (bare metal - do NOT use the development board with additional components! - they cannot go to uA due to the on board elements, i.e. LDO, LED etc.)
- few additional components as per schematics (see below)
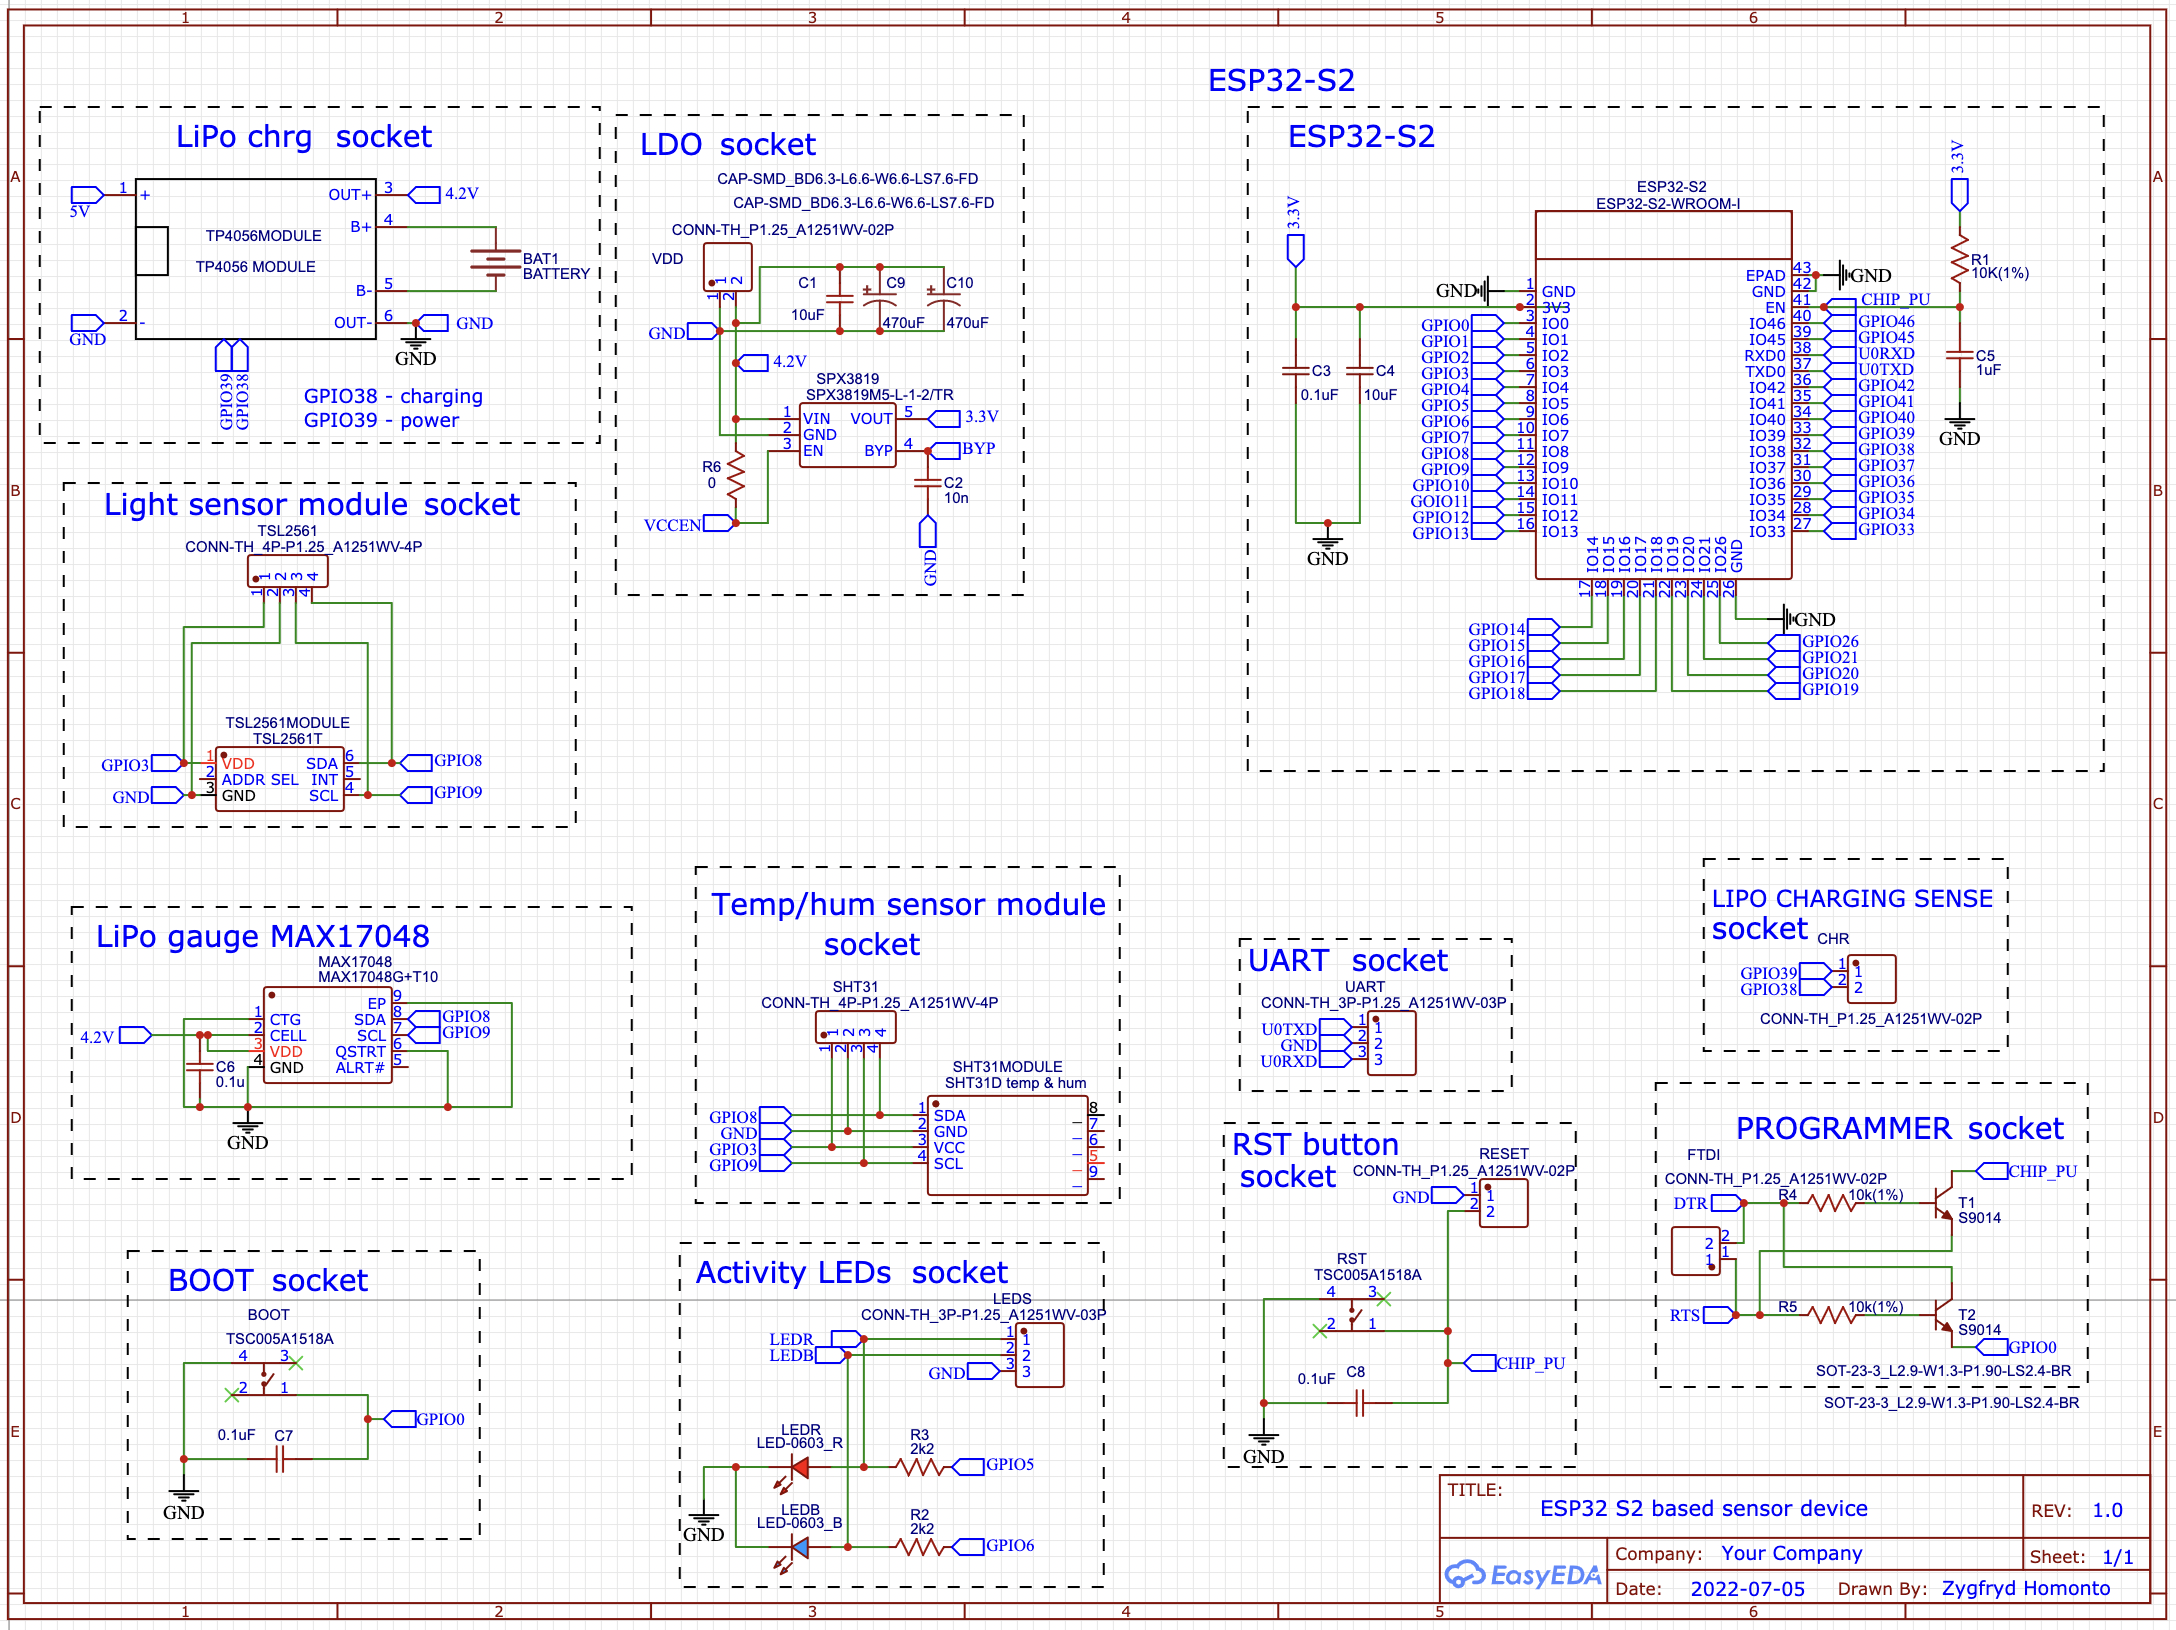
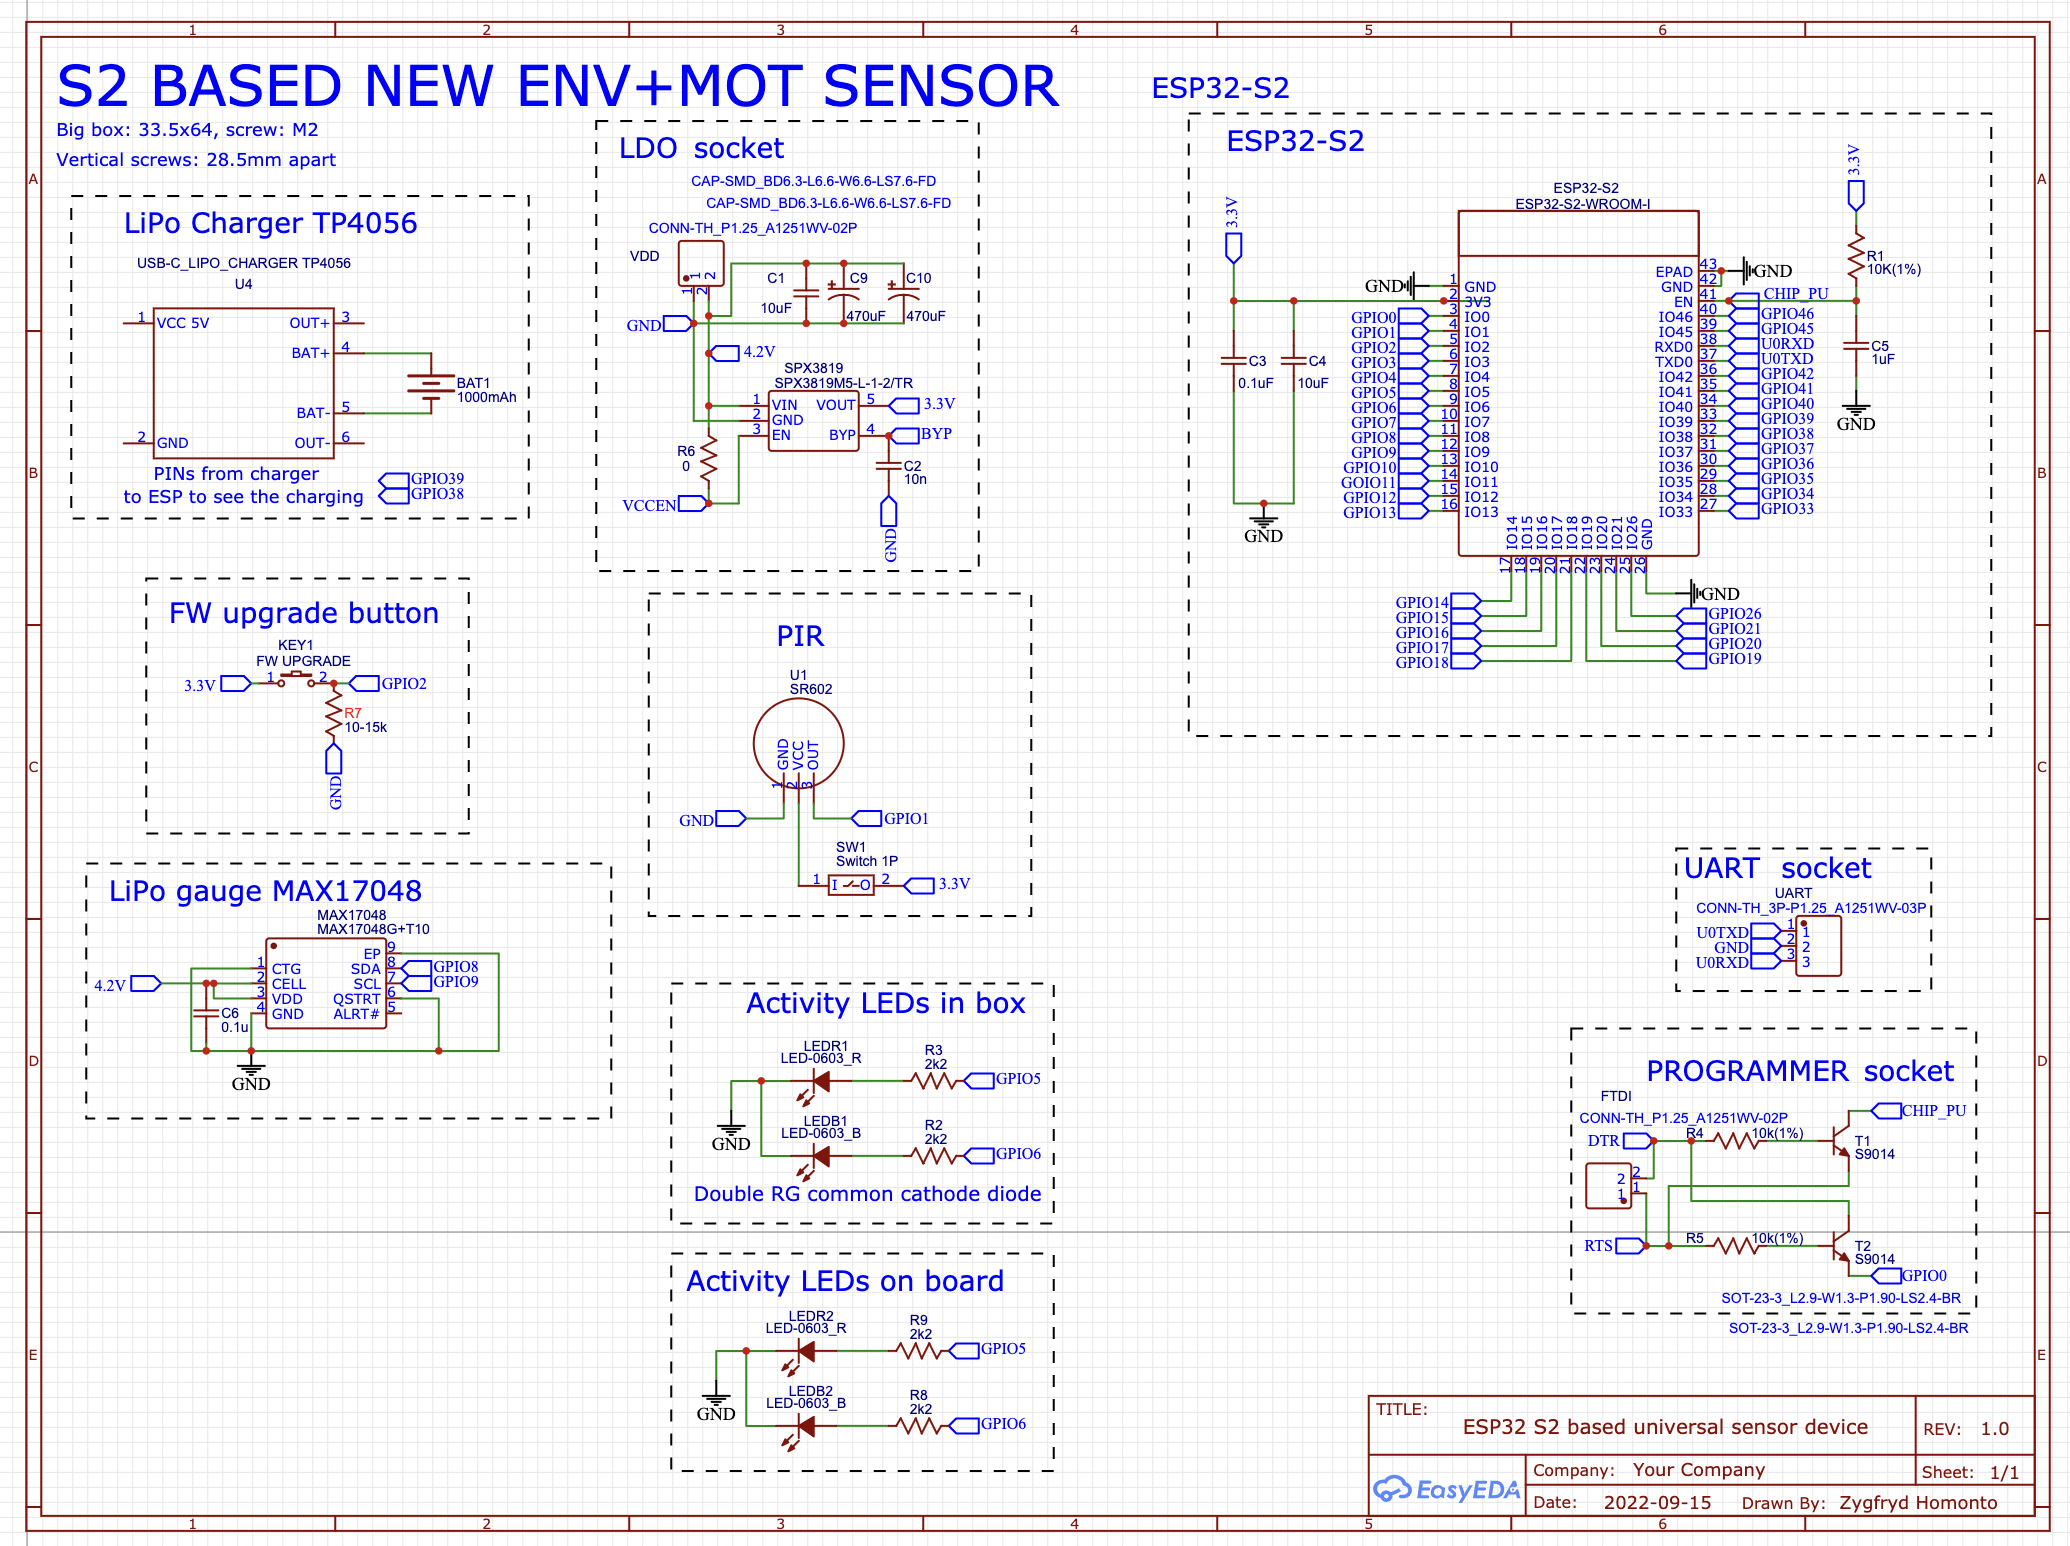
Final schematic (ESP32-S2 based):
With PIR sensor (motion detector)
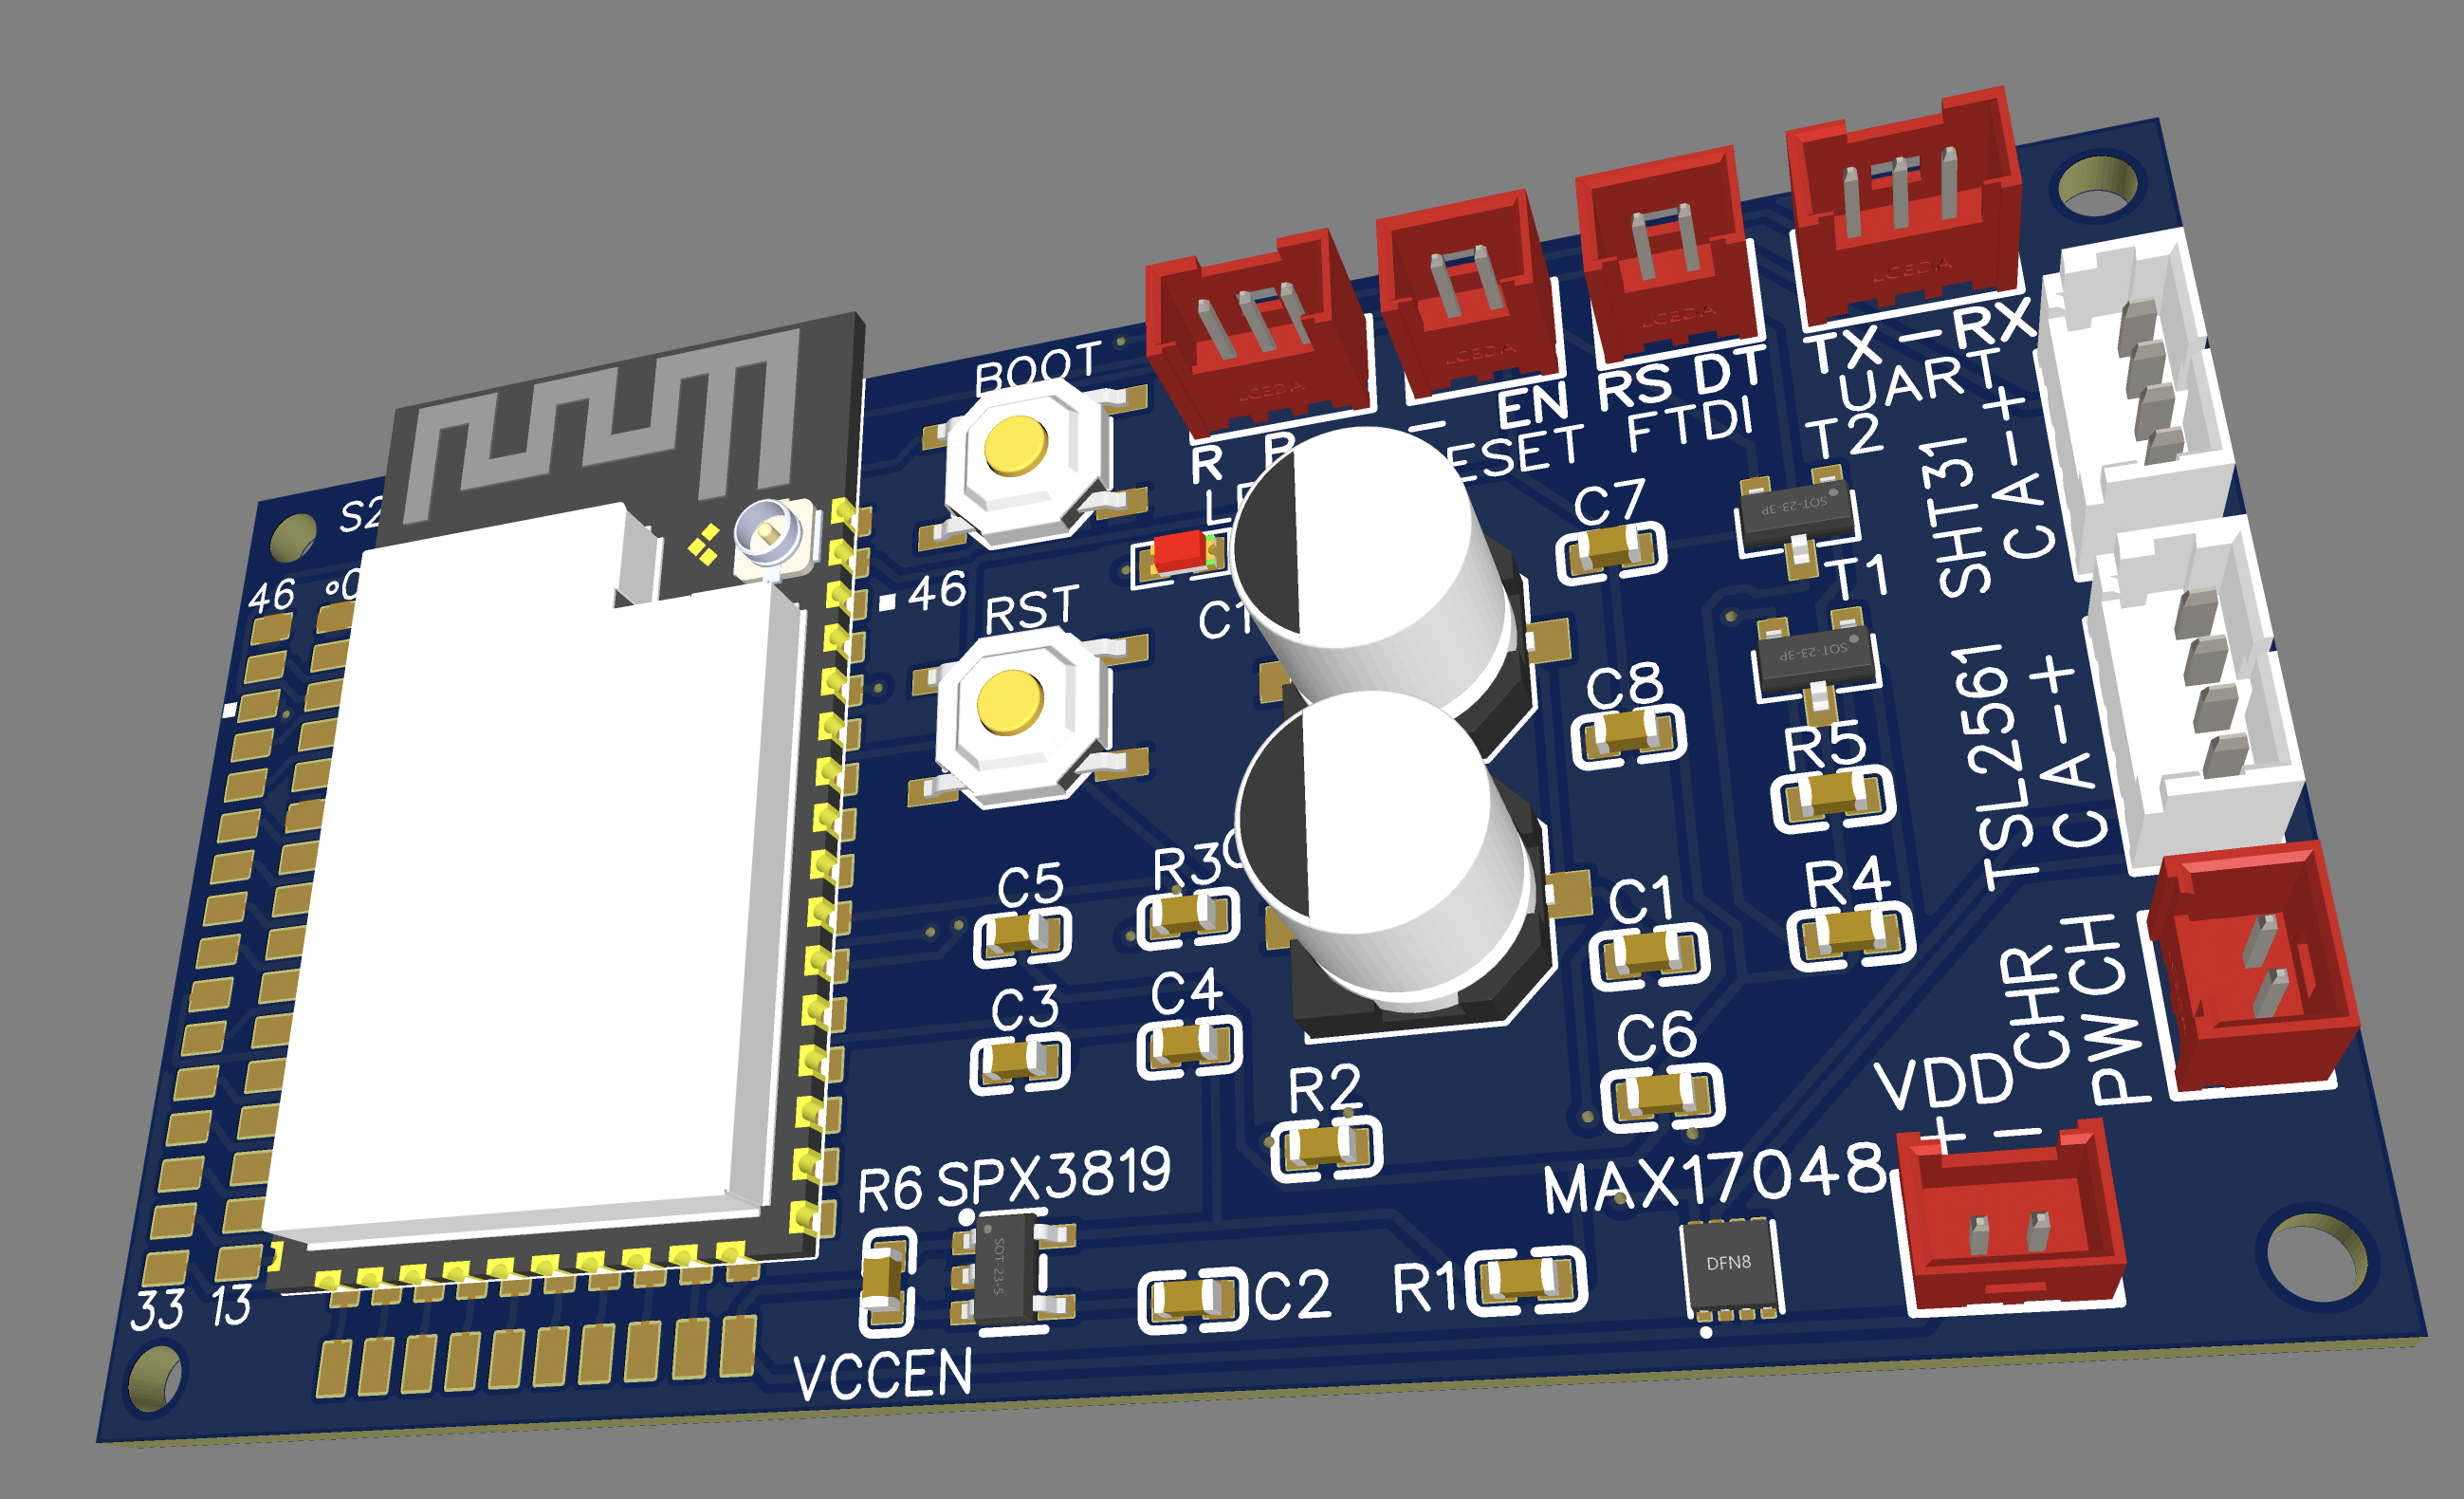
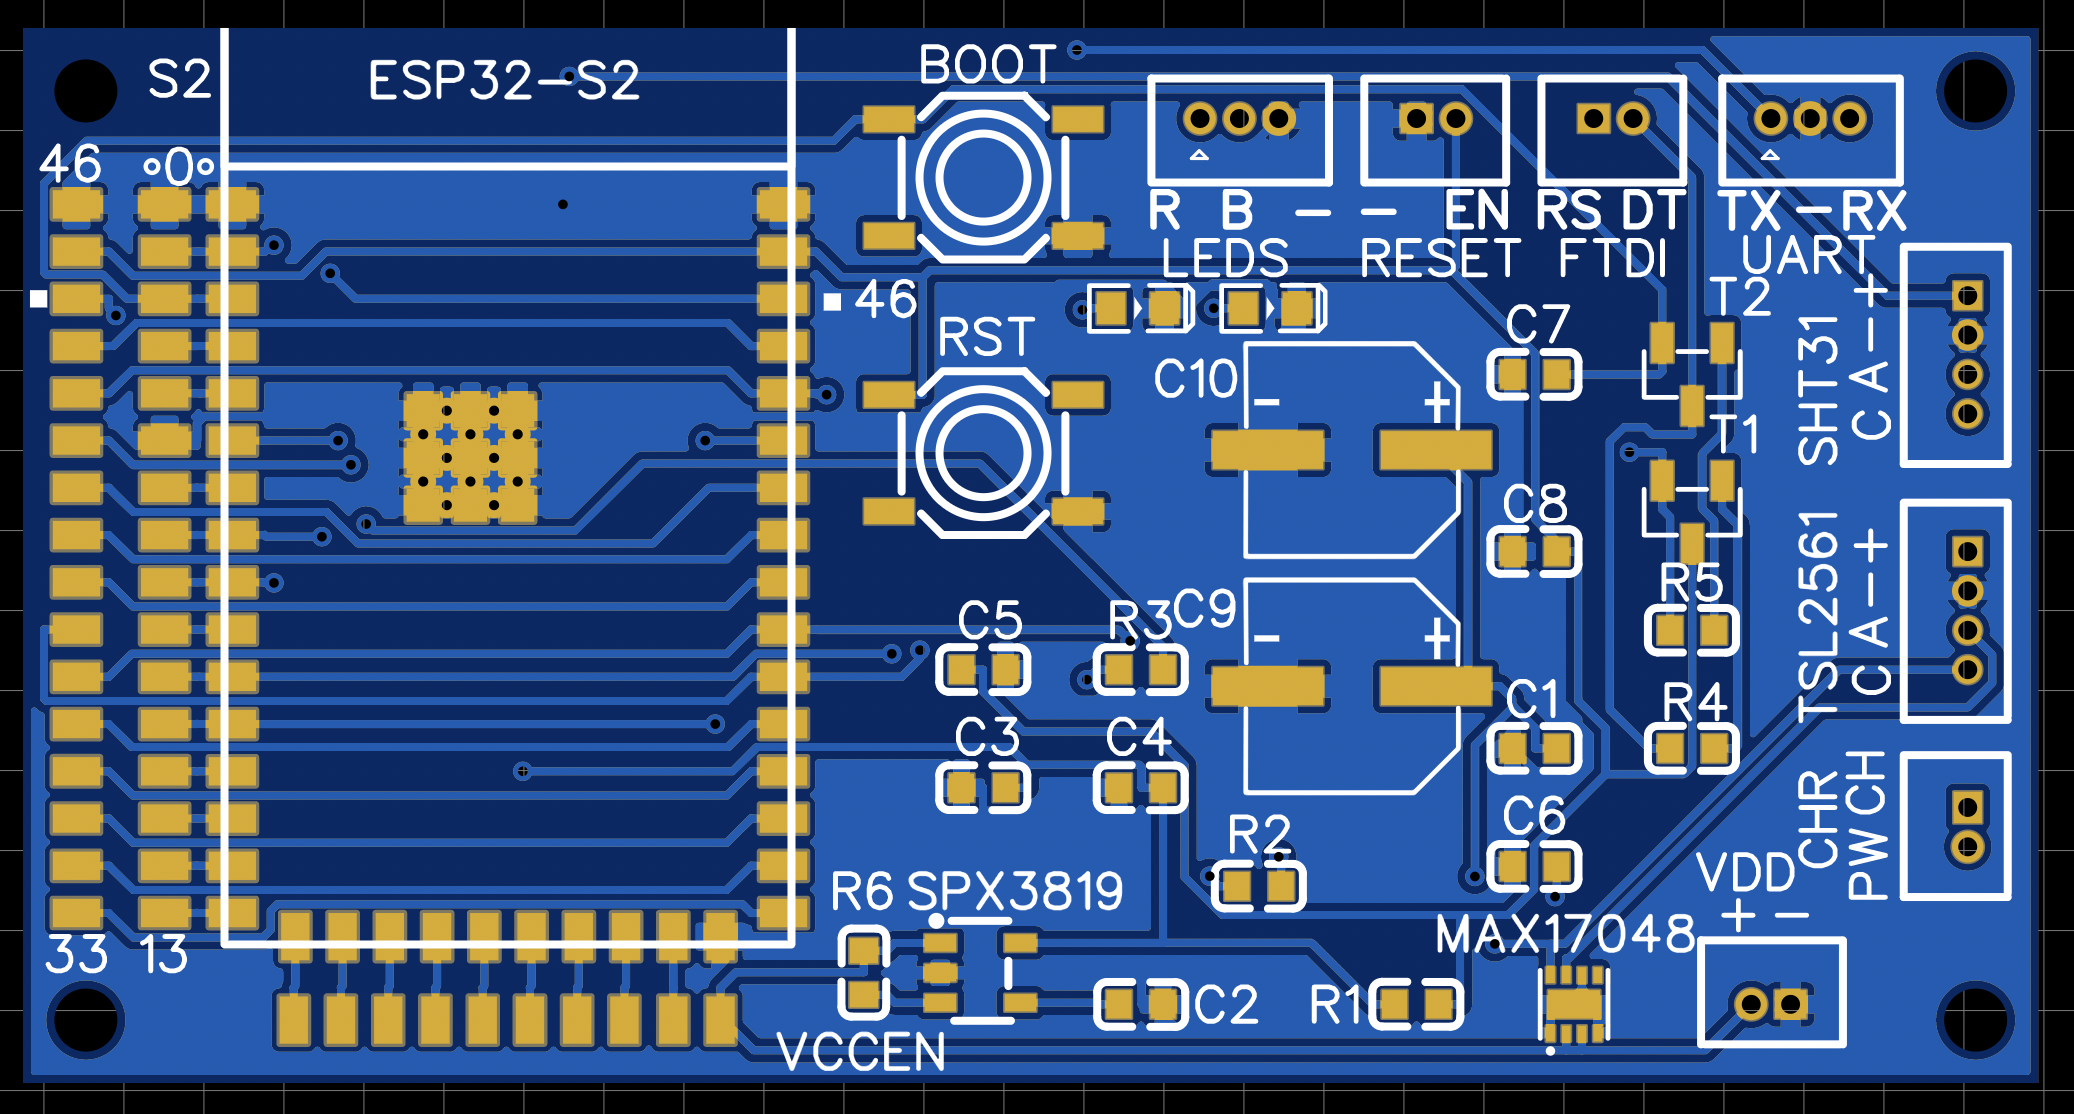
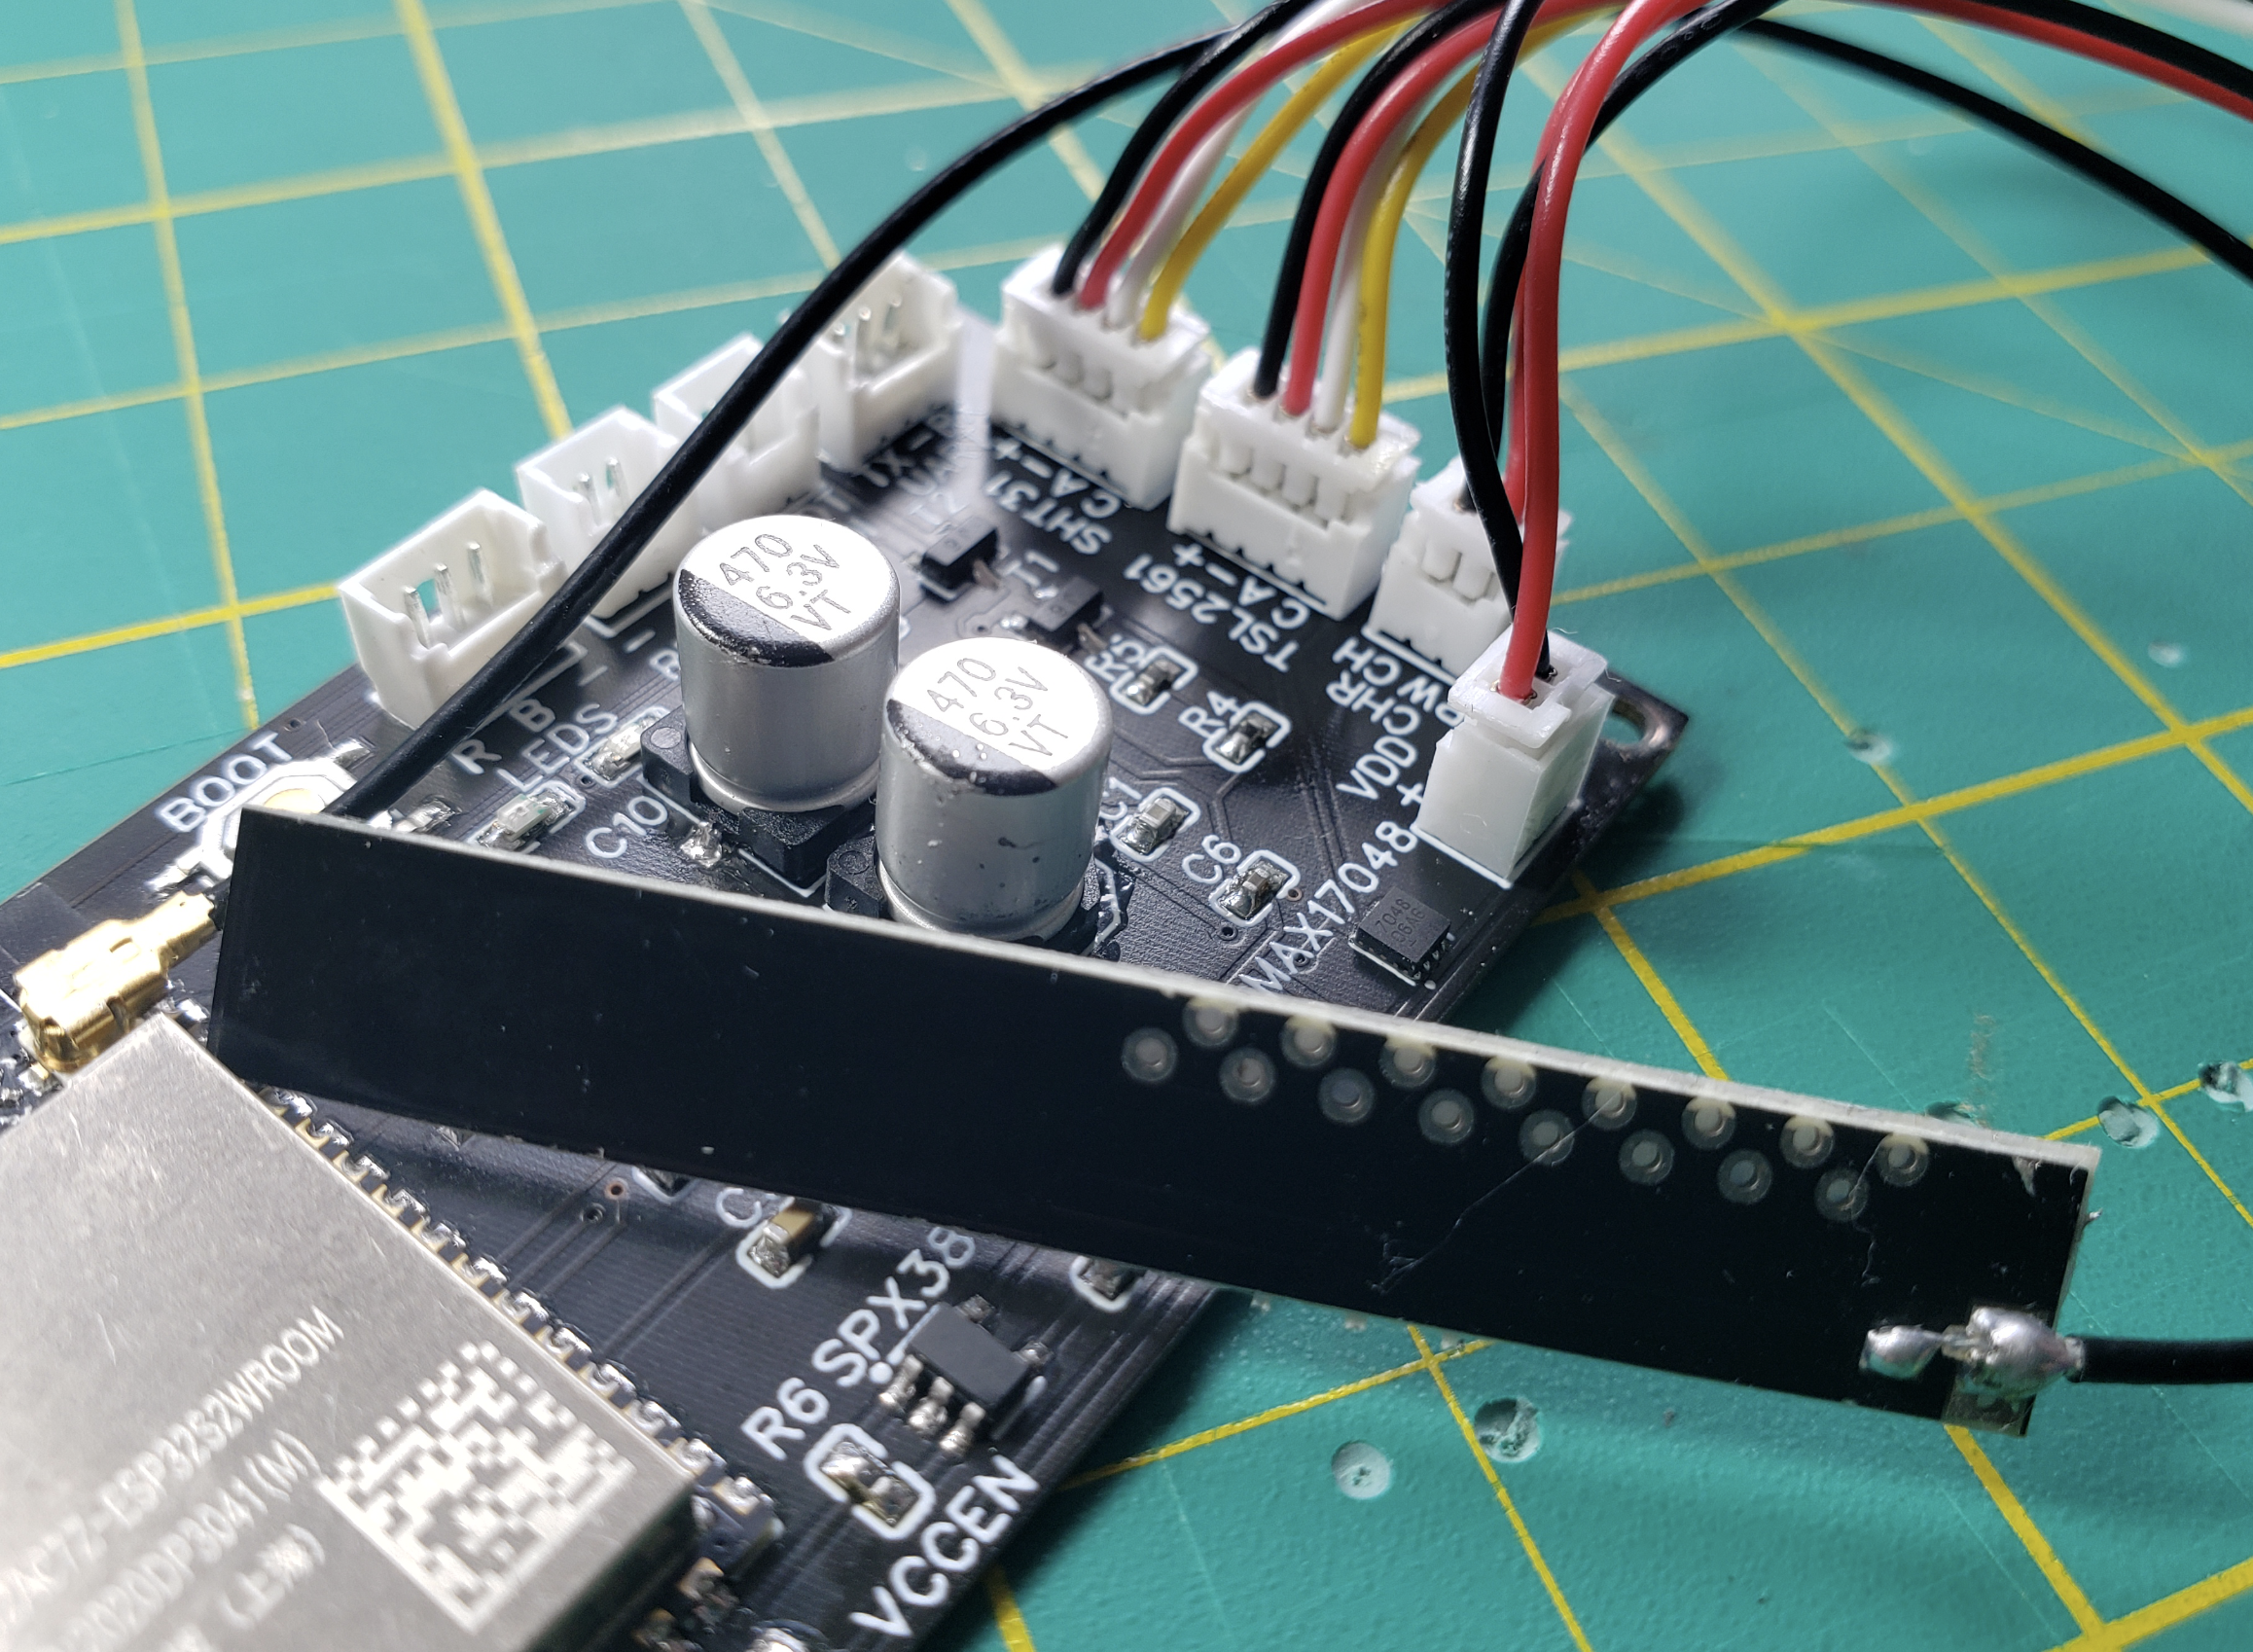
Final PCB (ESP32-S2 based) - design:
Preparing the boards to solder:
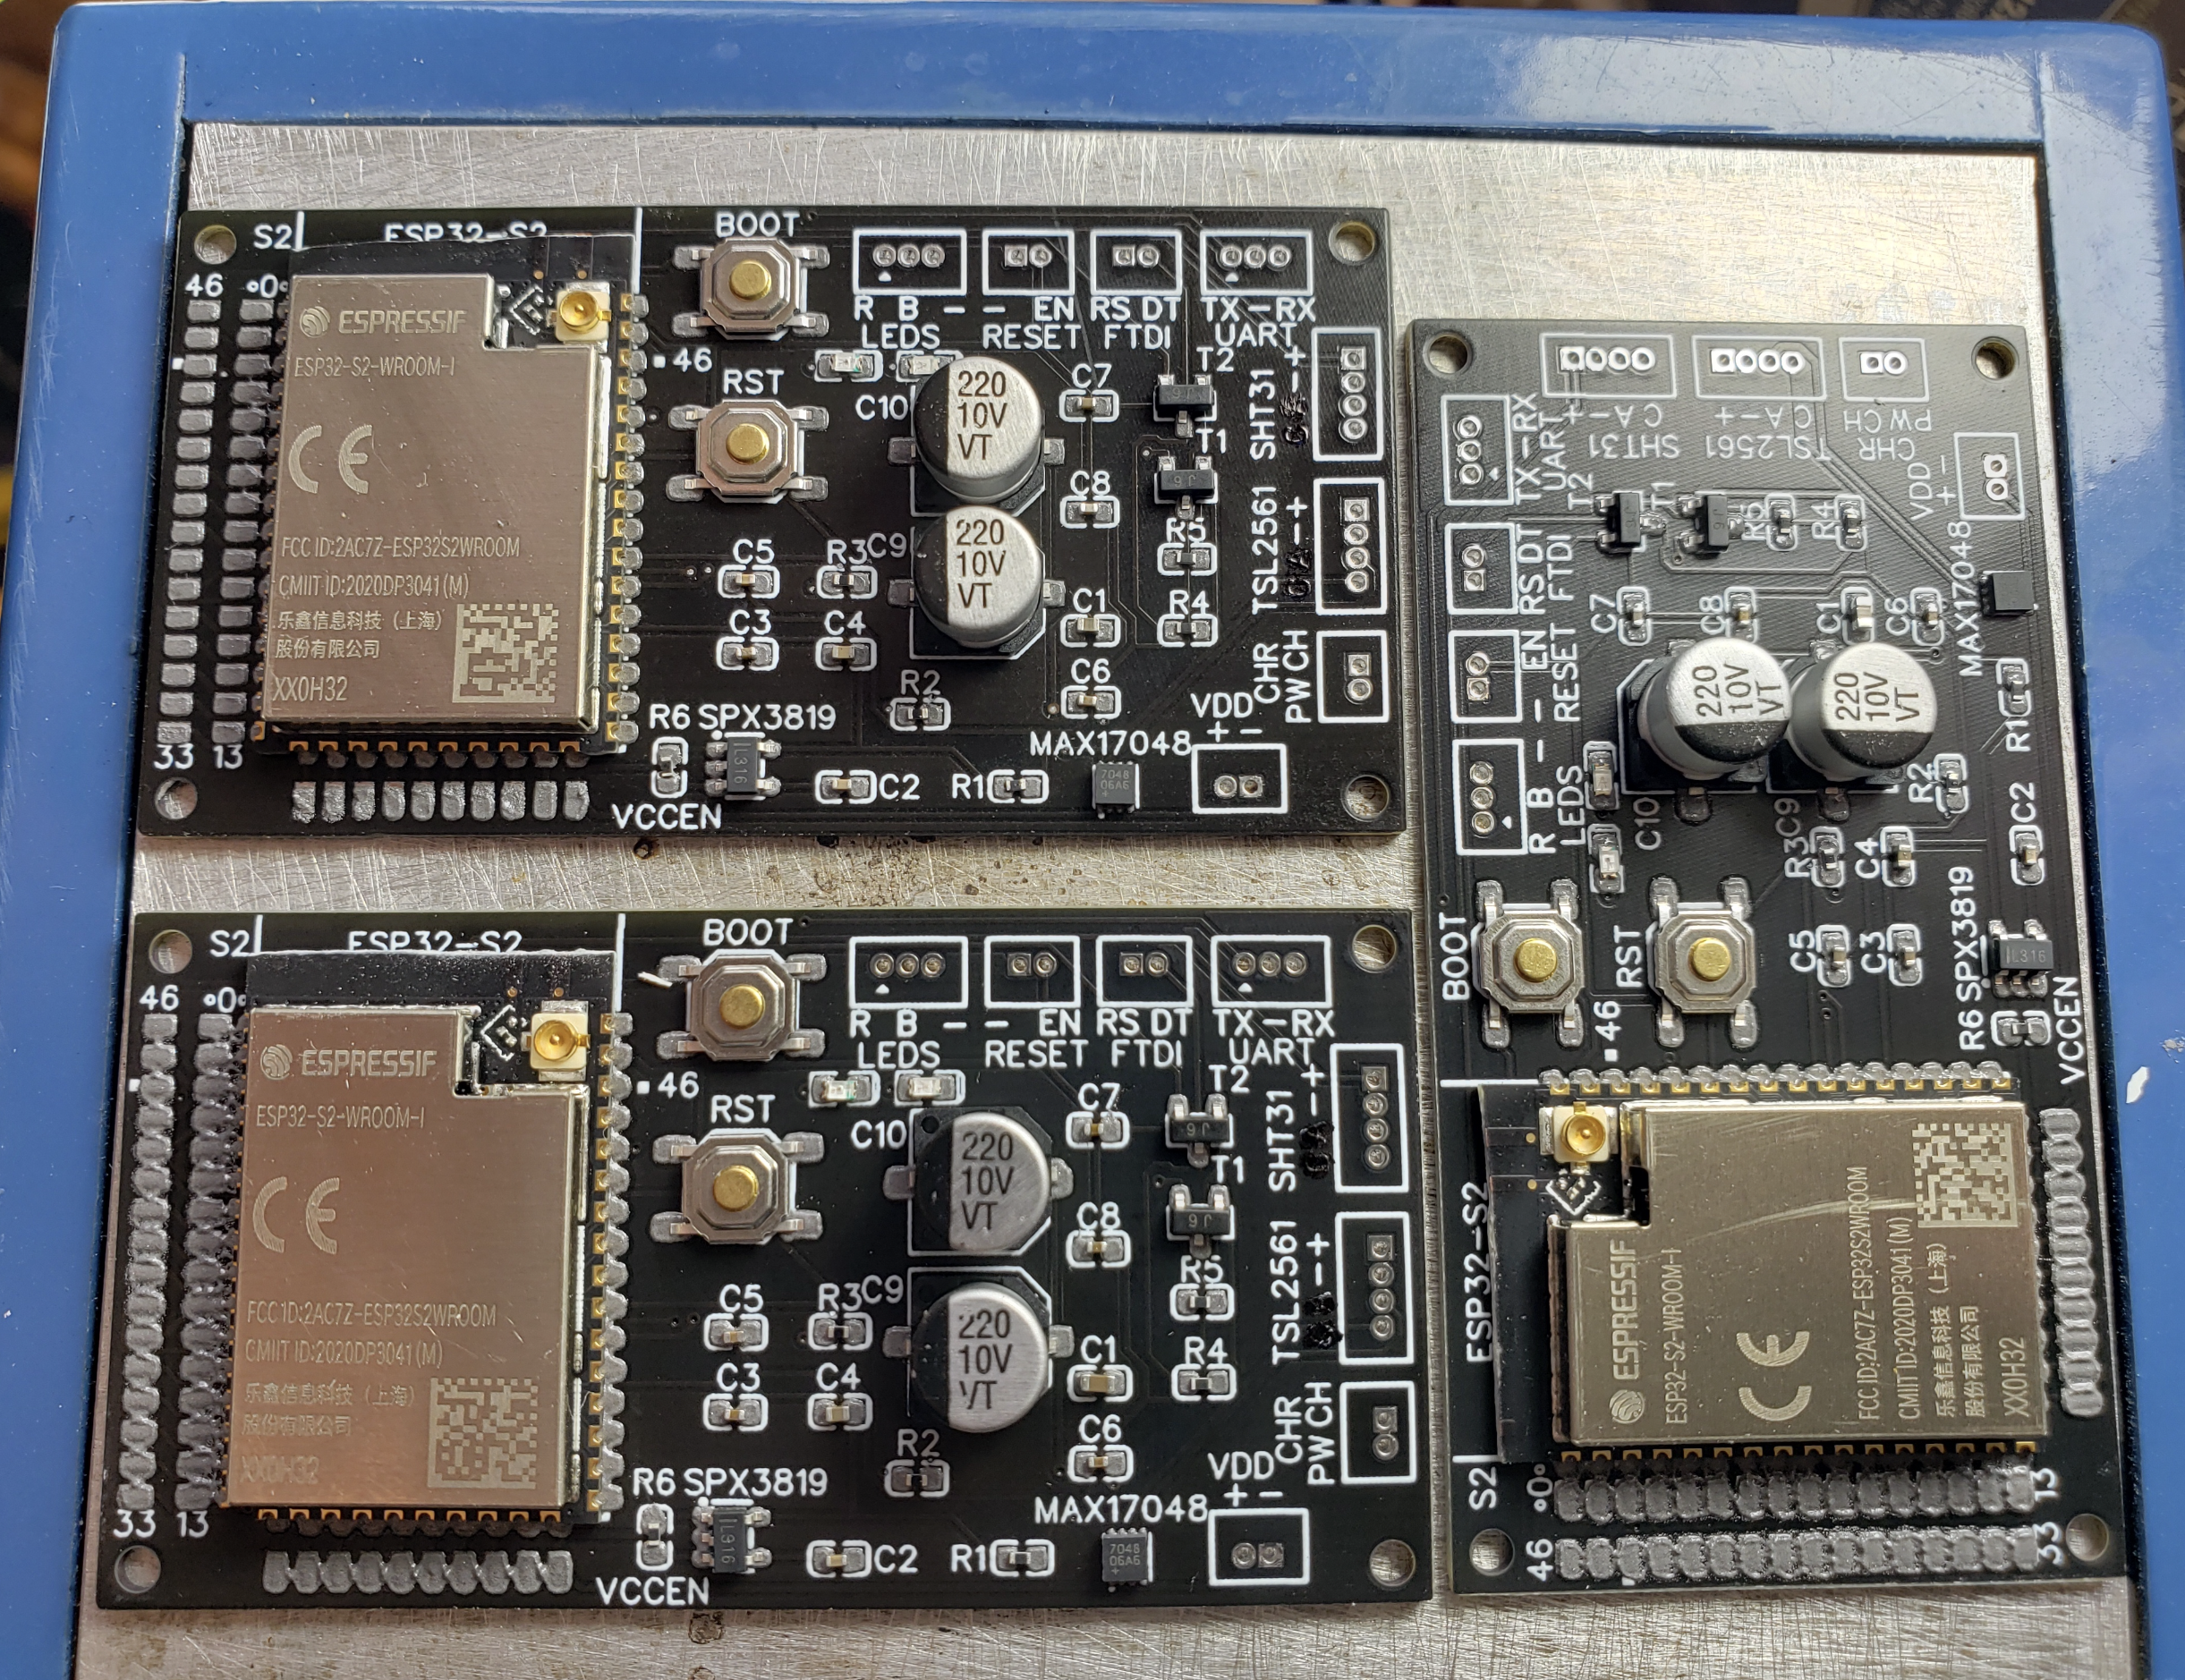
Soldered on hot plate:
SHT31 - temperature and humidity sensor:
TSL2561 - light sensor:
Testing all before putting into the box:
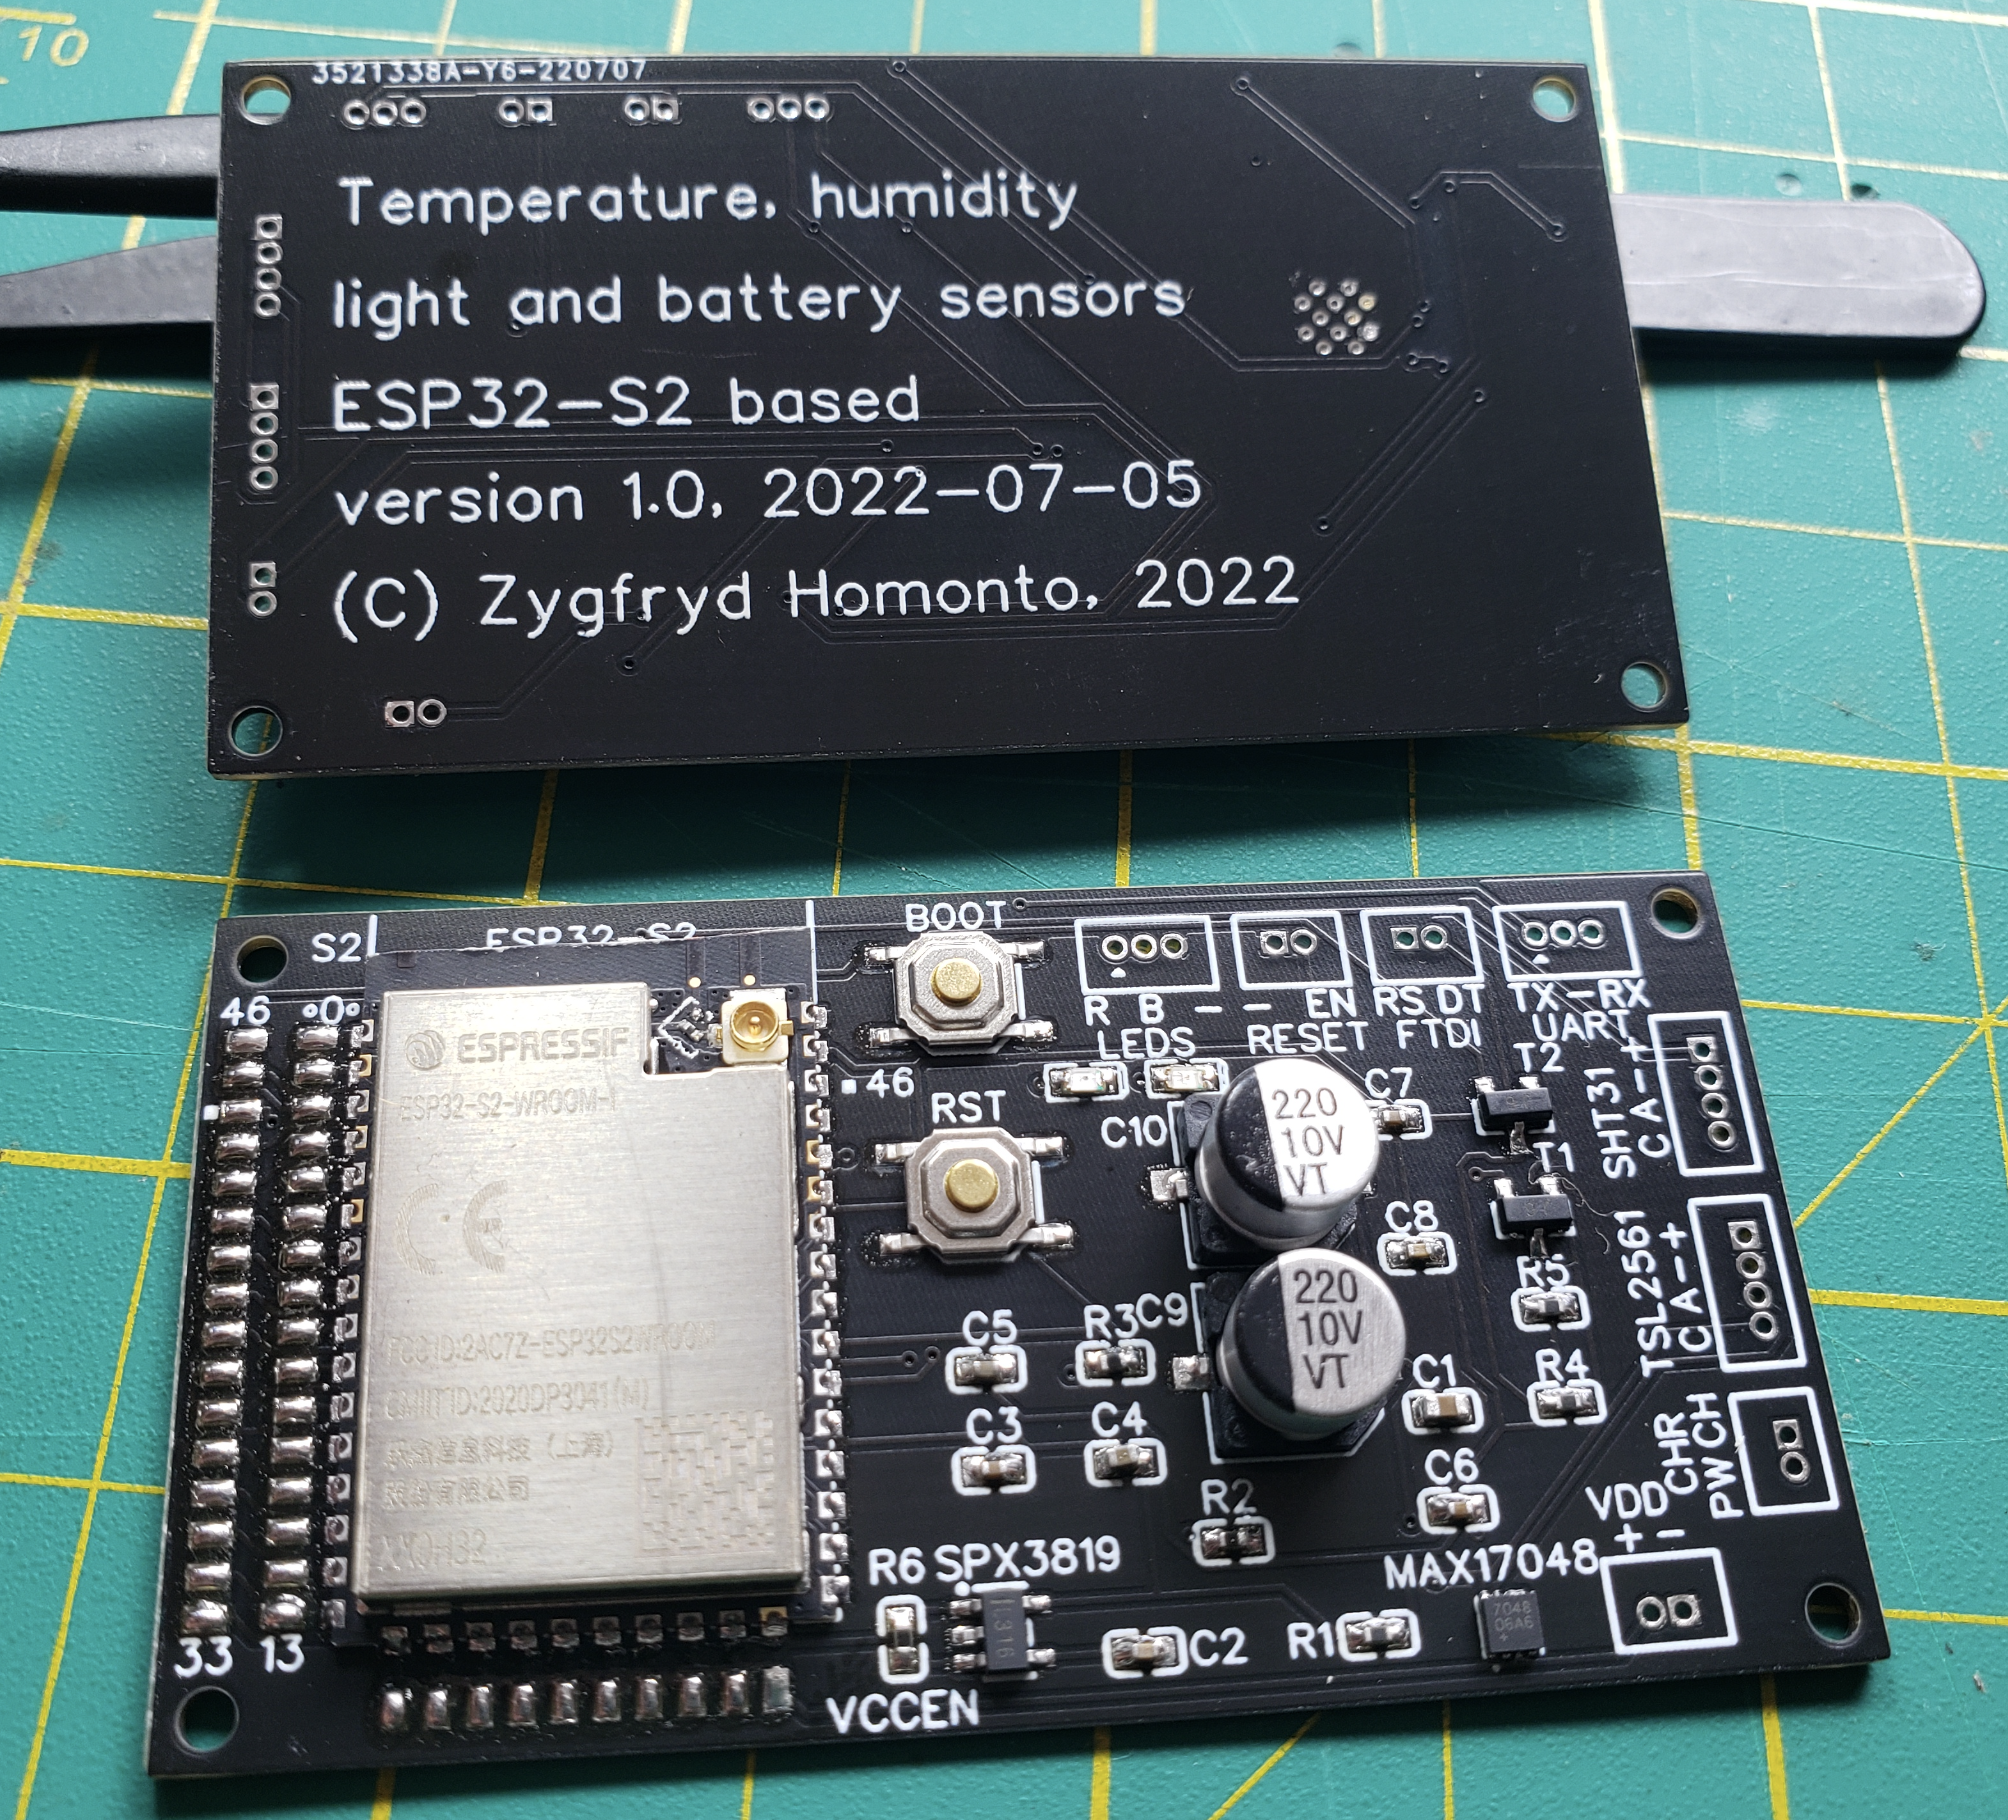
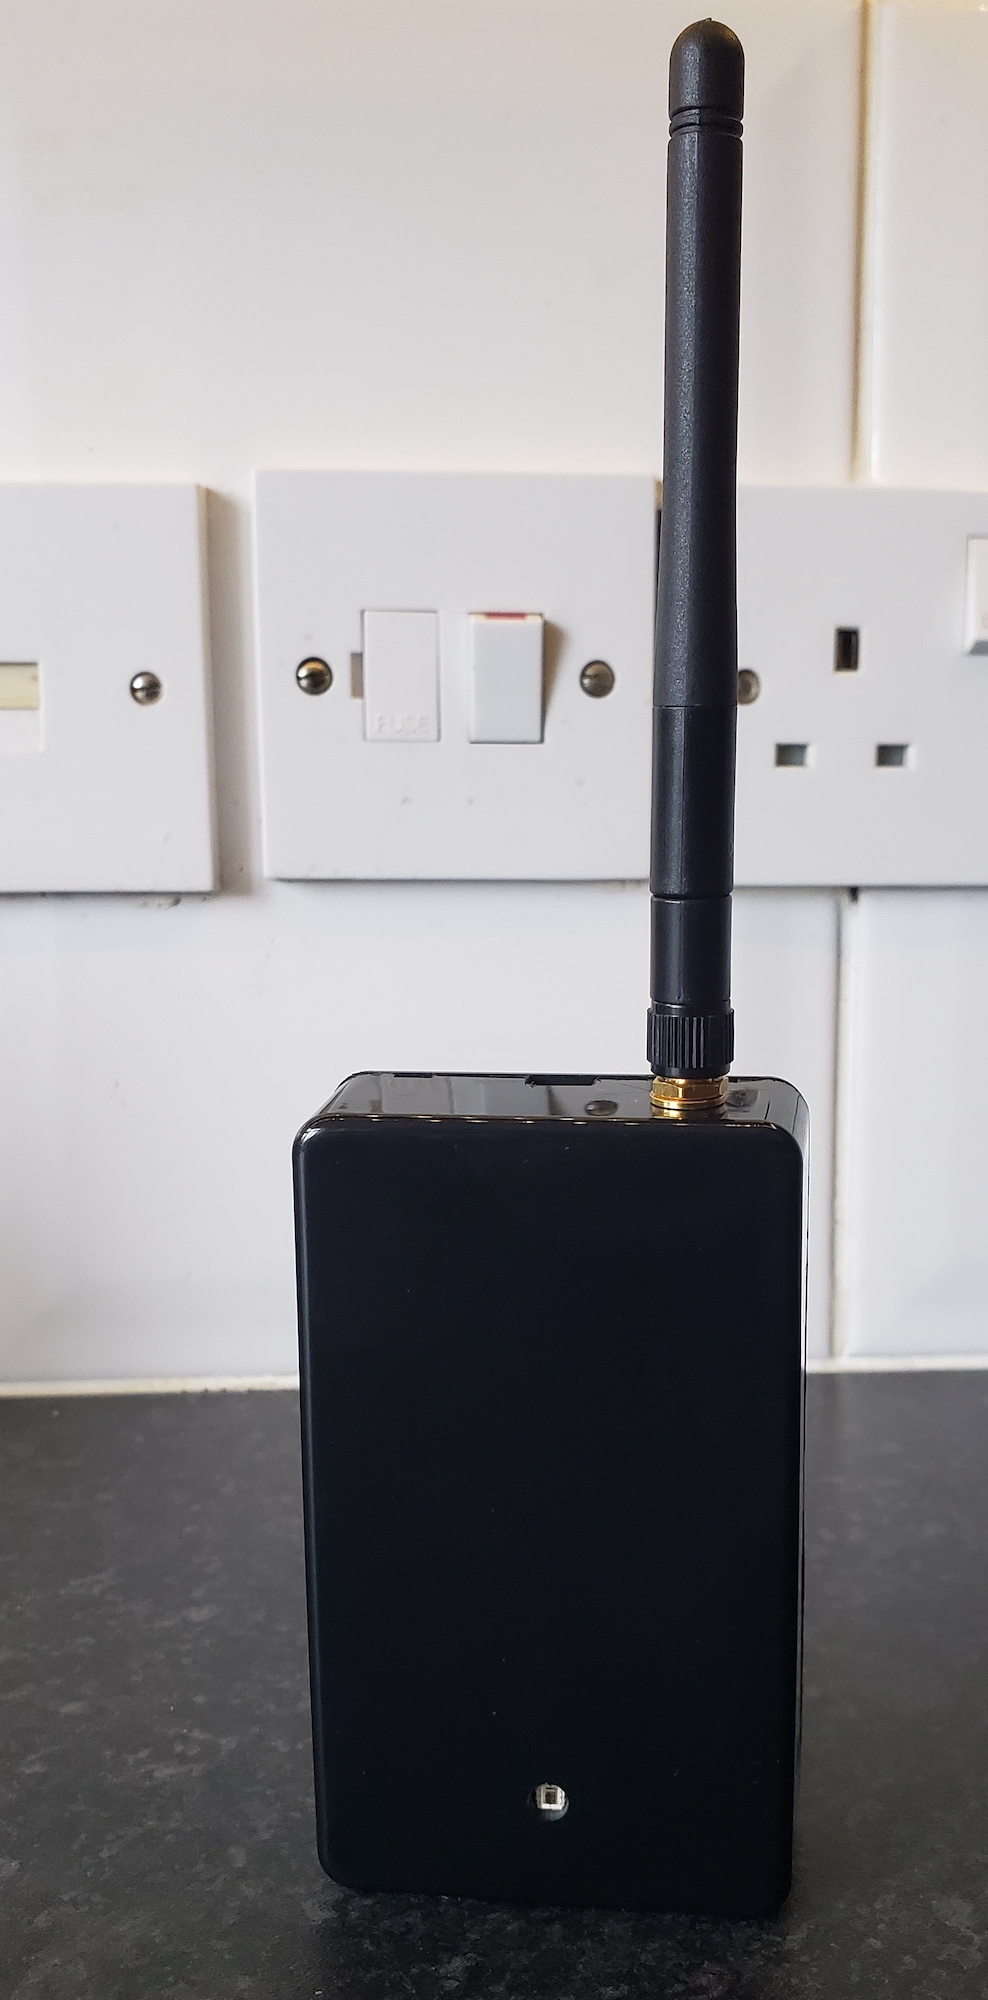
Final product:
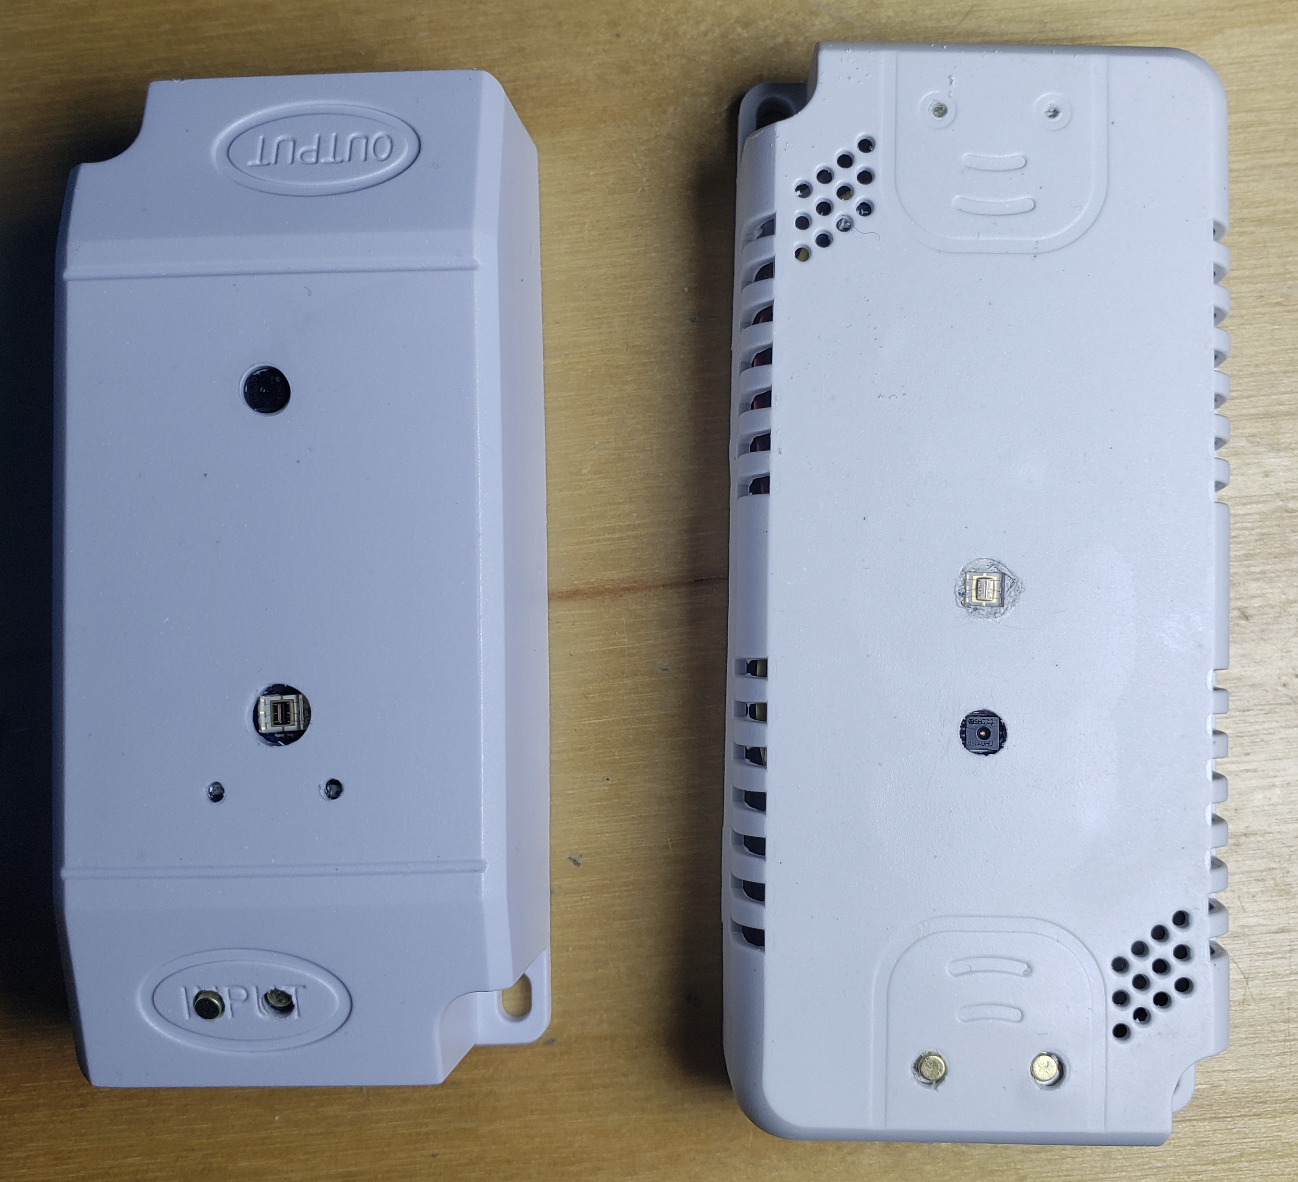
Power consumption and management
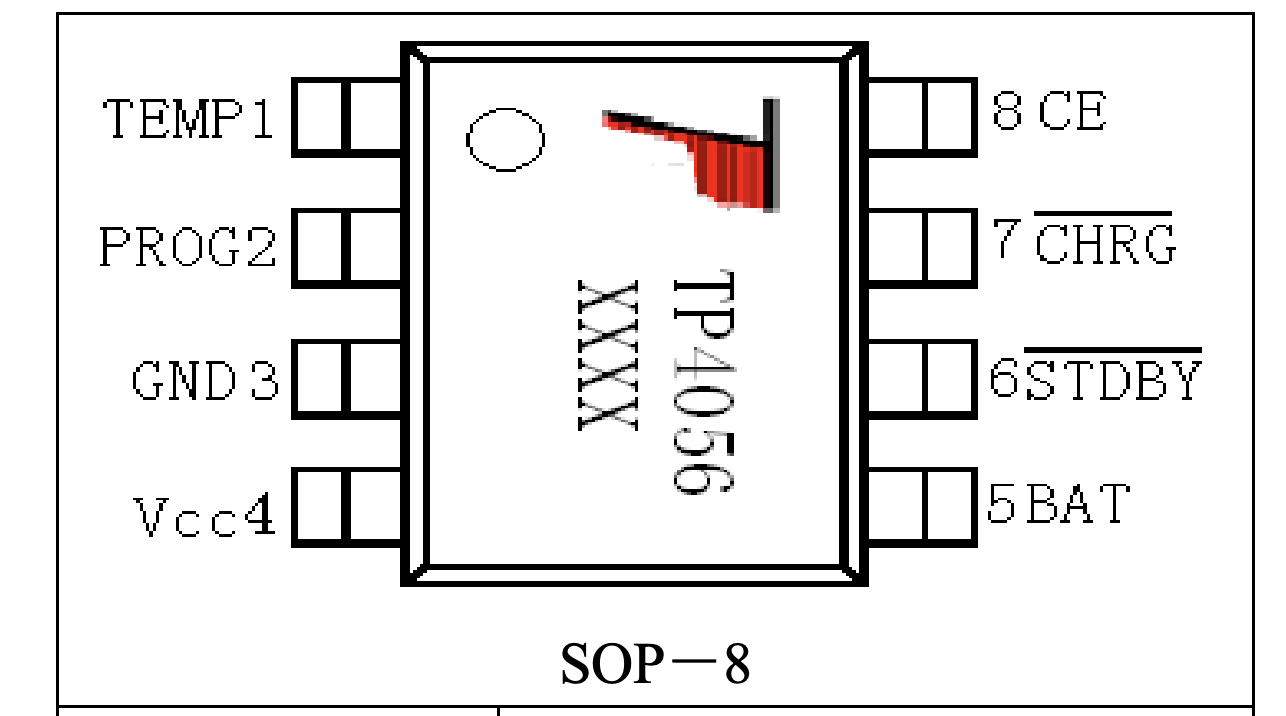
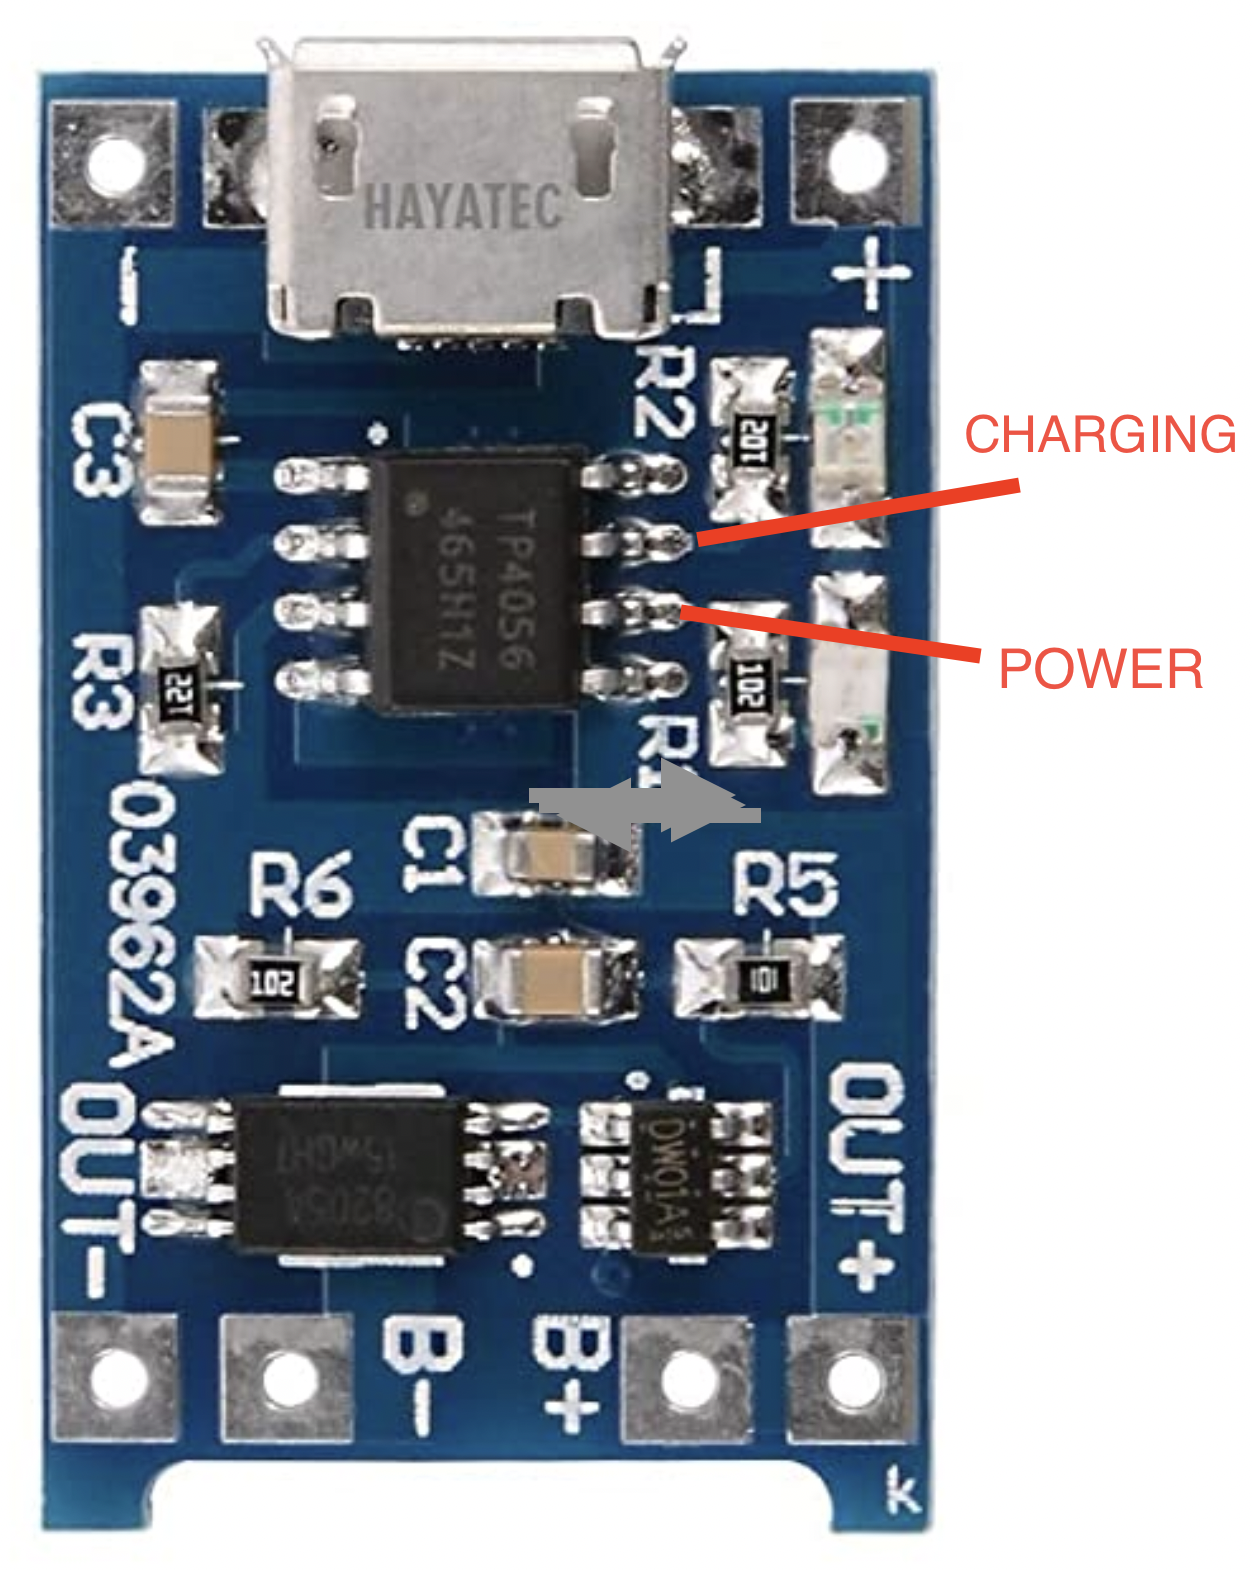
Sensor device is powered with LiPo battery and equipped with TP4056 USB-C charger.
It can be connected to solar panel or - from time to time if possible/needed - to USB-C charger.To minimise the sleep current, the power for all sensors is drawn from one of the ESP32 GPIO, so during the sleep time there is no current leakage - sensors are not powered up. With the above configuration the sleep current is as following (measured with PPK2):
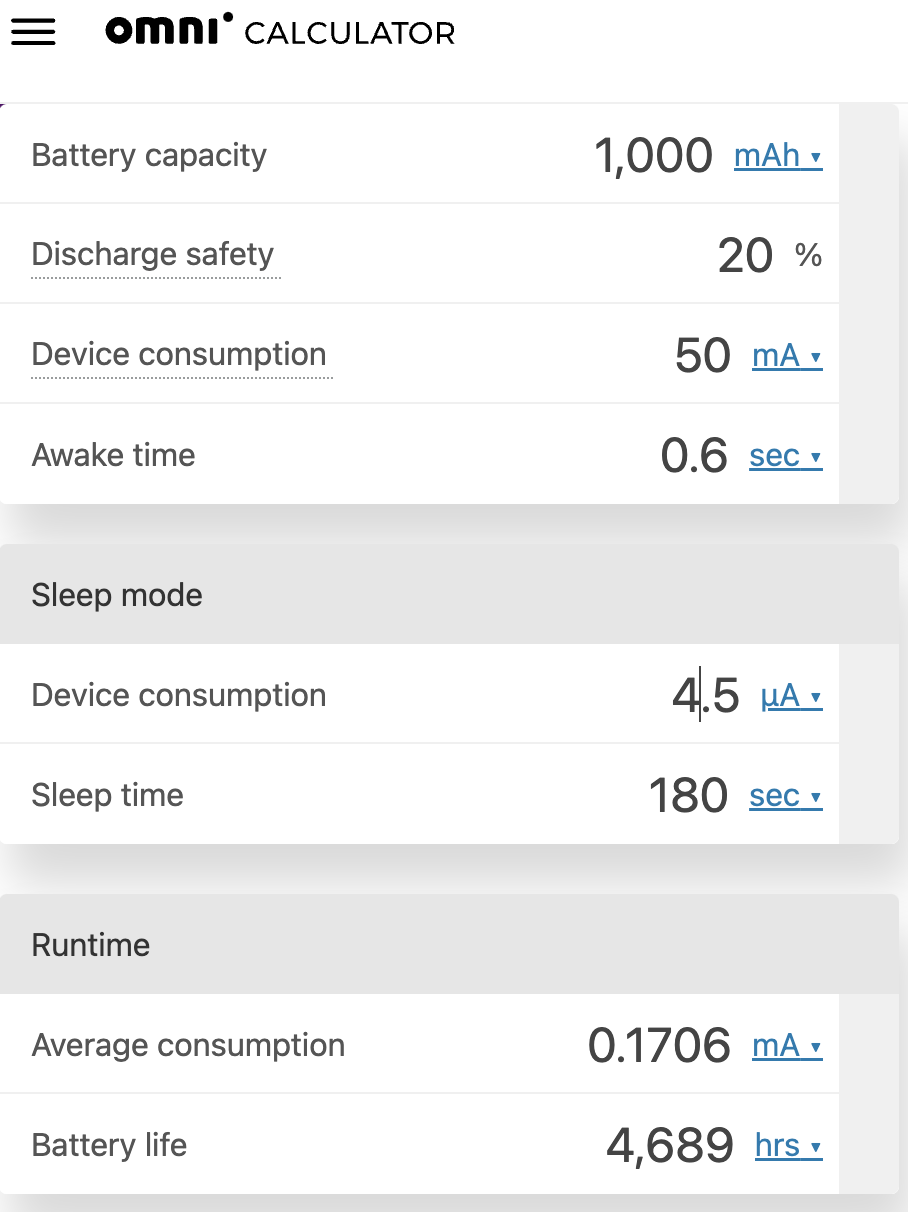
- ESP32-S WROOM - 4.5uA
- ESP32-S2 WROOM - 22.5uA
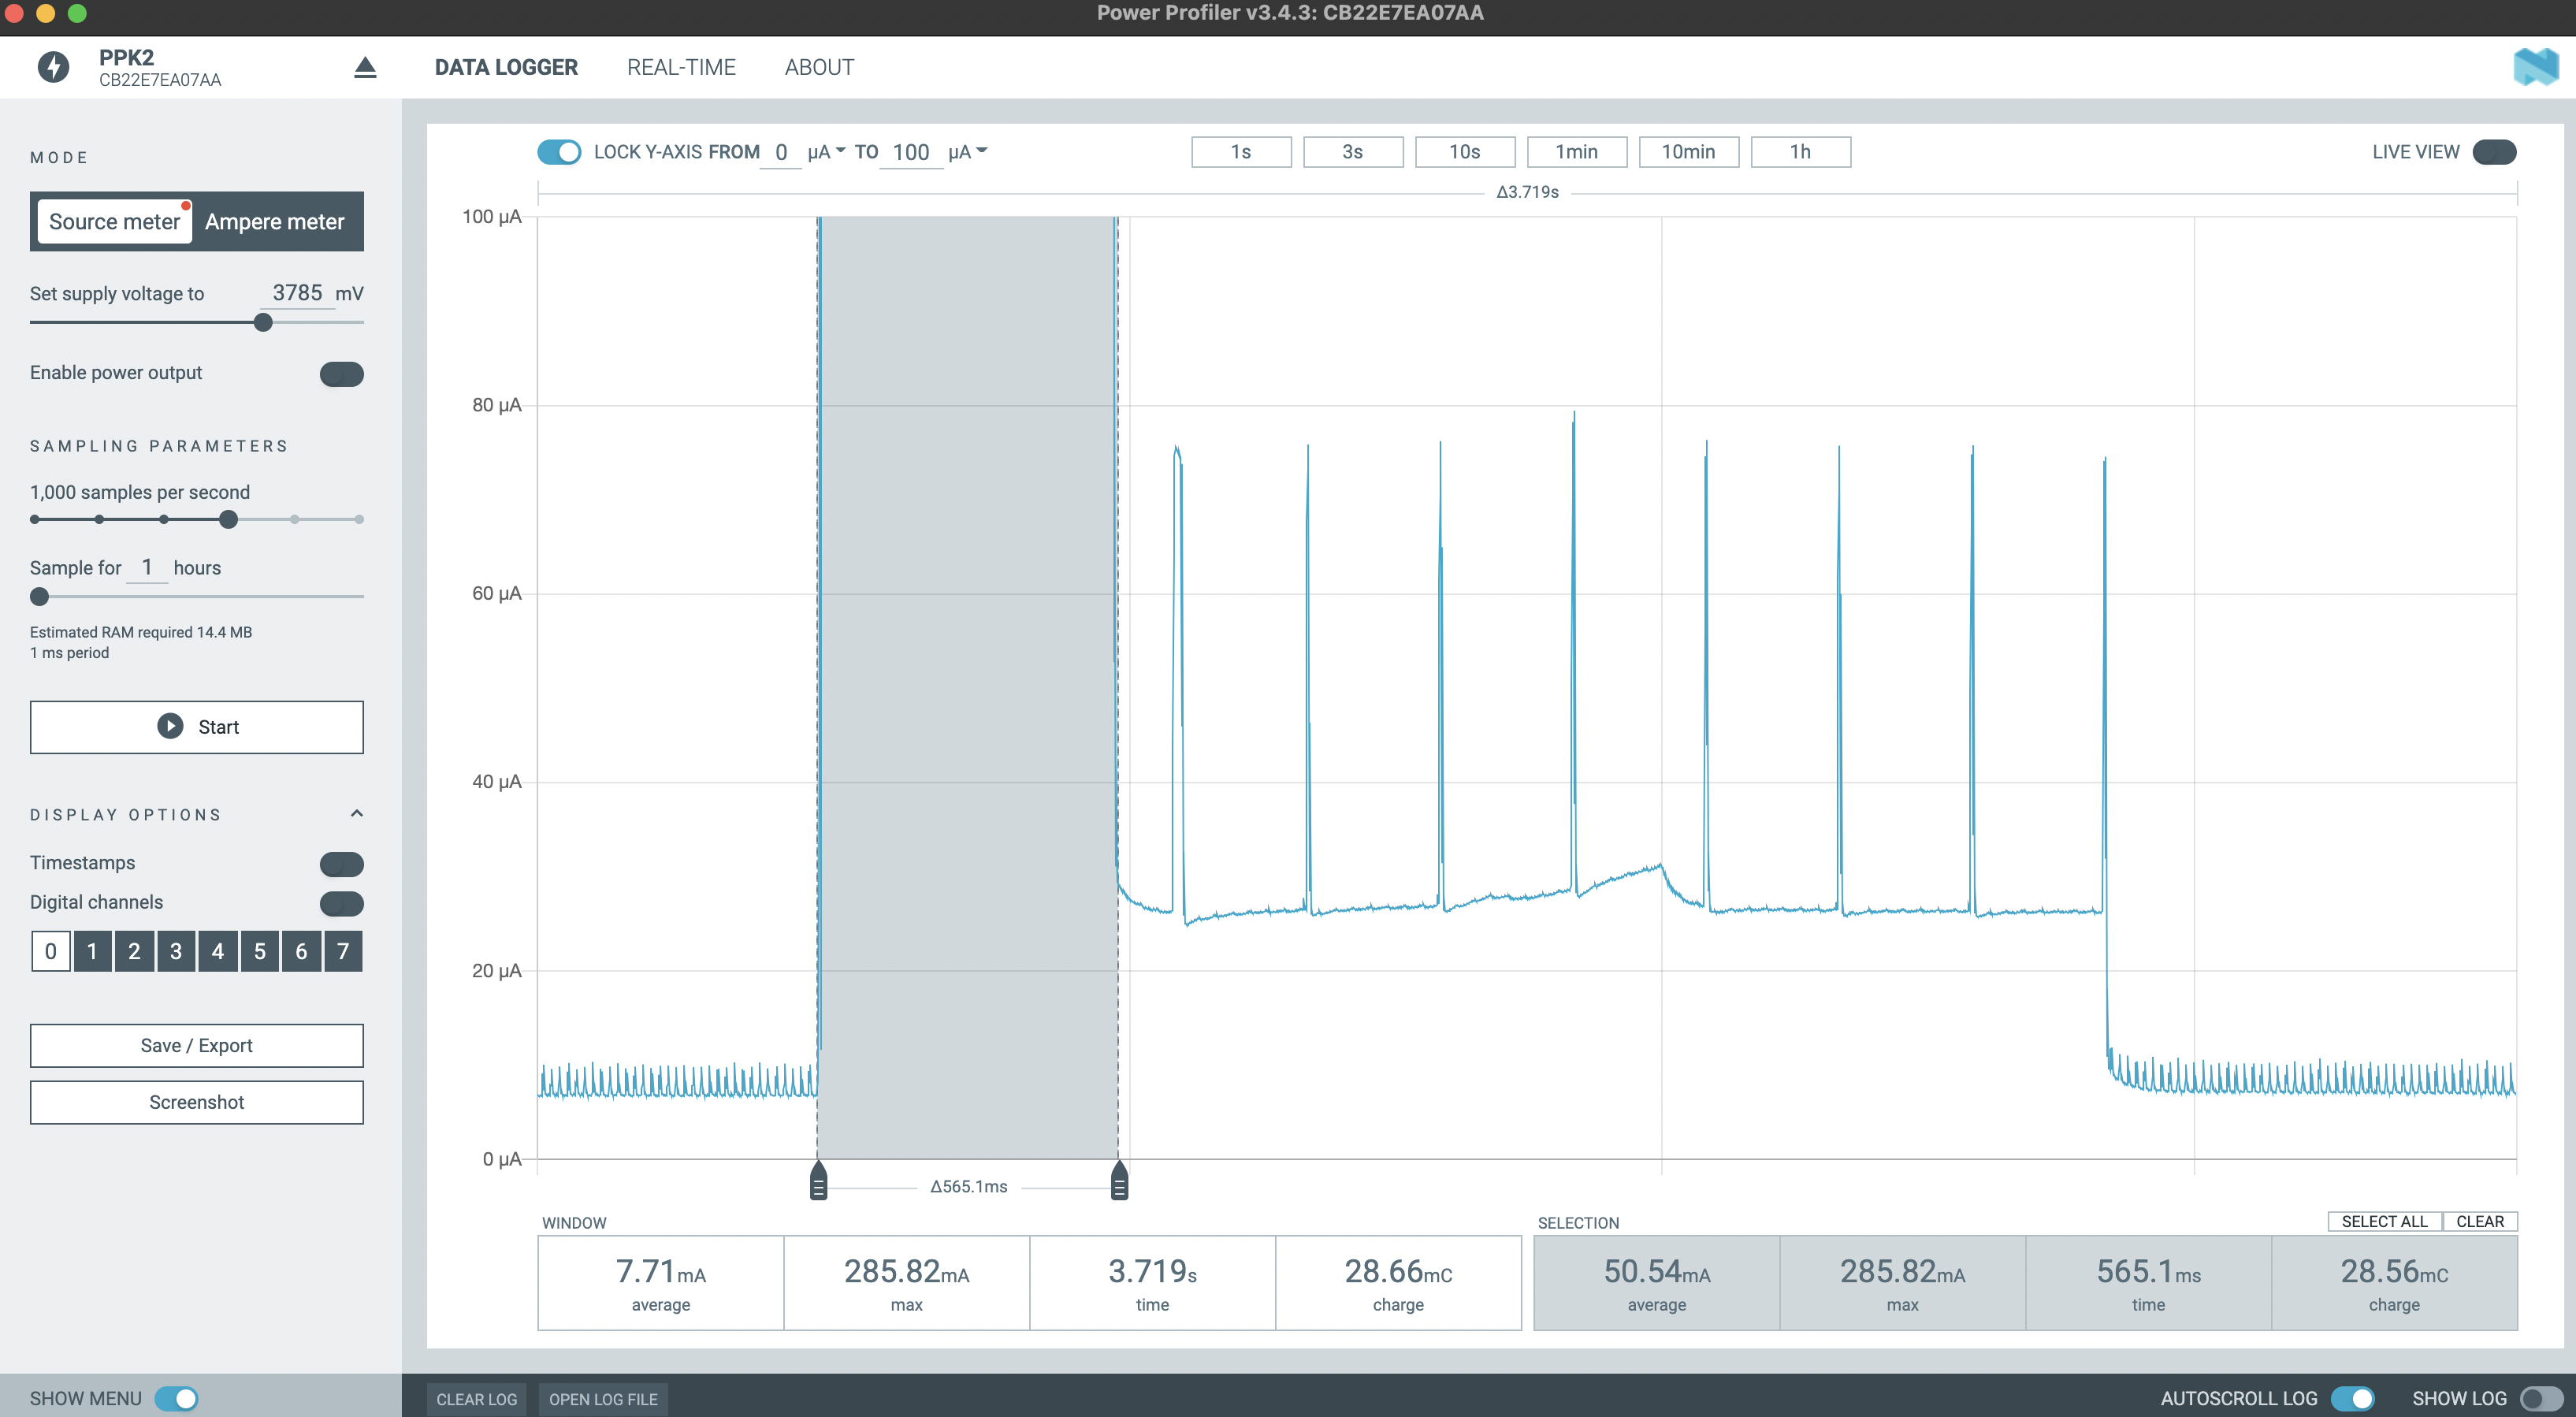
- ESP32-S WROOM - 600ms, 50mA average
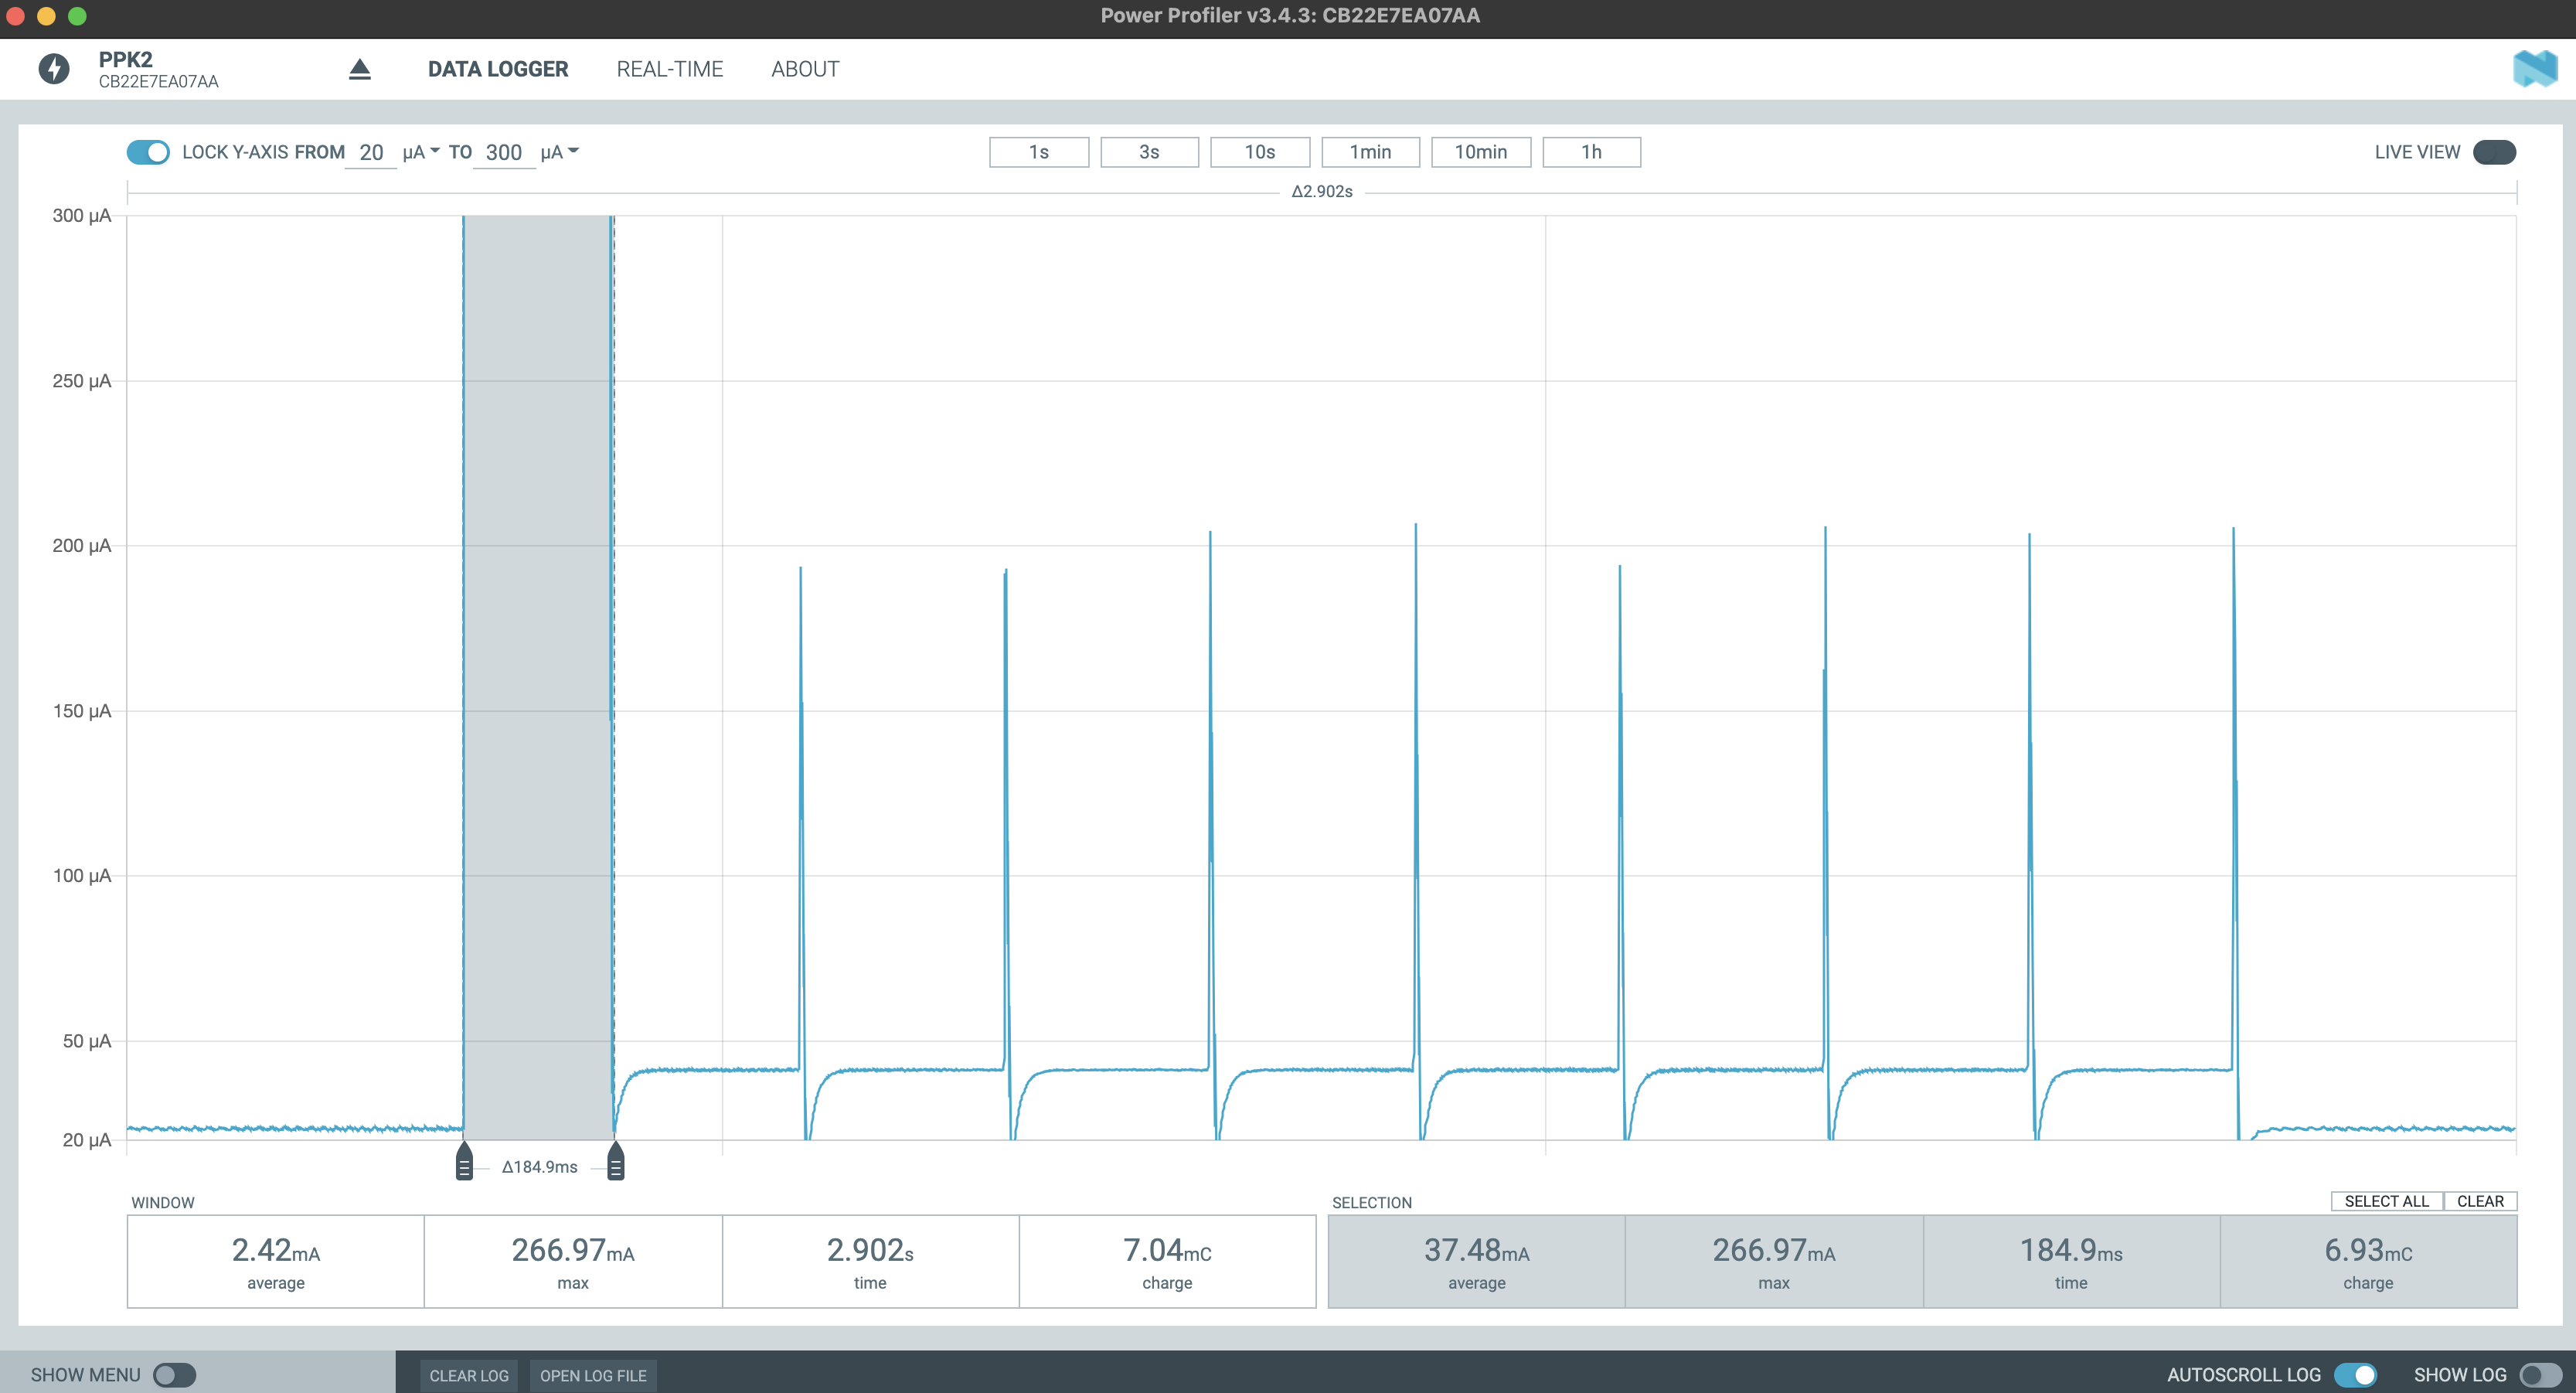
- ESP32-S2 WROOM - 200ms, 38mA average
ESP32-S WROOM working time and current:
ESP32-S2 WROOM working time and current:
And that is what really matters with the battery life time calculation, because 3 times shorter working time makes the difference.
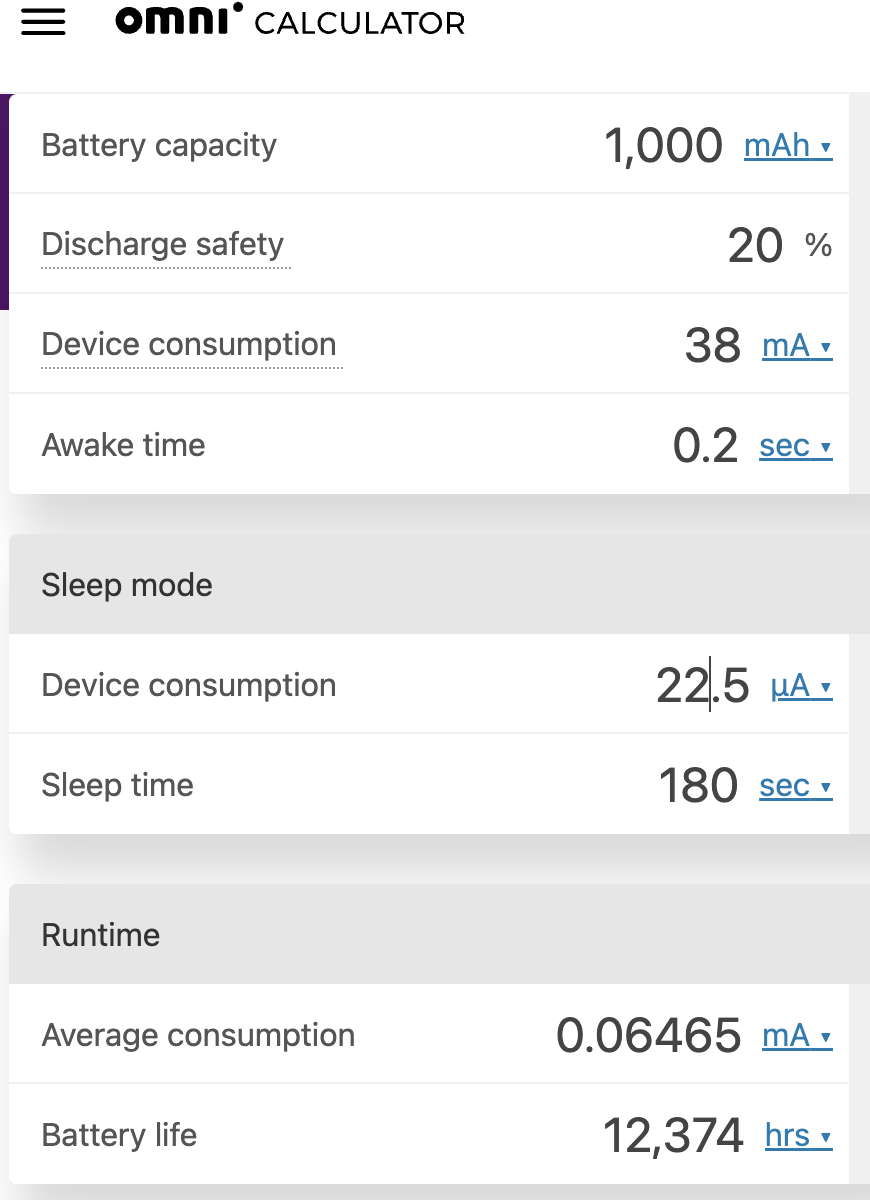
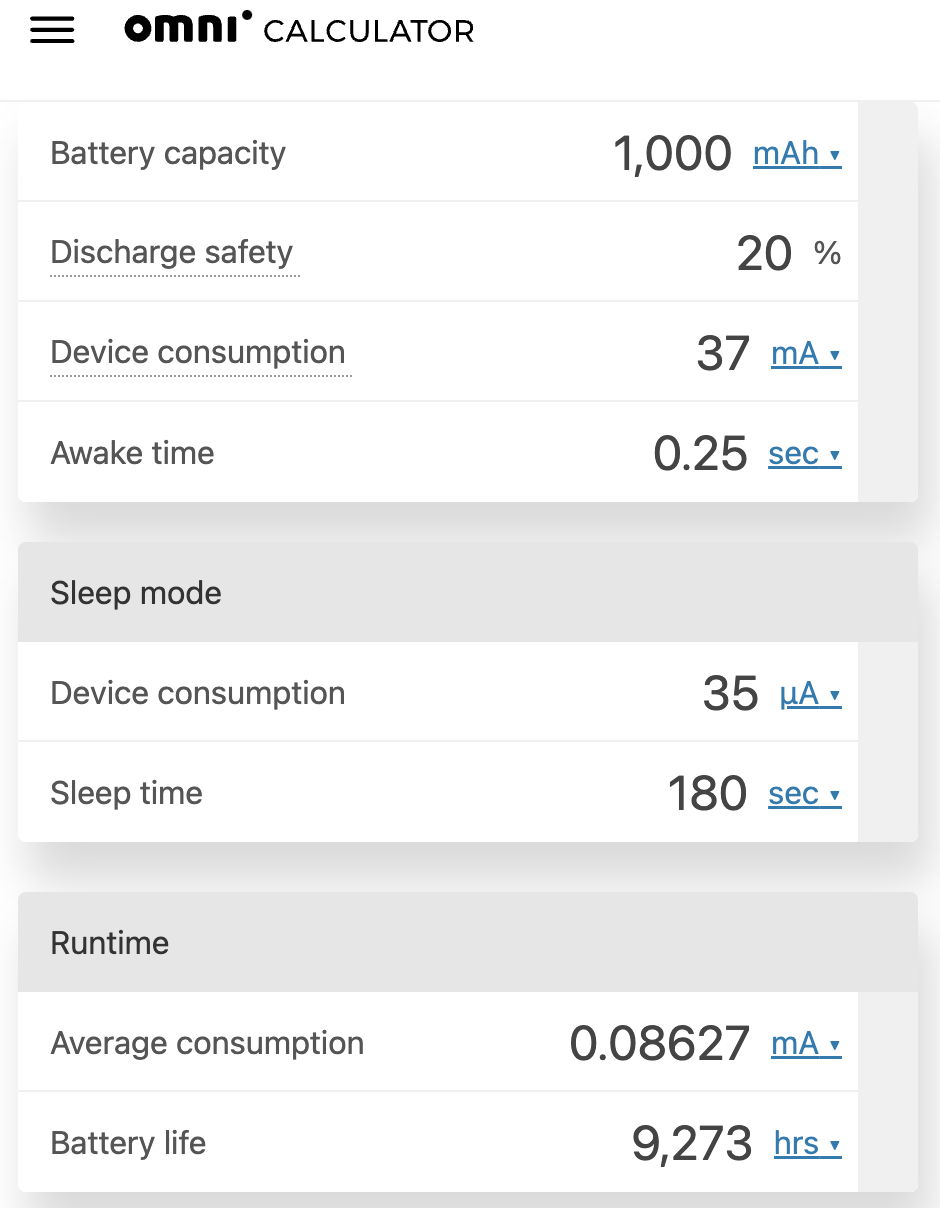
Rough and rounded up calculation (1000mAh battery, reserve capacity=20%, working time as above, sleep time=180s) shows as following:
- ESP32-S WROOM: 4 700 hours with average 170uA = 195 days, 6.5 months
- ESP32-S2 WROOM: 12 370 hours with average 65uA = 515 days, 17 months
ESP32-S WROOM battery life time calculation:
ESP32-S2 WROOM battery life time calculation:
So apparently the winner is ESP32-S2 WROOM with almost triple battery life.
EDIT: Final product as per design above consumes while sleeping 33uA - I have included LDO to make sure I have stable 3.3V - unfortunately it takes 8uA - still, as described above, the clue is in the very short working time rather than few uA here or there during the sleep - we are still talking above 9 200 hours on 1 battery charge - more than a year (383 days).
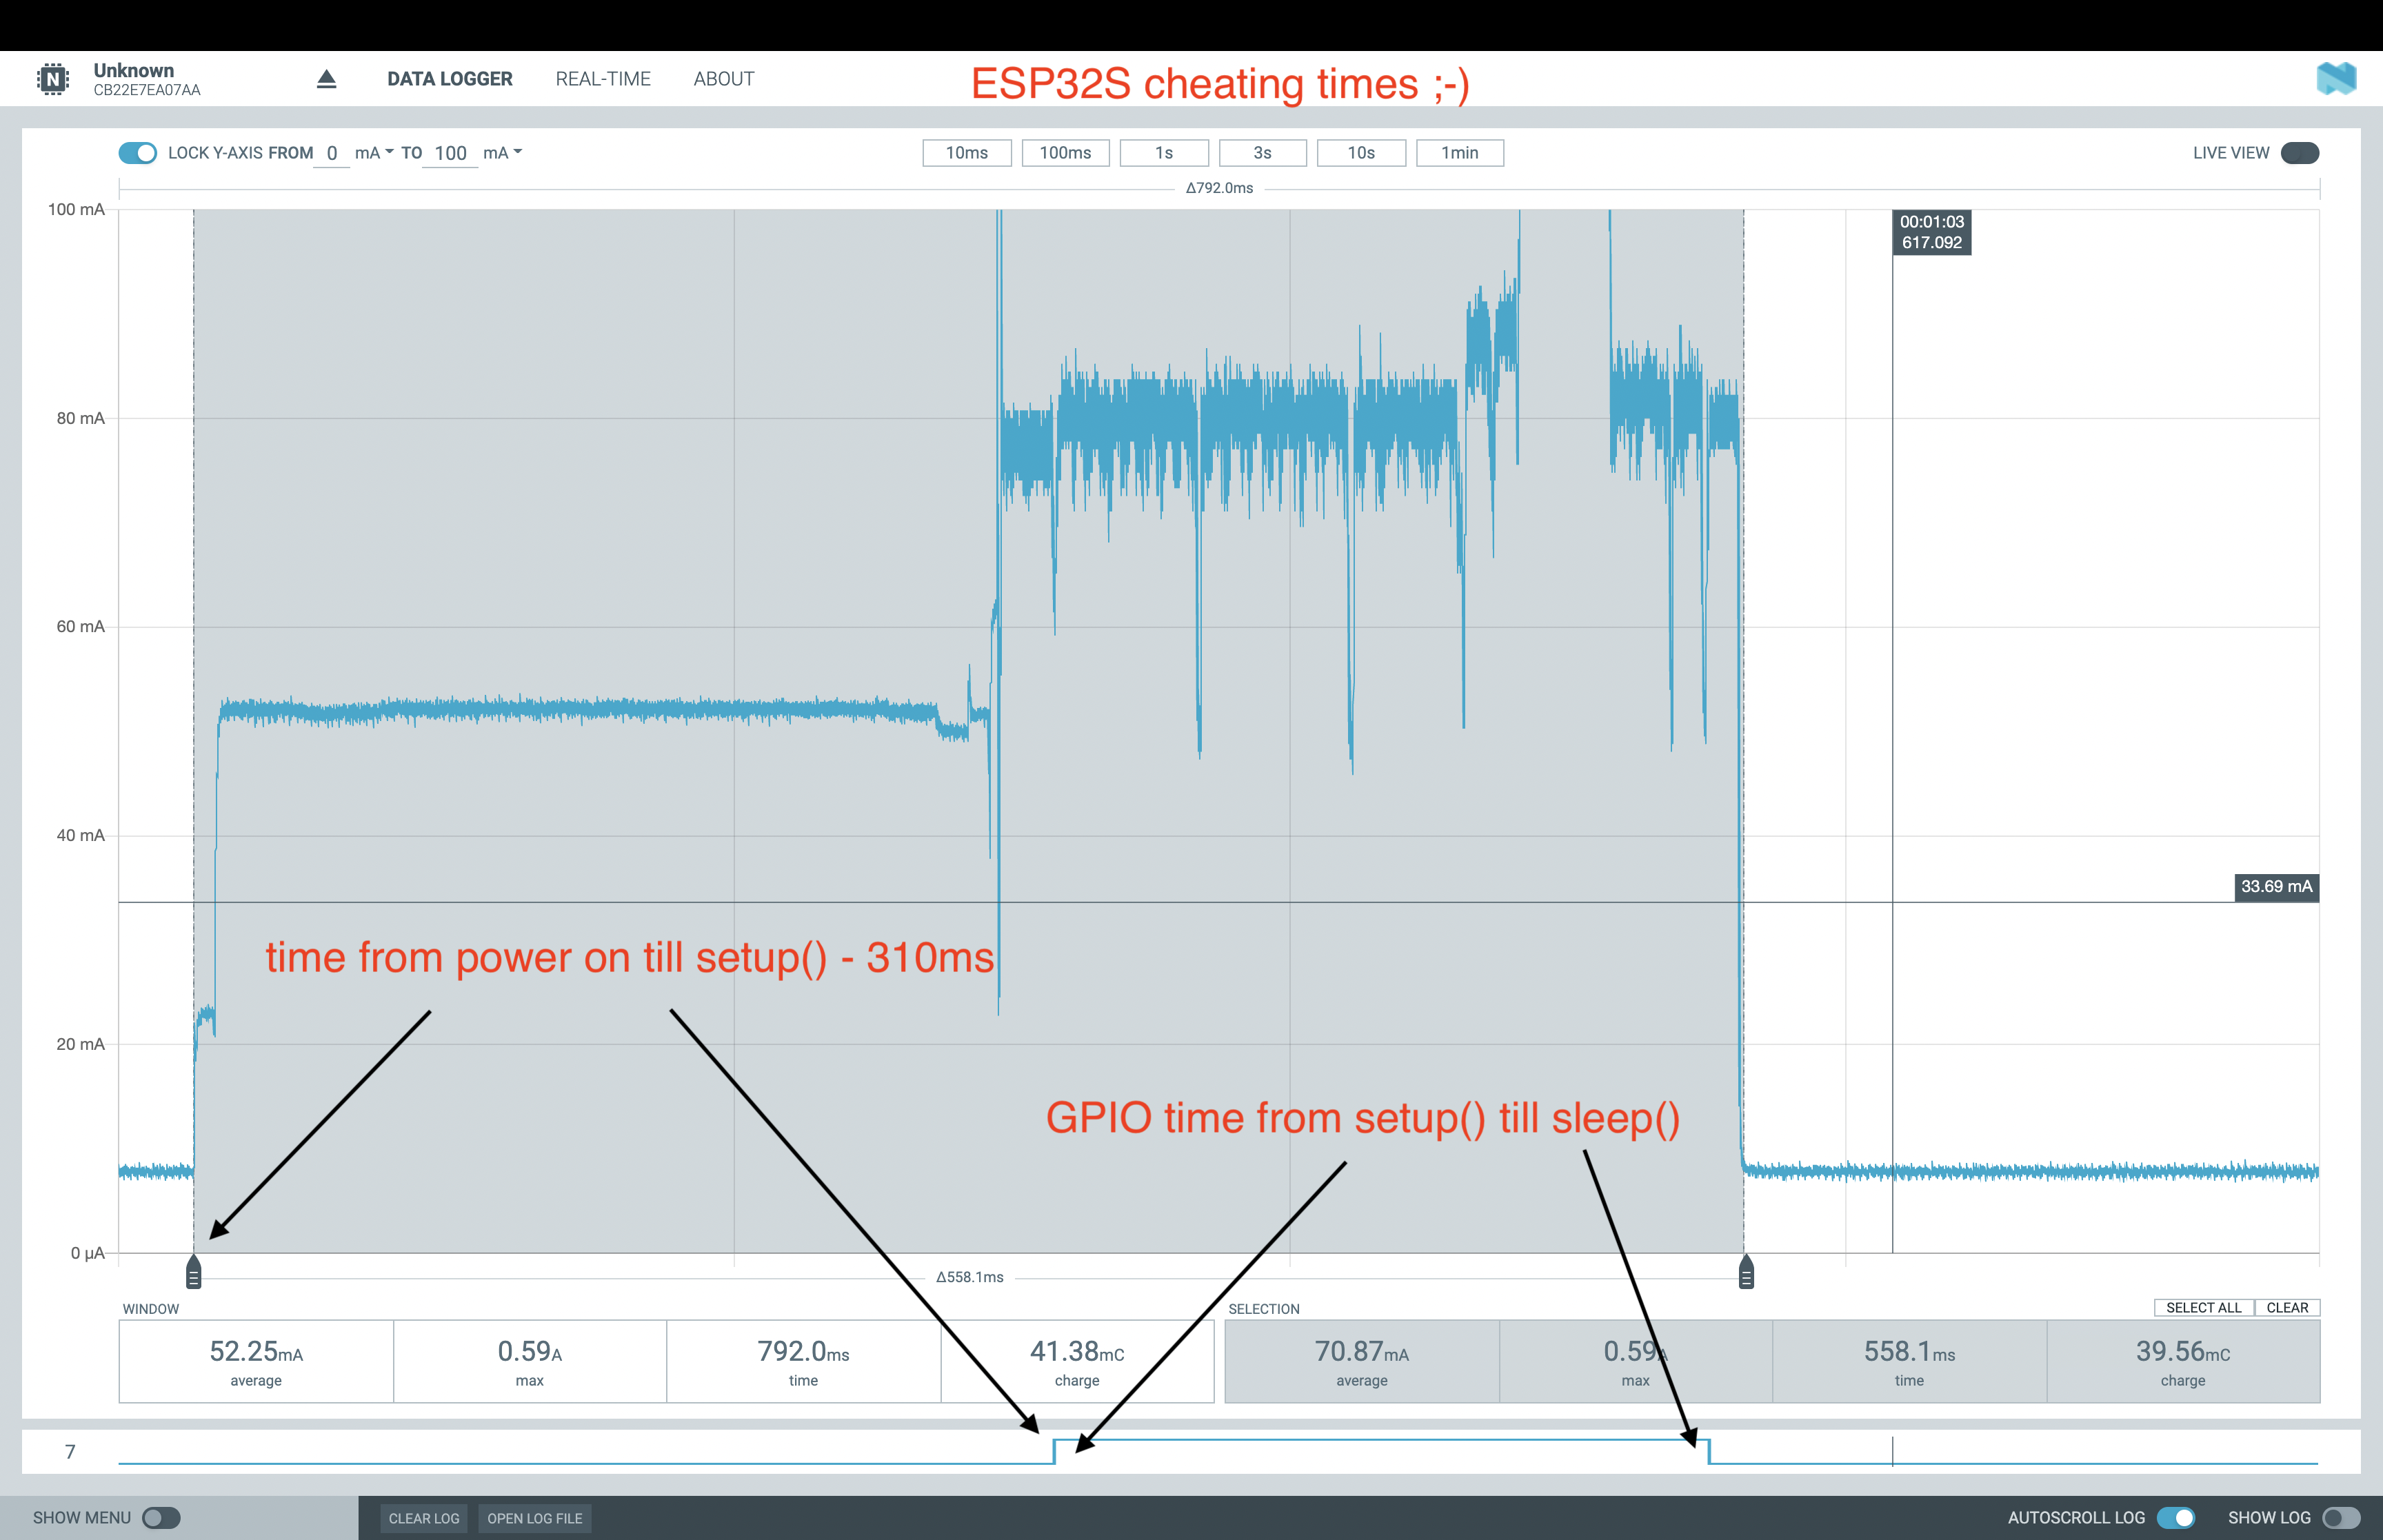
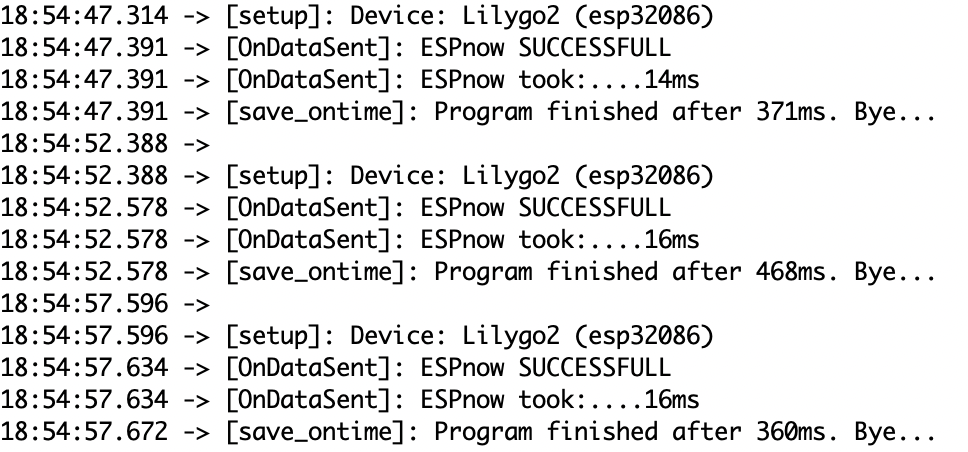
Measuring the working time
To measure working time you shall NOT rely only on millis or micros. I.e. ESP32S reports millis as first line in setup() as xx while ESP32-S2 shows 280ms. And actually both are wrong as you can see below on the screens:ESP32S times measured:
ESP32S-2 times measured. And on the left side the correct ontime reported by the sketch with error correction applied:

I used PPK2 and estimated the time the ESP32 works measuring the power consumption.
Conclusions:
- don't rely on millis() only
- ESP32-S2 starts much faster (35ms) than ESP32S (310ms)
- ESP32-S2 total working time is much shorter so the total power consumption with S2 is much lower accordingly - battery life is extended
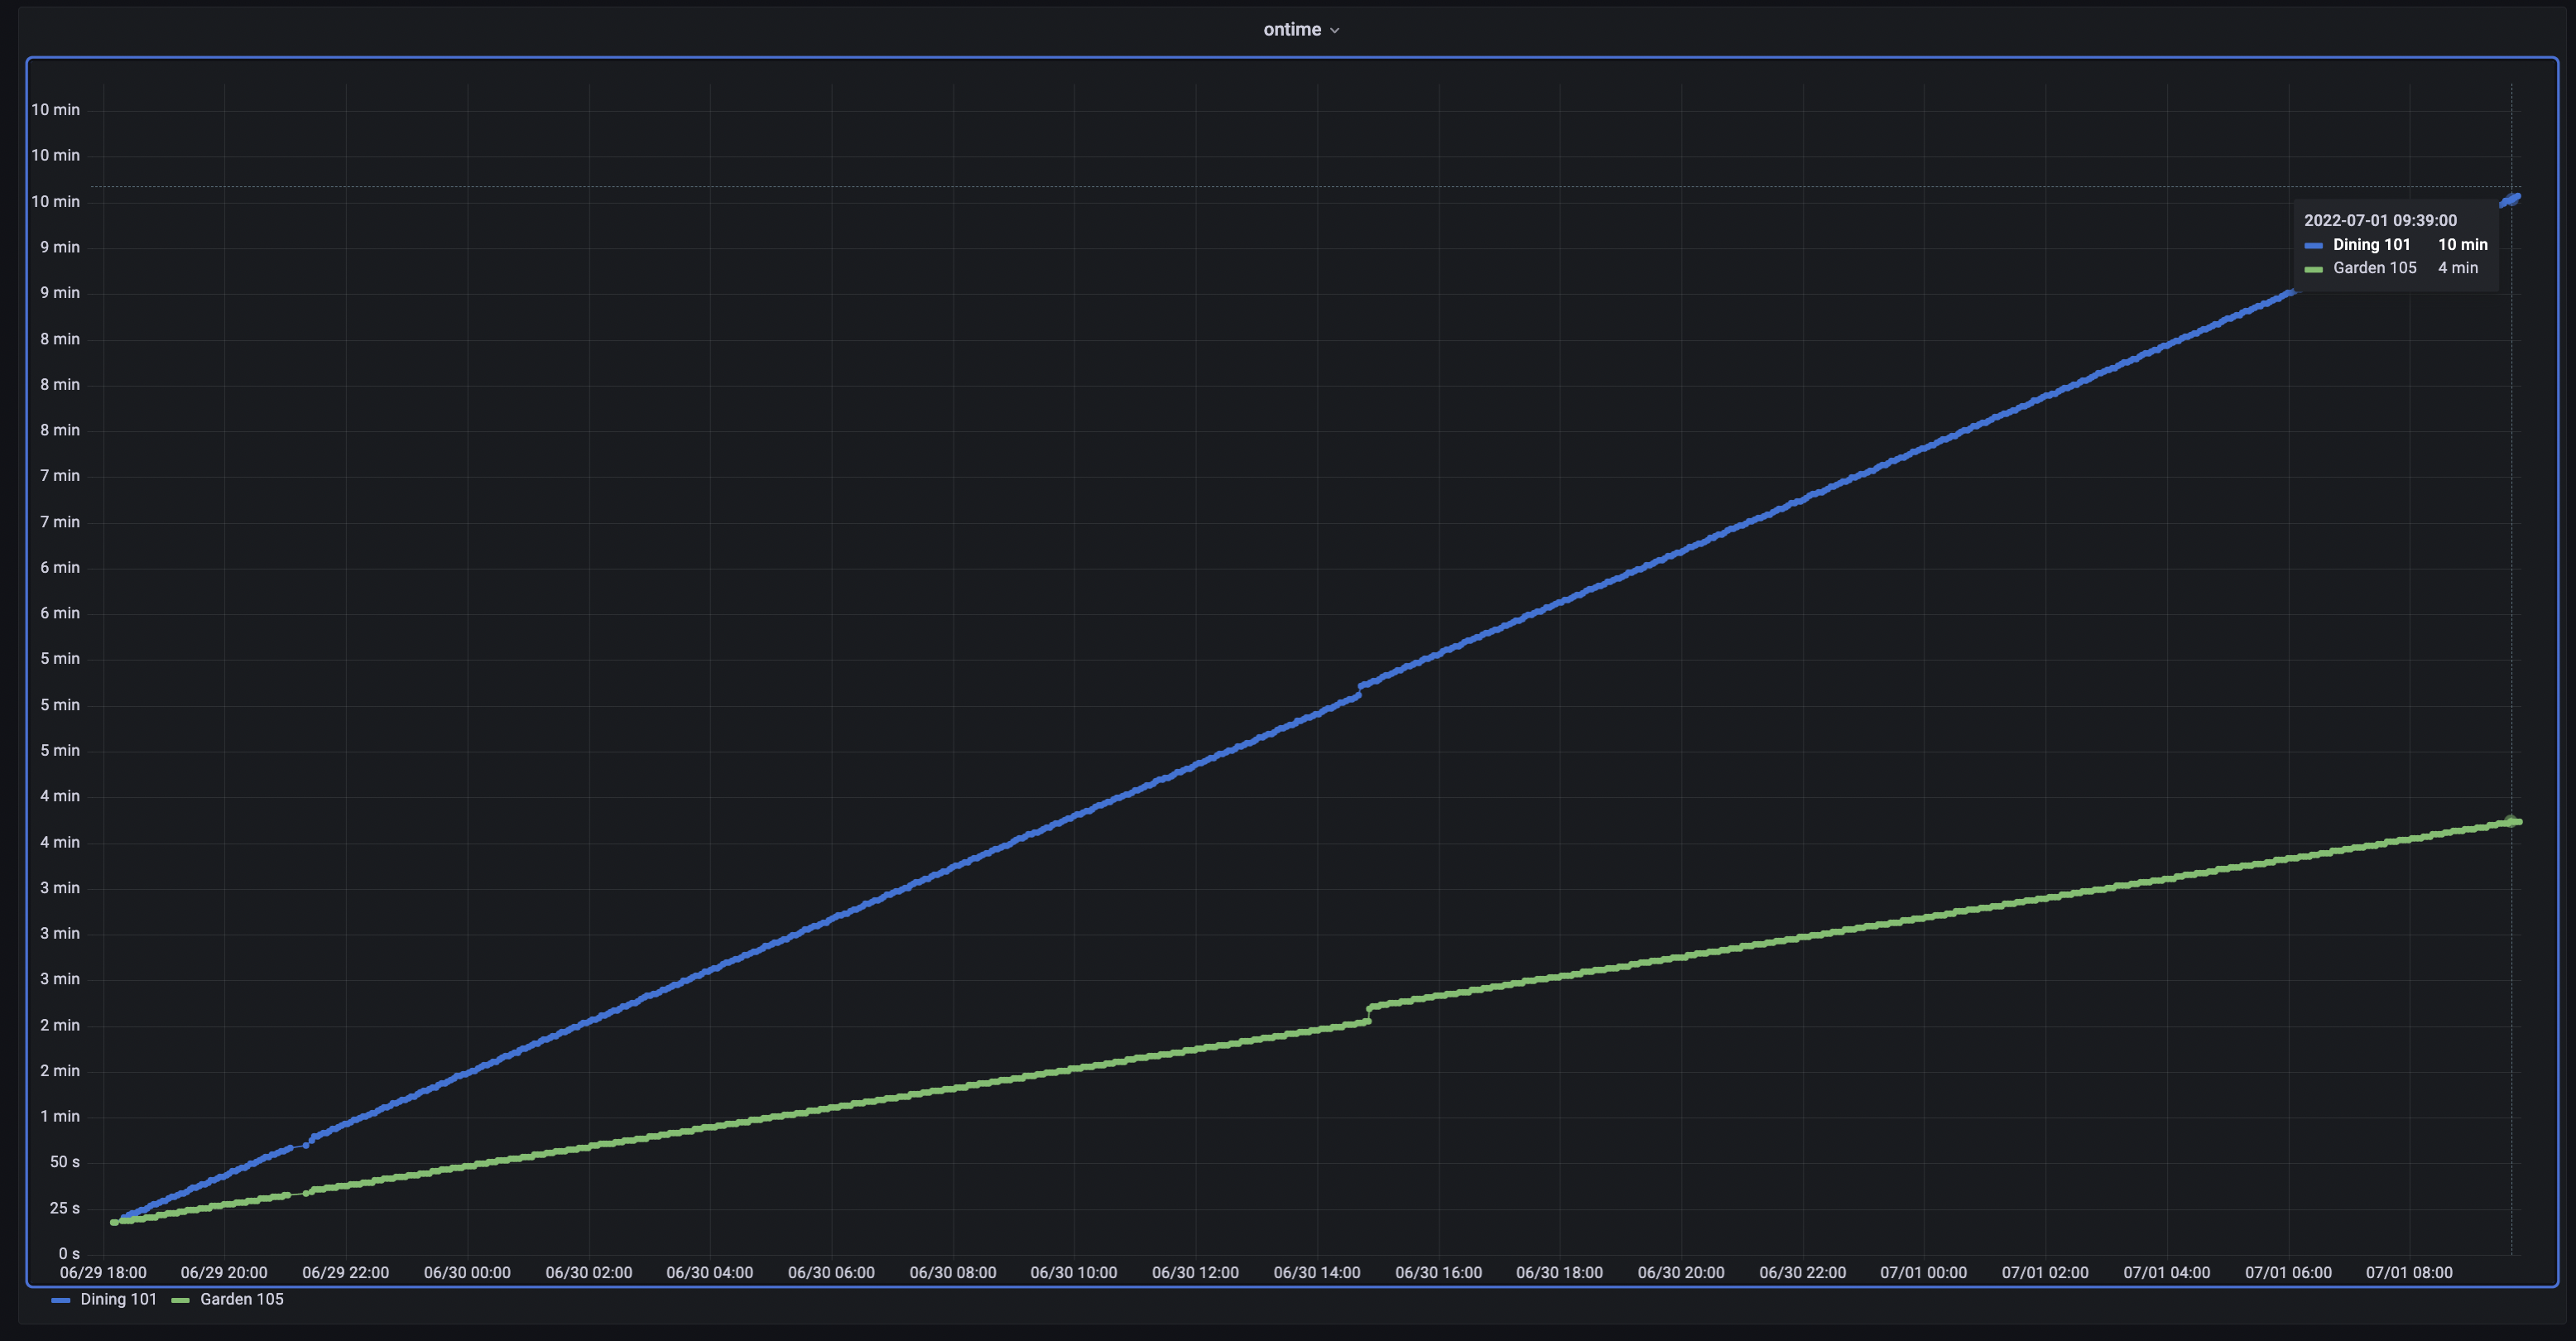
ESP32S and ESP32-S2 ontime after 1.5 days with 180s sleep - almost 2.5-3x more "ontime" for ESP32S:
Charging details
Sensor device also provides information about charging status:- NC - not connected
- ON - charging
- FULL - charged
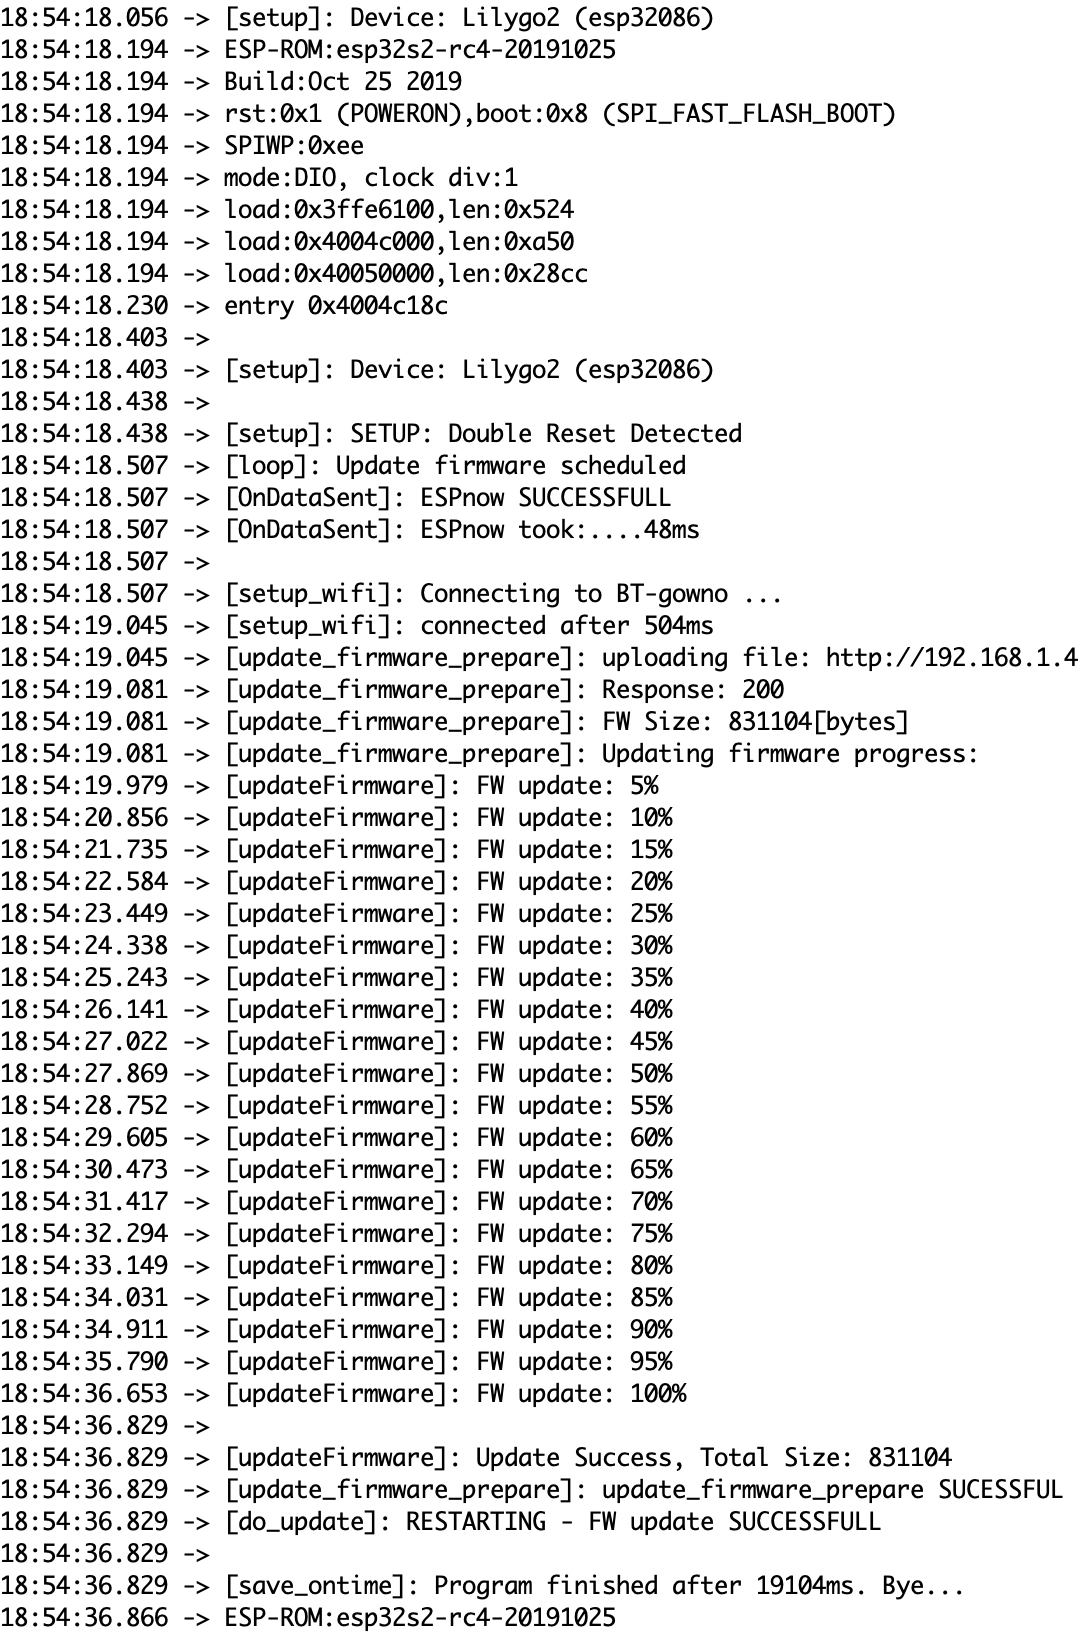
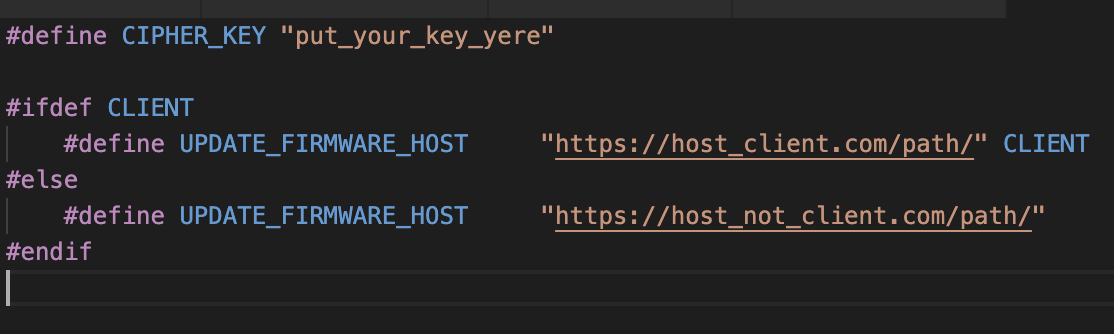
Firmware update - OTA
Sensor device
To perform firmware update there are few possibilities:double reset click - built in functions recognise double reset and if so done, performs firmware update - of course you need to visit the sensor to double click it ;-)- NOT IN USE ANYMOREroutine check for new firmware availability on the server: every 24h (configurable) sensor device connects to server and if new file found, performs update- NOT IN USE ANYMORE- 3rd: wire TX/RX to the FTDI programmer
- EDIT:4th: new schematic and code implements second button for OTA specifically
- 5th: MQTT command to perform OTA after next wake up
Gateway device
To perform firmware update you simply click the button "Update" on Home Assistant (in the device section of gateway) - gateway will connect to the server where the binary is stored and if file is found, it will perform firmware update and restart gateway. I am using Apache minimal add on Home Assistant - since all sensors are in the same network where Home Assistant is, there is no need for internet access for sensors (and gateway).Configuration
All sensors used in the sensor device (SHT31, TSL2561, MAX17048, checking charging status) are optional and can be disabled in configuration file. On top of that, light sensor (TSL2561) can be replaced with phototransistor (i.e. TEPT4400) - also configurable. In the simplest (and useless) configuration, sensor sends only... its name and RSSI level to Home Assistant.Sleep time (configurable) is initially set to 180s (3 minutes).
Other important configurable settings (some mandatory, some optional):
WiFi channel - it must be the same for ESPnow communication and gateway to AP (router) communication - gateway and sensor devices- NOT IN USE ANYMORE- SSID - gateway and sensor devices (NEEDED ONLY TO PERFORM OTA on sensor device)
- password - gateway and sensor devices (NEEDED ONLY TO PERFORM OTA on sensor device)
- MQTT server IP - gateway device
- MQTT username - gateway device
- MQTT password - gateway device
UPDATE:
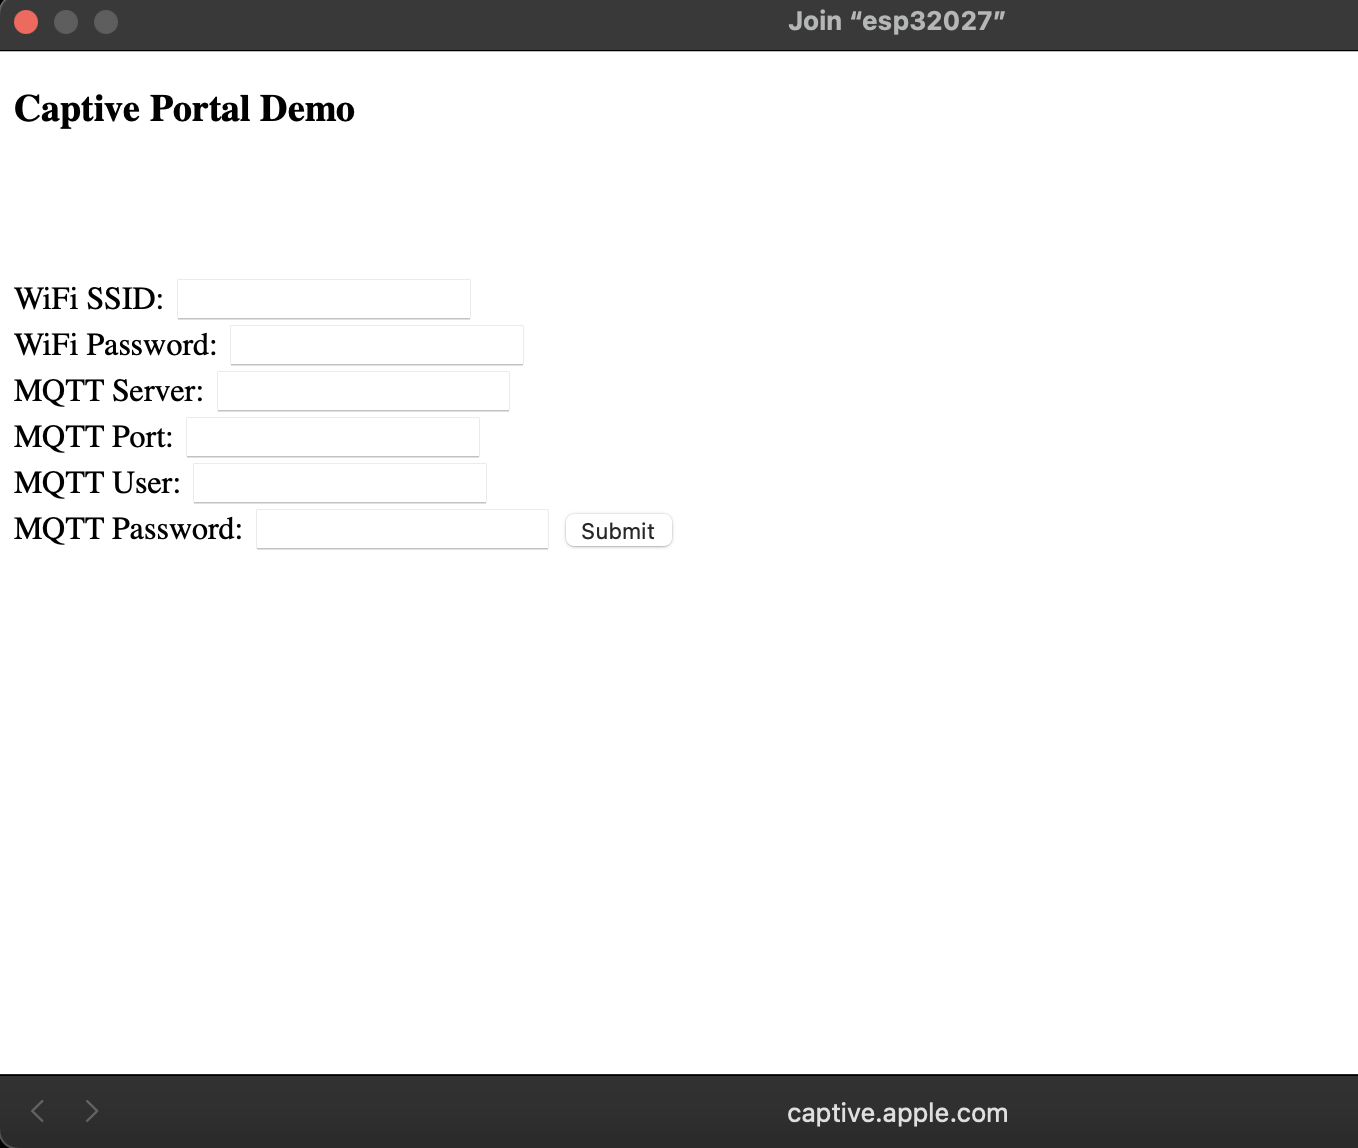
All below configuration parameters are being set up during first integration of gateway devices over Captive Portal.
GATEWAY DEVICE BELOW:
SENSOR DEVICE BELOW:
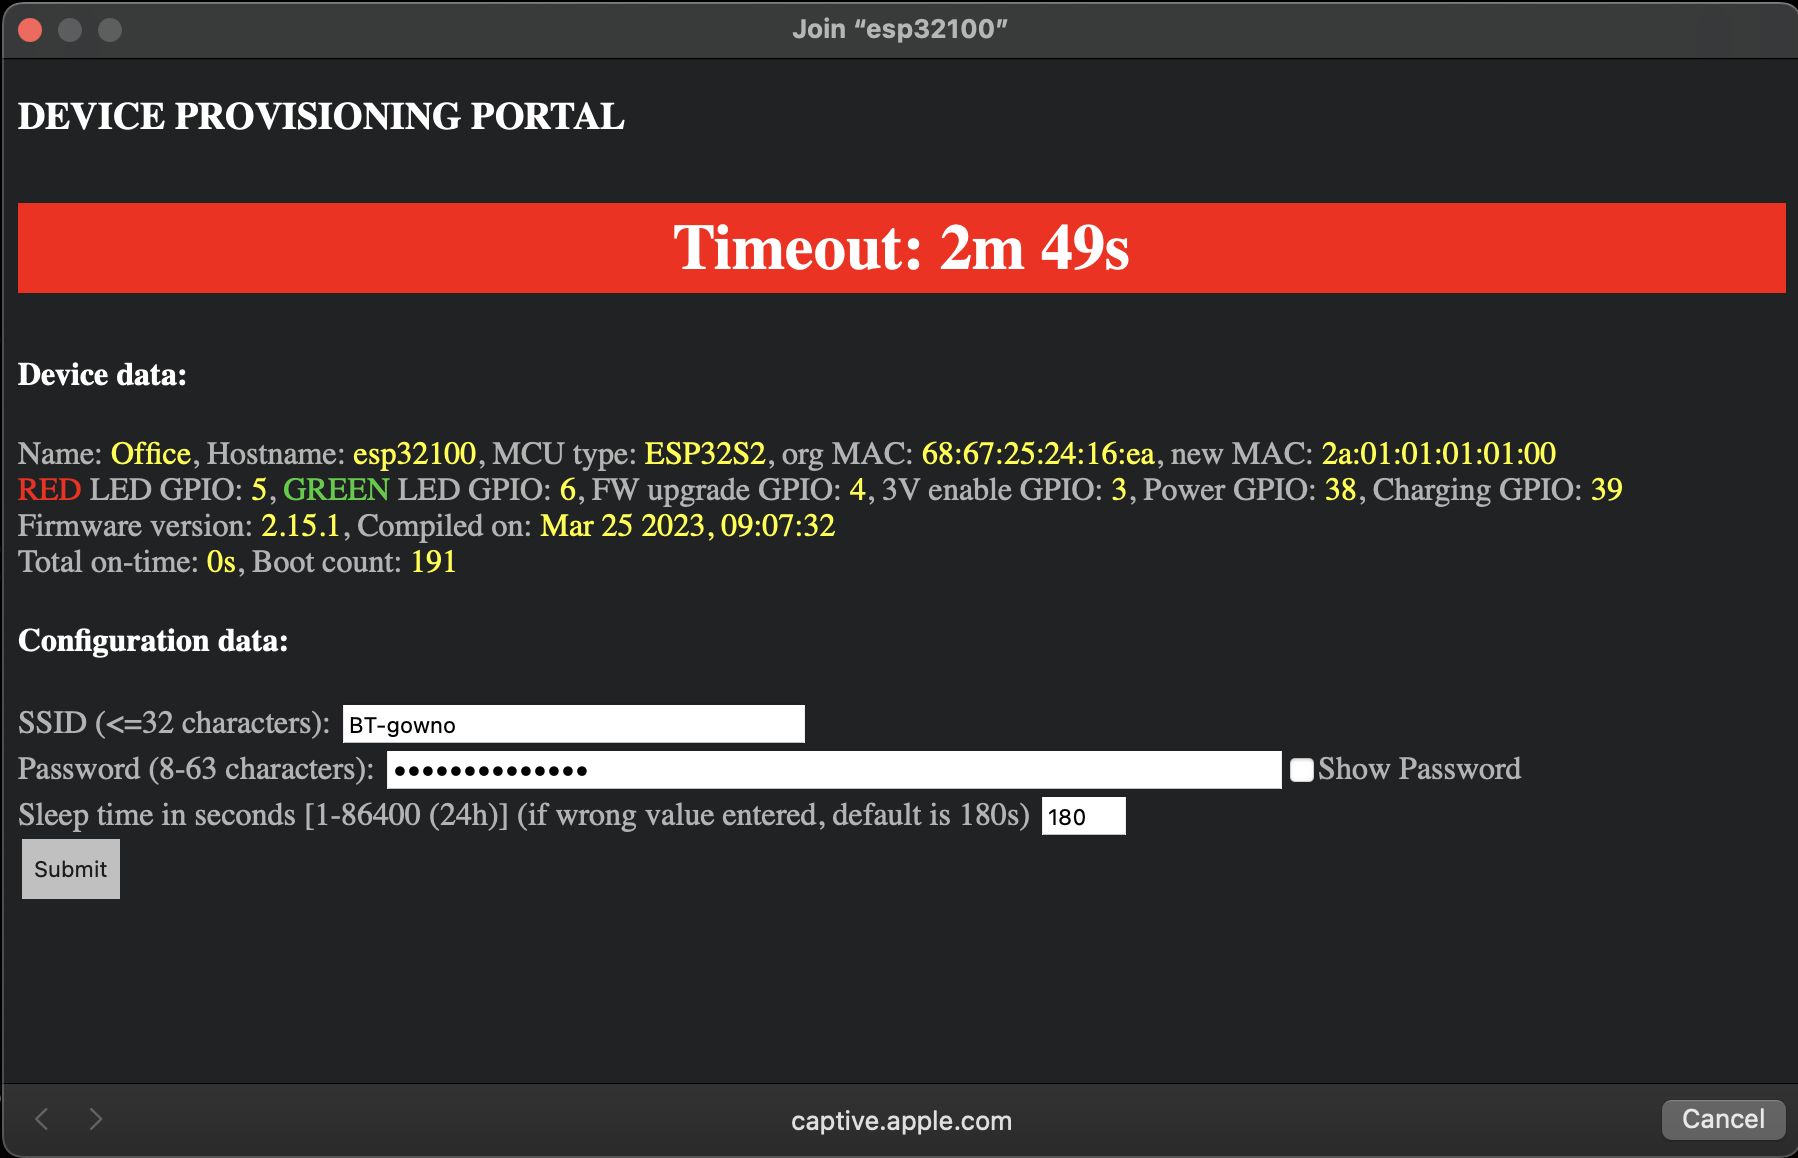
All info on ESP is stored in encrypted form so not readable by "non-super-hacker" ;-)
WHEN GATEWAY CANNOT CONNECT TO WIFI OR MQTT, IT WILL START CAPTIVE PORTAL so that you can change the mandatory parameters such us:
When you invoke OTA for sender device, and wifi credentials are NOT OK, device will start Captive Portal so you can update them accordingly
Software
Sensor device - sender
Tasks are as described above so the code is in 1 file only:Next is the file with credentials: passwords.h
Finally there is a configuration file where you must specify details for each sensor device (such as sensors used, GPIO etc.): devices_config.h
The sequence is:
- configure the device in devices_config.h
- uncomment the DEVICE_ID you want to compile the sketch for in main sketch: sender.ino
- compile/upload to the device
- repeat the above 3 points for the next sensor device
Sender in action (test device):
Gateway device - receiver
Gateway tasks are more complex (as described above) so the code is split into multiple files - per functionEntire configuration is in config.h file
Next is the file with credentials: passwords.h (
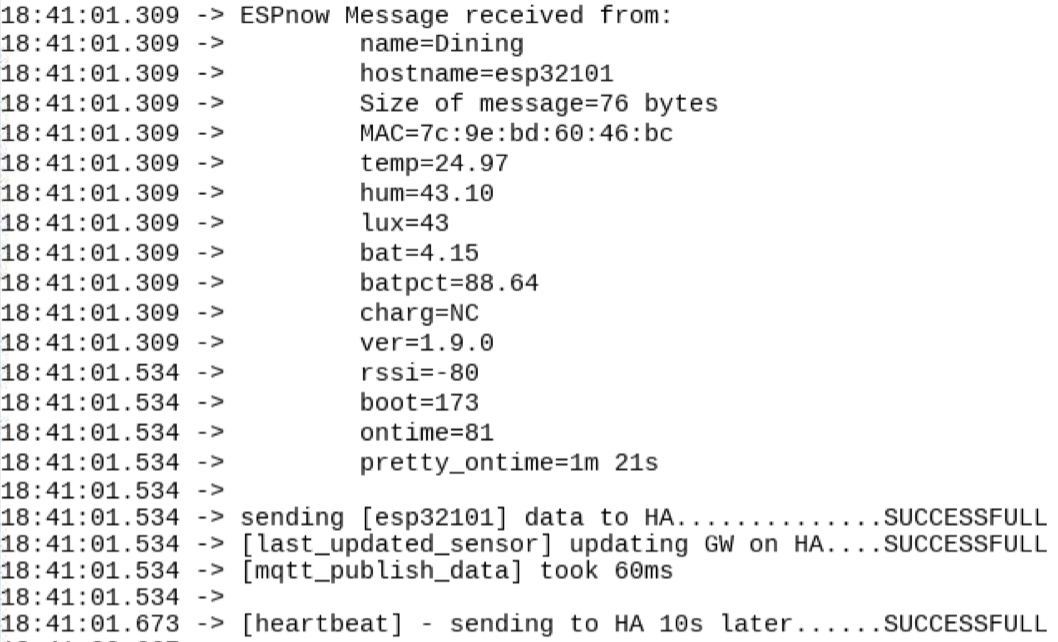
Receiver in action (real device):
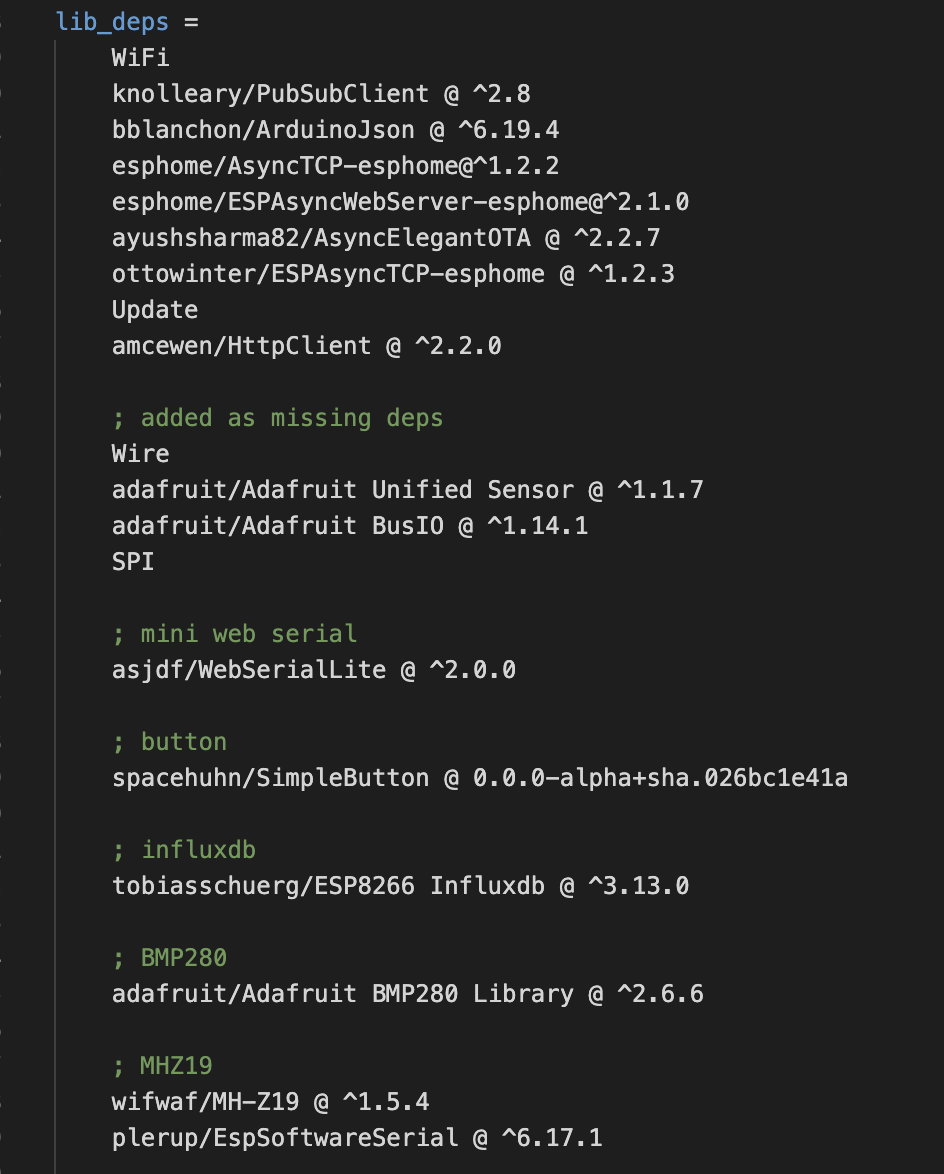
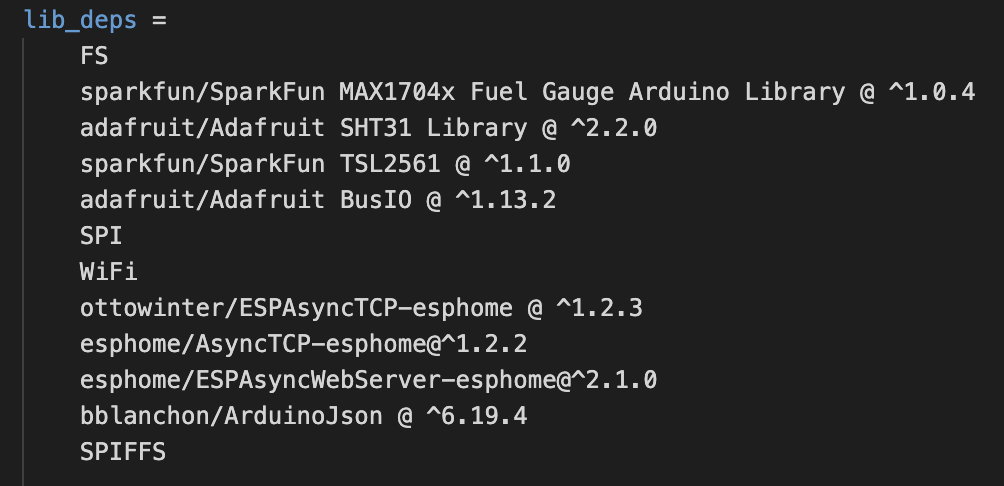
Libraries needed:
Some of the libriaries are for specific device - not all are always needed - check the configuration file for details
Gateway:
Sensor device:
Home Assistant
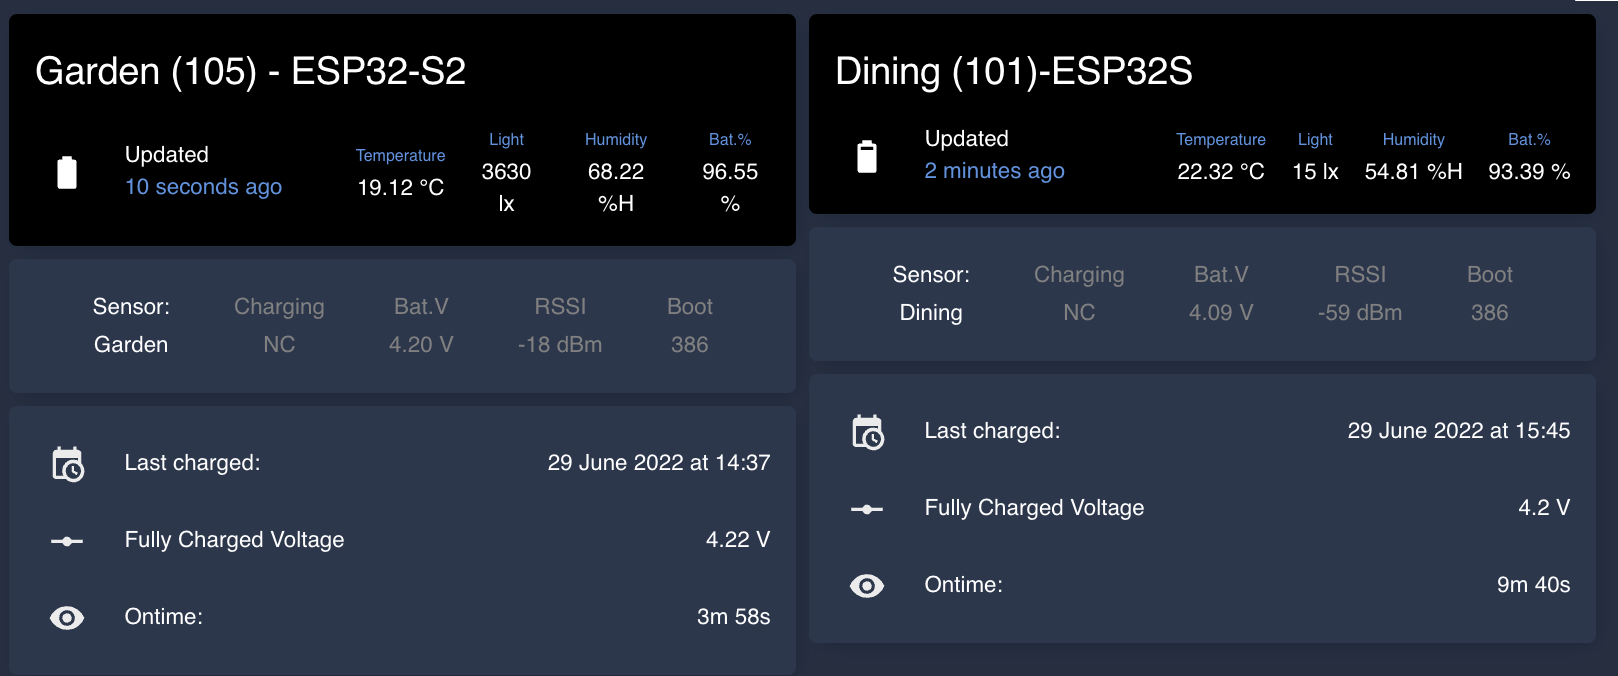
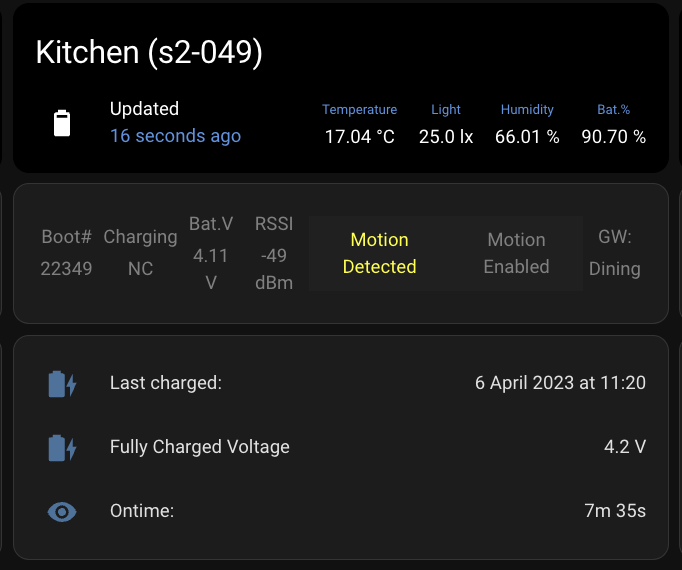
Information from sensor device on Home Assistant:
- device name
- temperature [C]
- humidity [%]
- light [lux]
- battery in [%] and [Volt]
Additionally few diagnostic information:
- wifi signal/rssi [dBm]
- firmware version
- boot number
- [cumulative] ontime (in seconds) for further postprocessing i.e. in Grafana - it resests to 0 when charging starts
- [cumulative] pretty ontime, i.e.: "1d 17h 23m 12s" (human readable) - it resests to 0 when charging starts
- some other sensors/info as well - some sensors are disabled by default on Home Assistant - enable what you need after integration
Ontime is calculated based on millis (time just before hibernation - start time) including empirically established difference between real startup time and measured with PPK2 (apparently both: ESP32 and ESP32-S2 are "cheating" with millis, however S2 shows hundreds of millis just after start, while ESP32 shows very low value after start - both are innaccurate and mainly depend on the size of the binary file, that has to be loaded into ESP32 memory during startup by bootloader). Ontime is also reduced by turning off the bootloader logo during wake up from sleep.
Gateway device (with its entities) as well as all sensor devices (with their entities) are automatically configured in Home Assistant using MQTT discovery
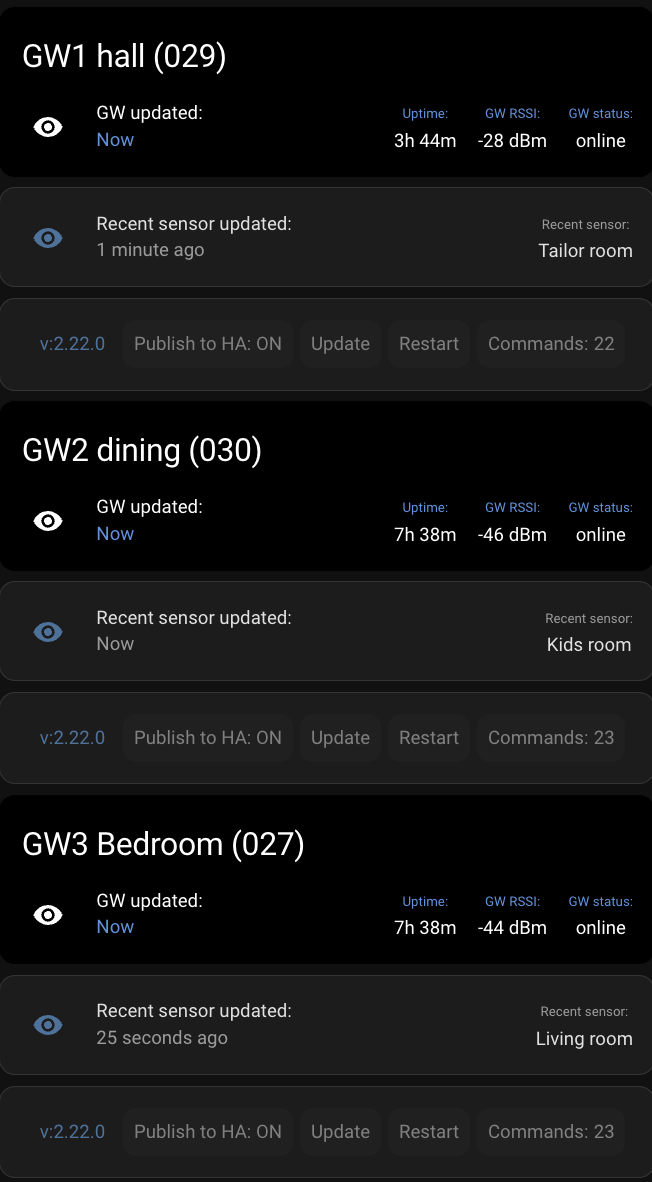
Gateway device as discovered by Home Assistant:
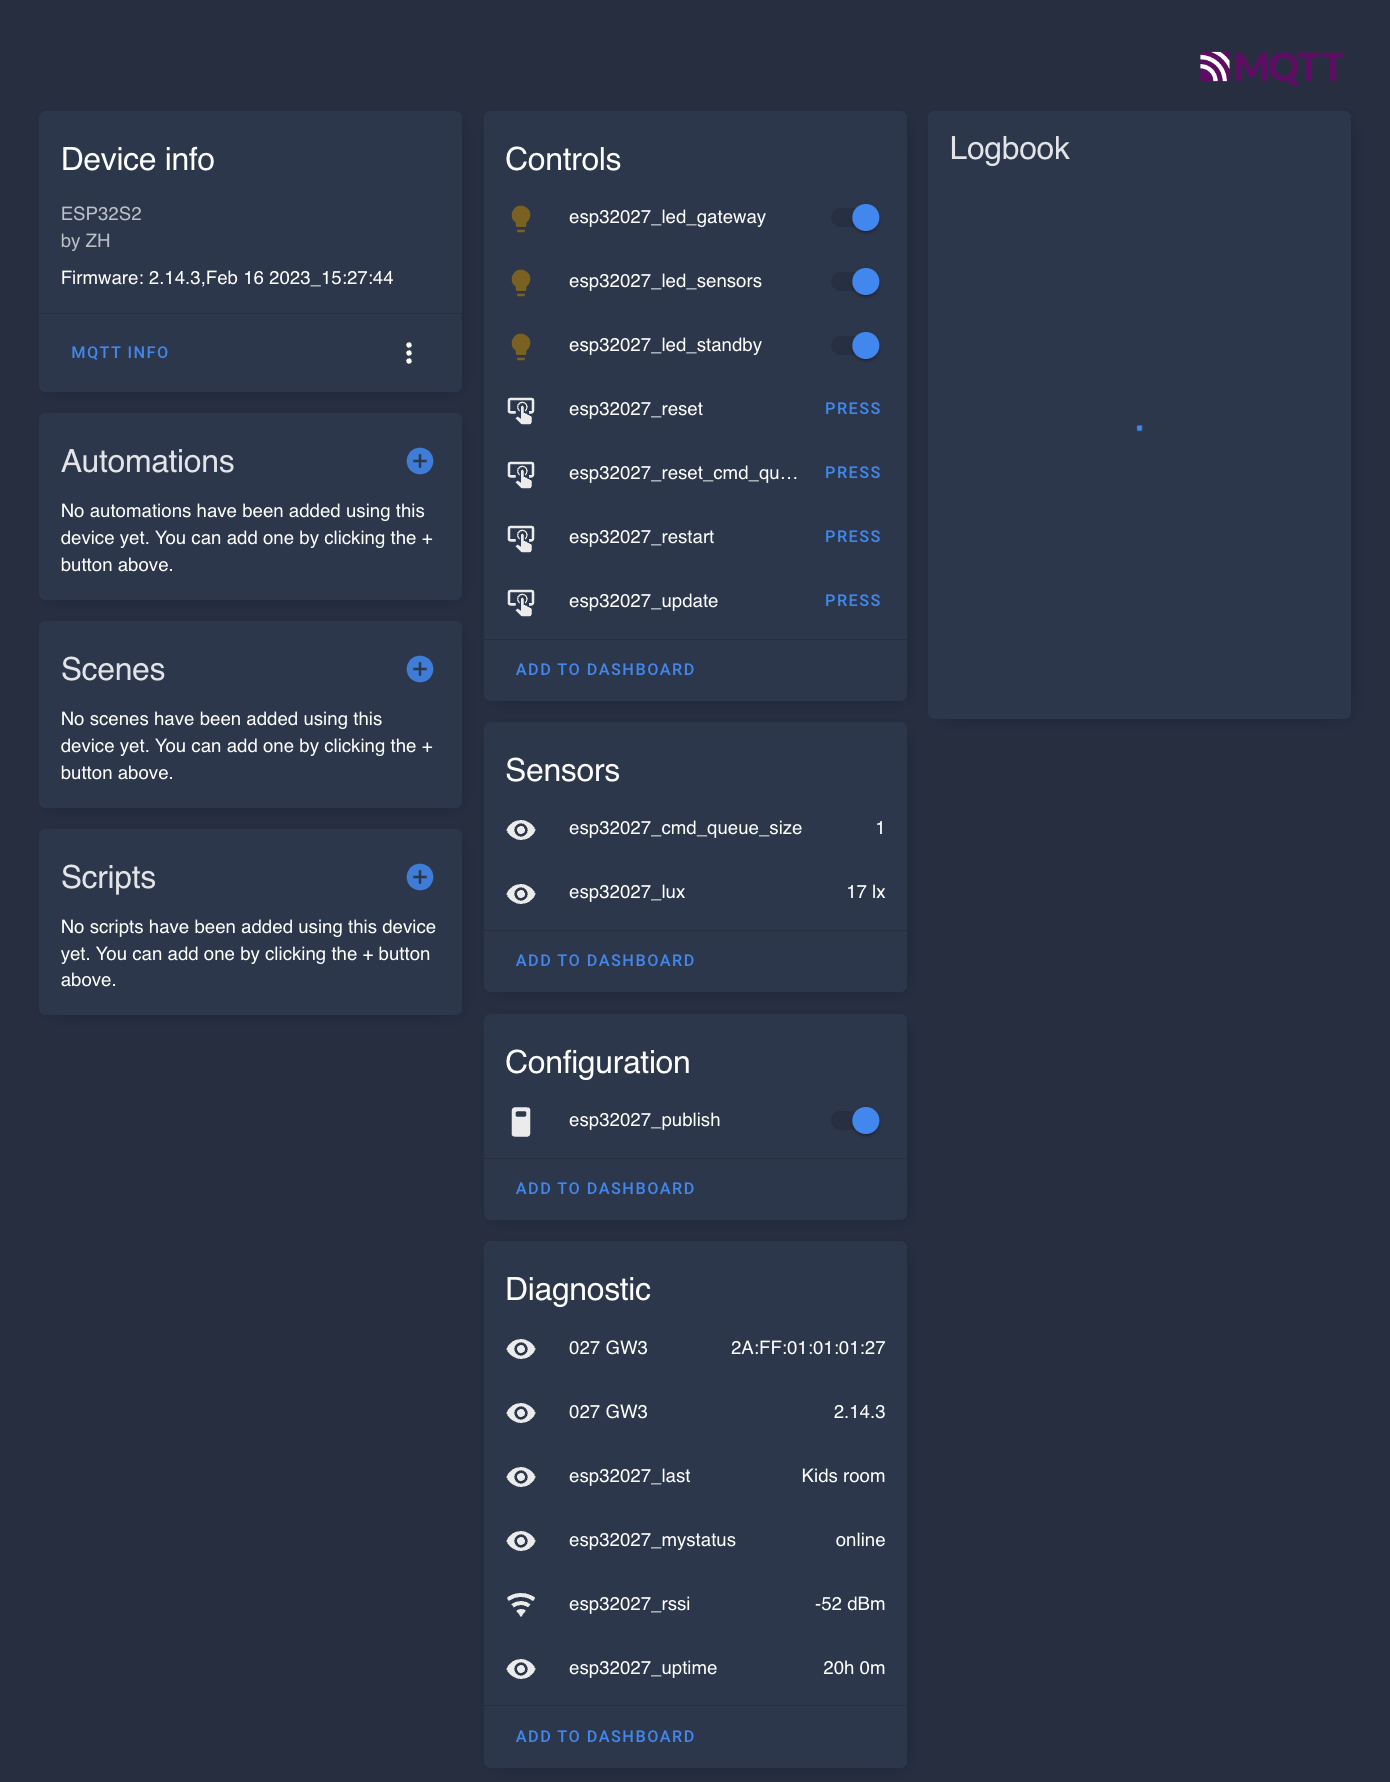
Gateway device on lovelace dashboard:
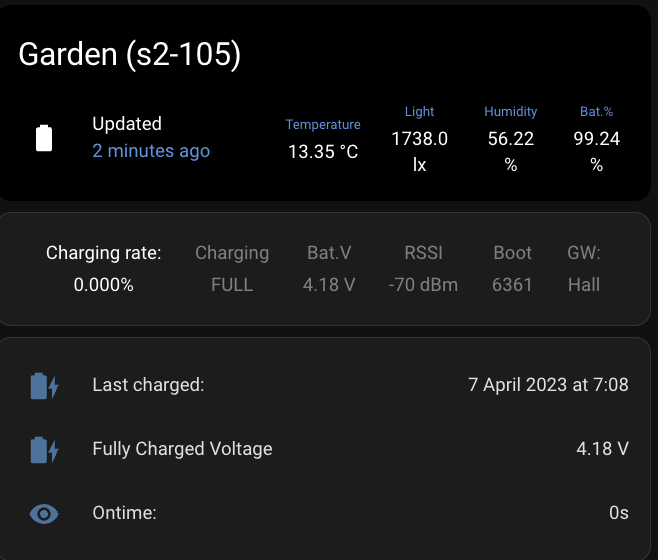
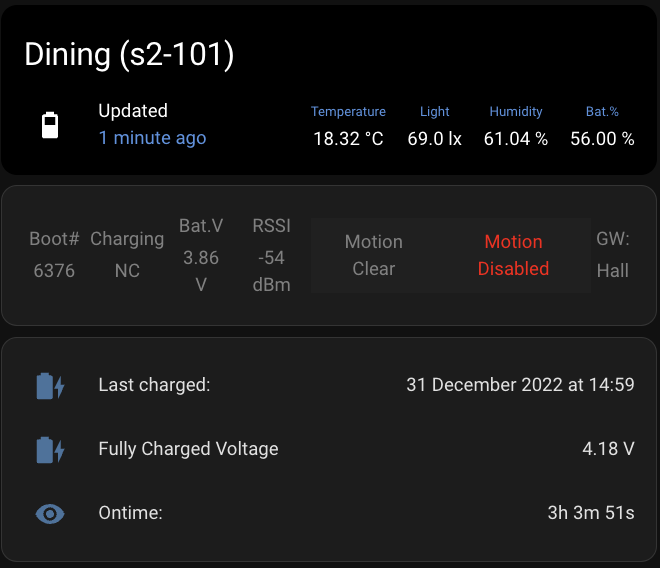
Sensor device as discovered by Home Assistant:
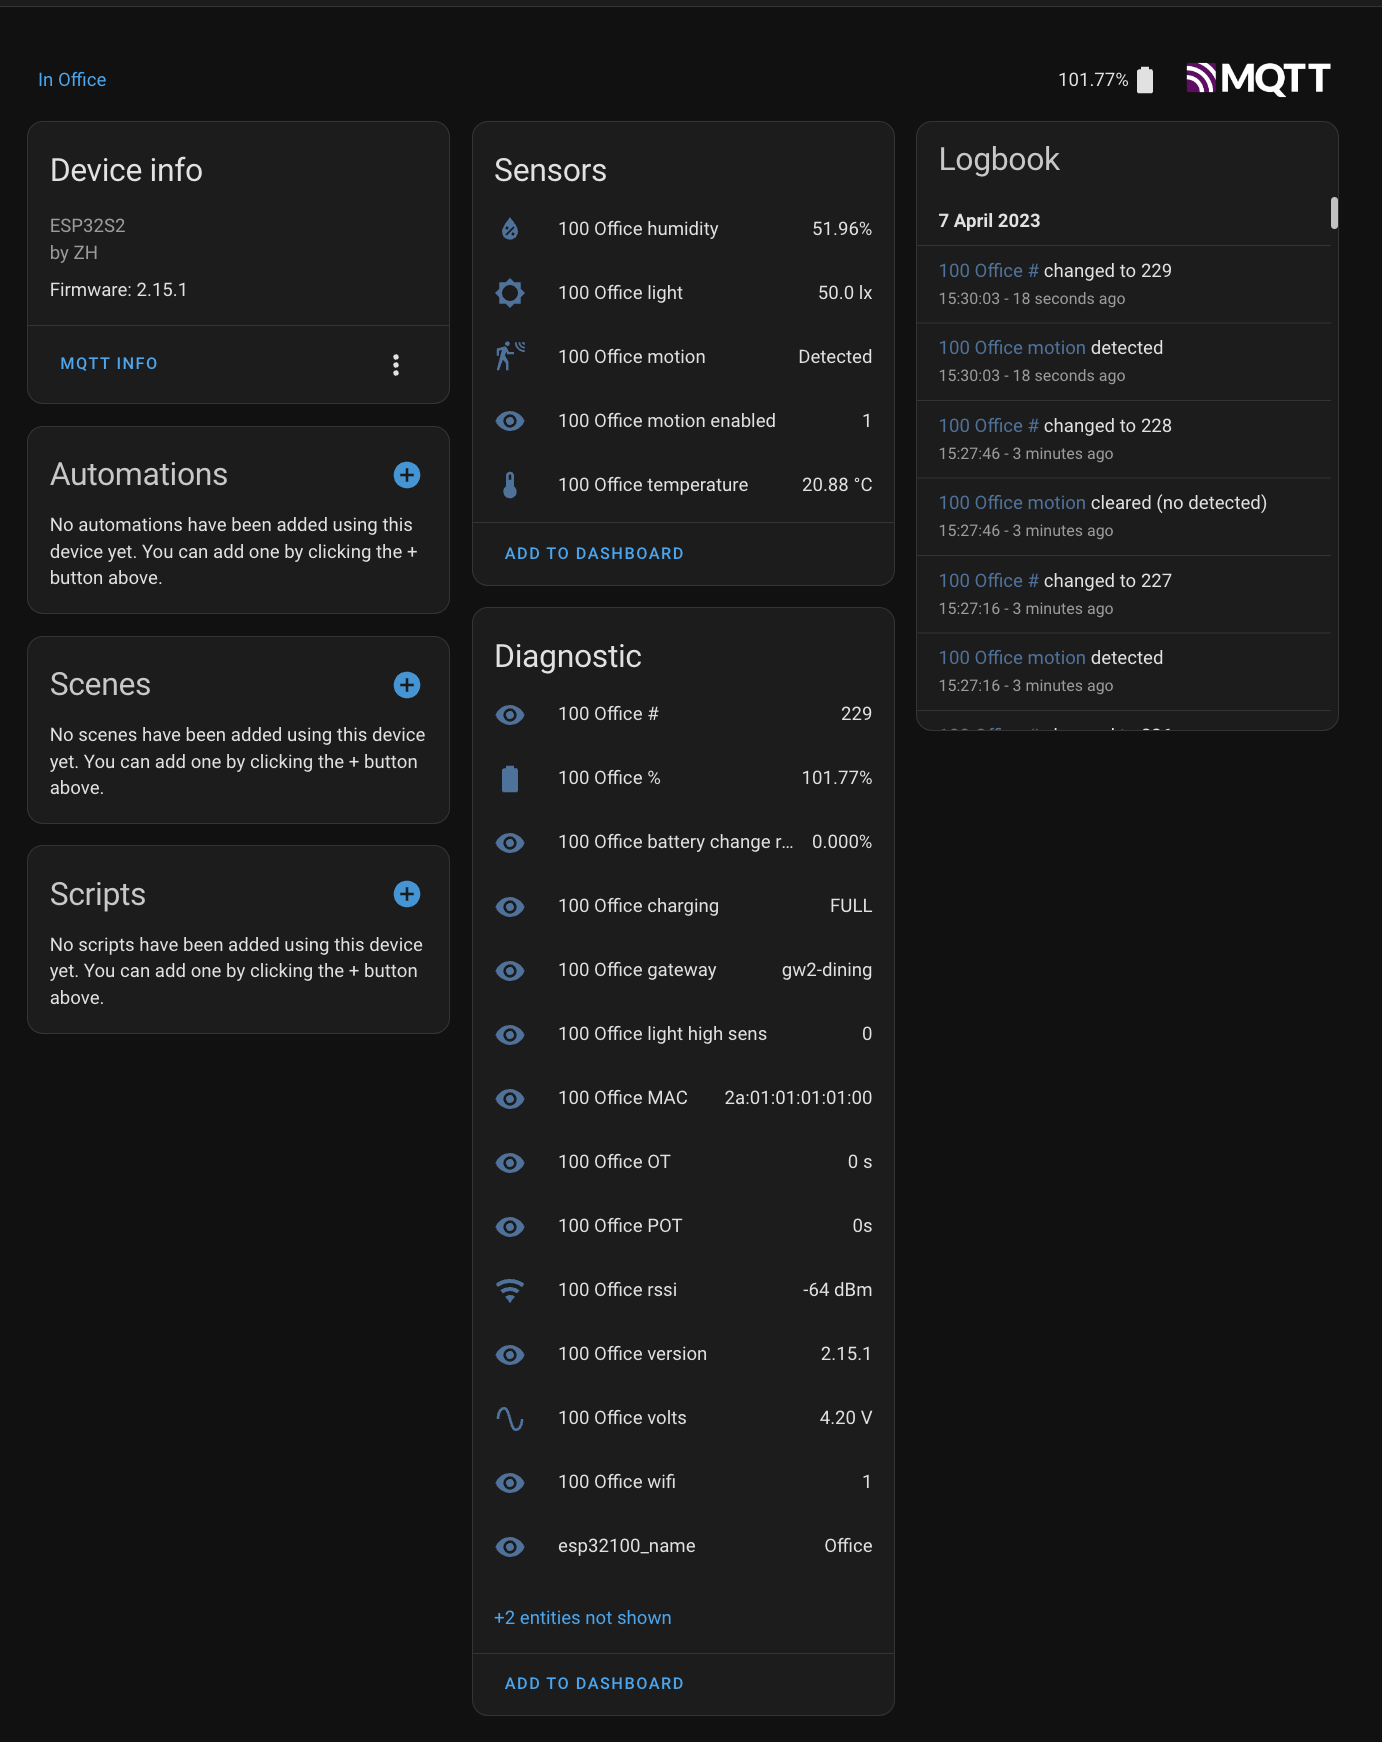
Sensor Devices on lovelace dashboard:
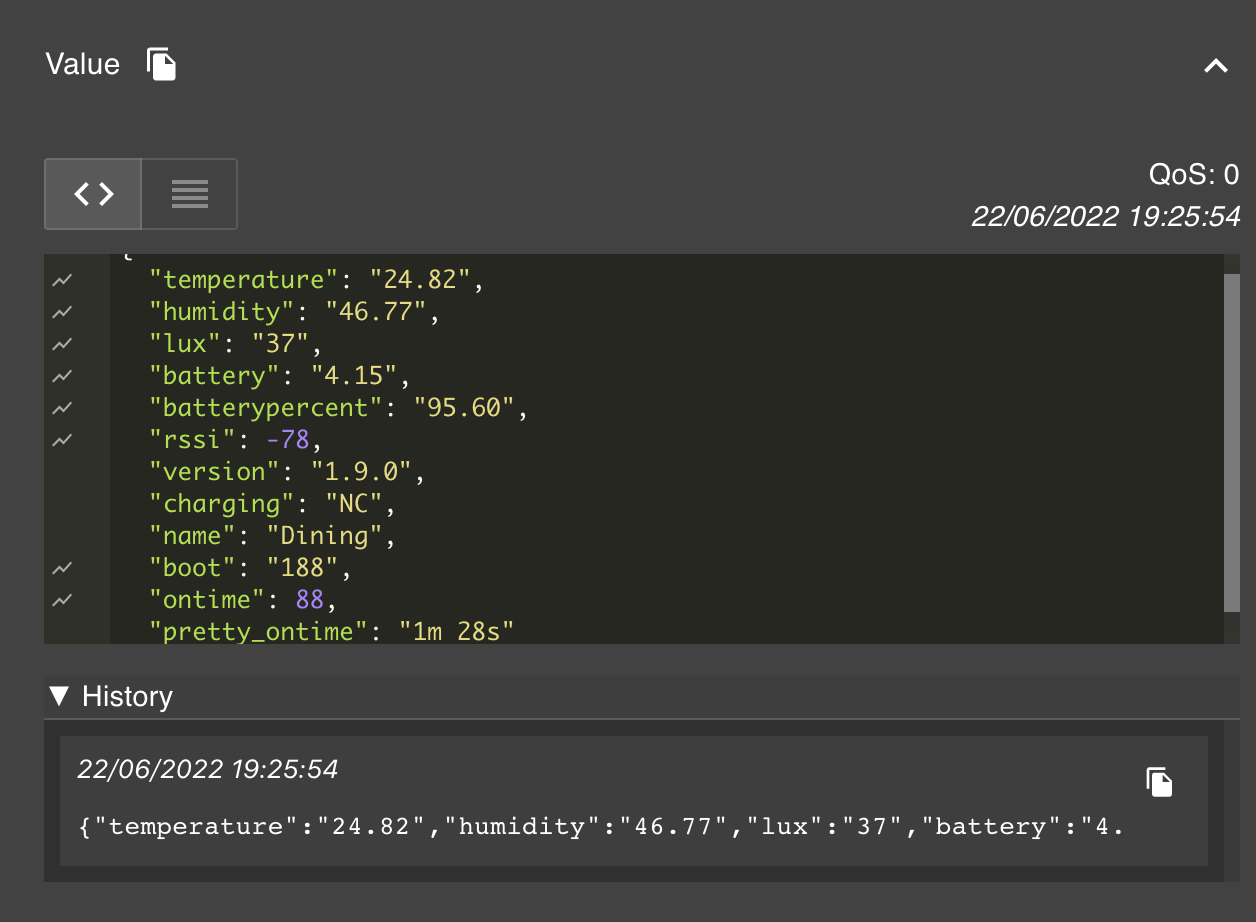
MQTT structure
All information from sensor device is sent to Home Assistant MQTT broker in one topic: sensor_hostname/sensor/state
And message arrives in JSON format:
TODO list
Probably nothing at this moment ;)Updates
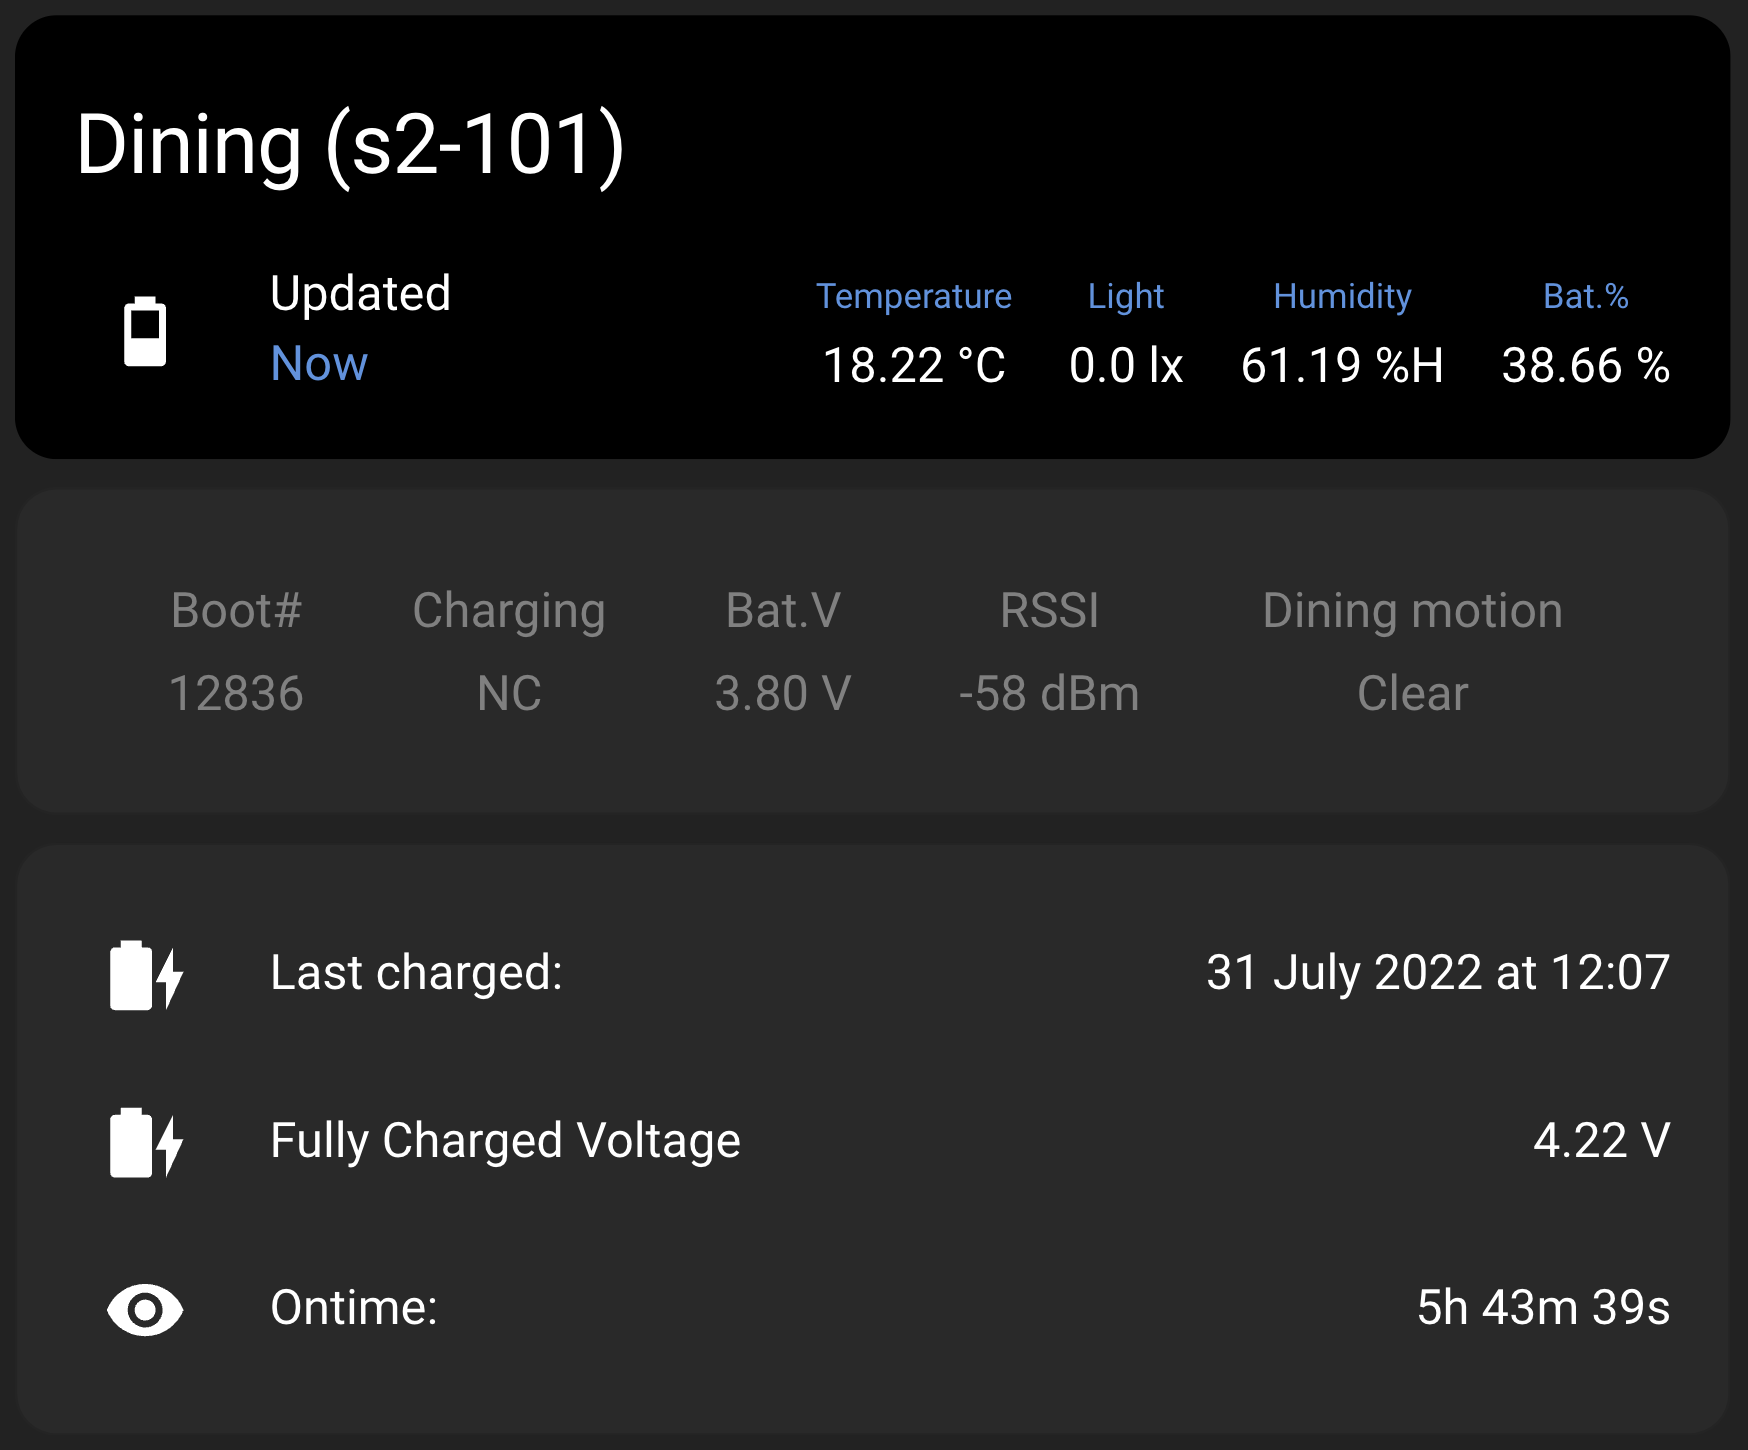
Update 2022-12-31:
After 160 days on 1 battery charge, the battery status is as below: 38.66% and 3.8V. But I am recharging it now and putting there on 1st January 2023 to have easy calculation for the entire 2023 - maybe on 1 charge it will work the whole year? Let's see in January 2024... ;-)
Update 2023-01-26:
OTA is here for sleeping devices. Please check changelog.txt on how to.
Update 2023-02-12:
LEDs on sensor devices can be turned OFF/ON by MQTT command. If not OFF, then automatically dimmed by measured light.
Implemeneted MQTT commands to receiver (to act on sensor devices):
- - topic:
- esp32030/cmd/cmd_for_sender - command shall be send to all gateways as nobody knows which gw controls which sensor
- - message:
- {"mac":"xx:01:01:01:zz:yy","command":"1"} - OTA
- {"mac":"xx:01:01:01:zz:yy","command":"2"} - restart
- {"mac":"xx:01:01:01:zz:yy","command":"3"} - captive portal
- {"mac":"xx:01:01:01:zz:yy","command":"4"} - factory reset
- {"mac":"xx:01:01:01:zz:yy","command":"10"} - Motion OFF
- {"mac":"xx:01:01:01:zz:yy","command":"11"} - Motion ON
- {"mac":"xx:01:01:01:zz:yy","command":"21"} - force connection to GW1
- {"mac":"xx:01:01:01:zz:yy","command":"22"} - force connection to GW2 (if exists)
- {"mac":"xx:01:01:01:zz:yy","command":"23"} - force connection to GW3 (if exists)
- {"mac":"xx:01:01:01:zz:yy","command":"200"} - LEDs completely OFF
- {"mac":"xx:01:01:01:zz:yy","command":"201"} - LEDs dimm automatically by ESP: lux below 1 ->dc=1, lux between 1 and 10 => dc=10, lux>10 => dc=255
Update 2023-02-17:
Force connection to specific gateway - see below commands: 21, 22 and 23
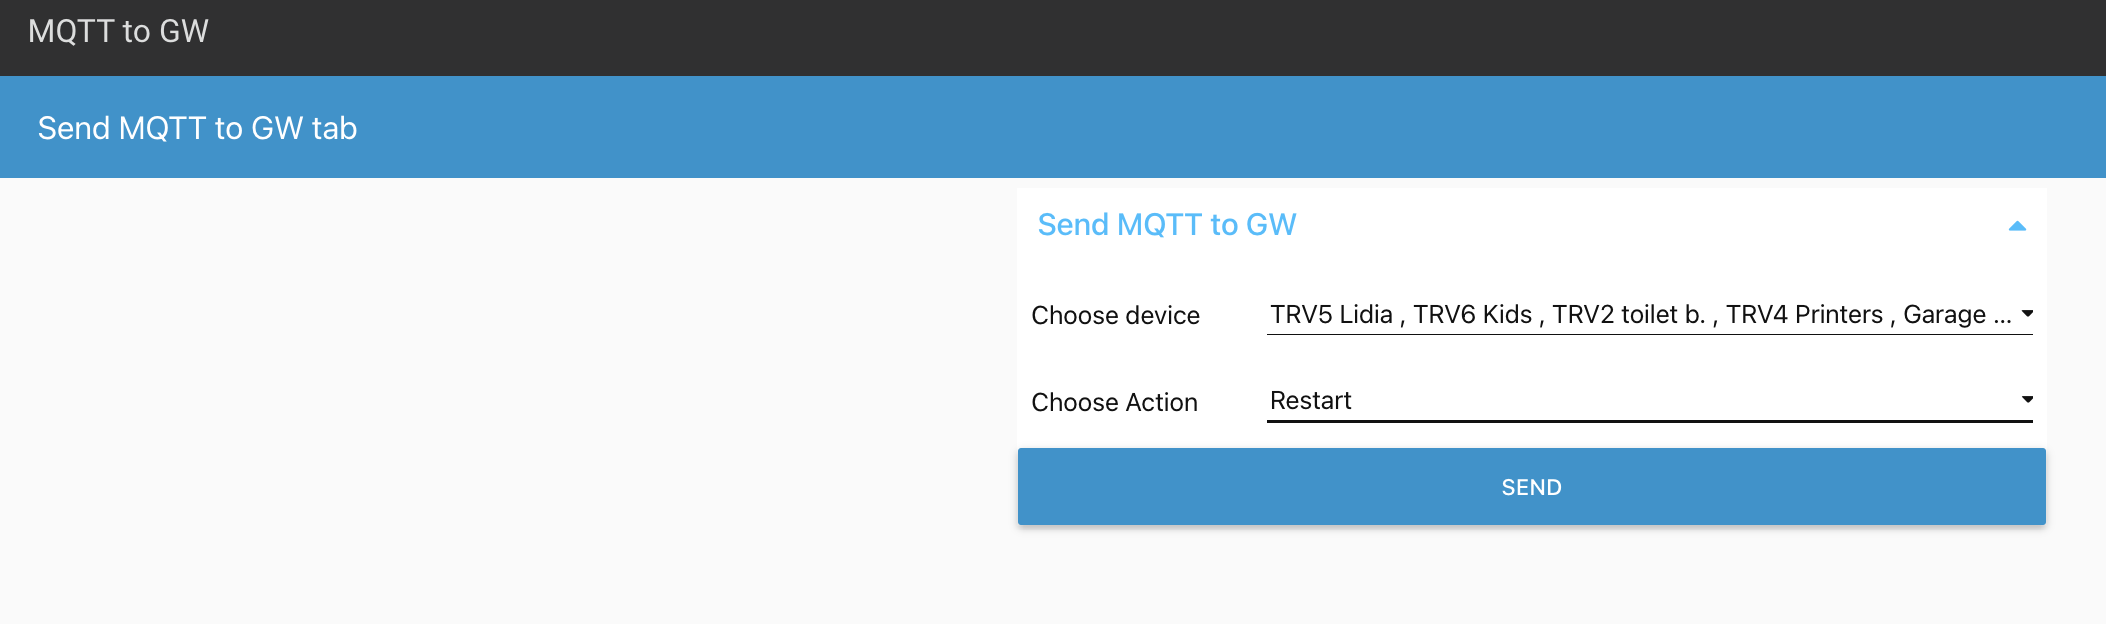
All commands to sensor devices are available in Node Red dashboard - no more hustle
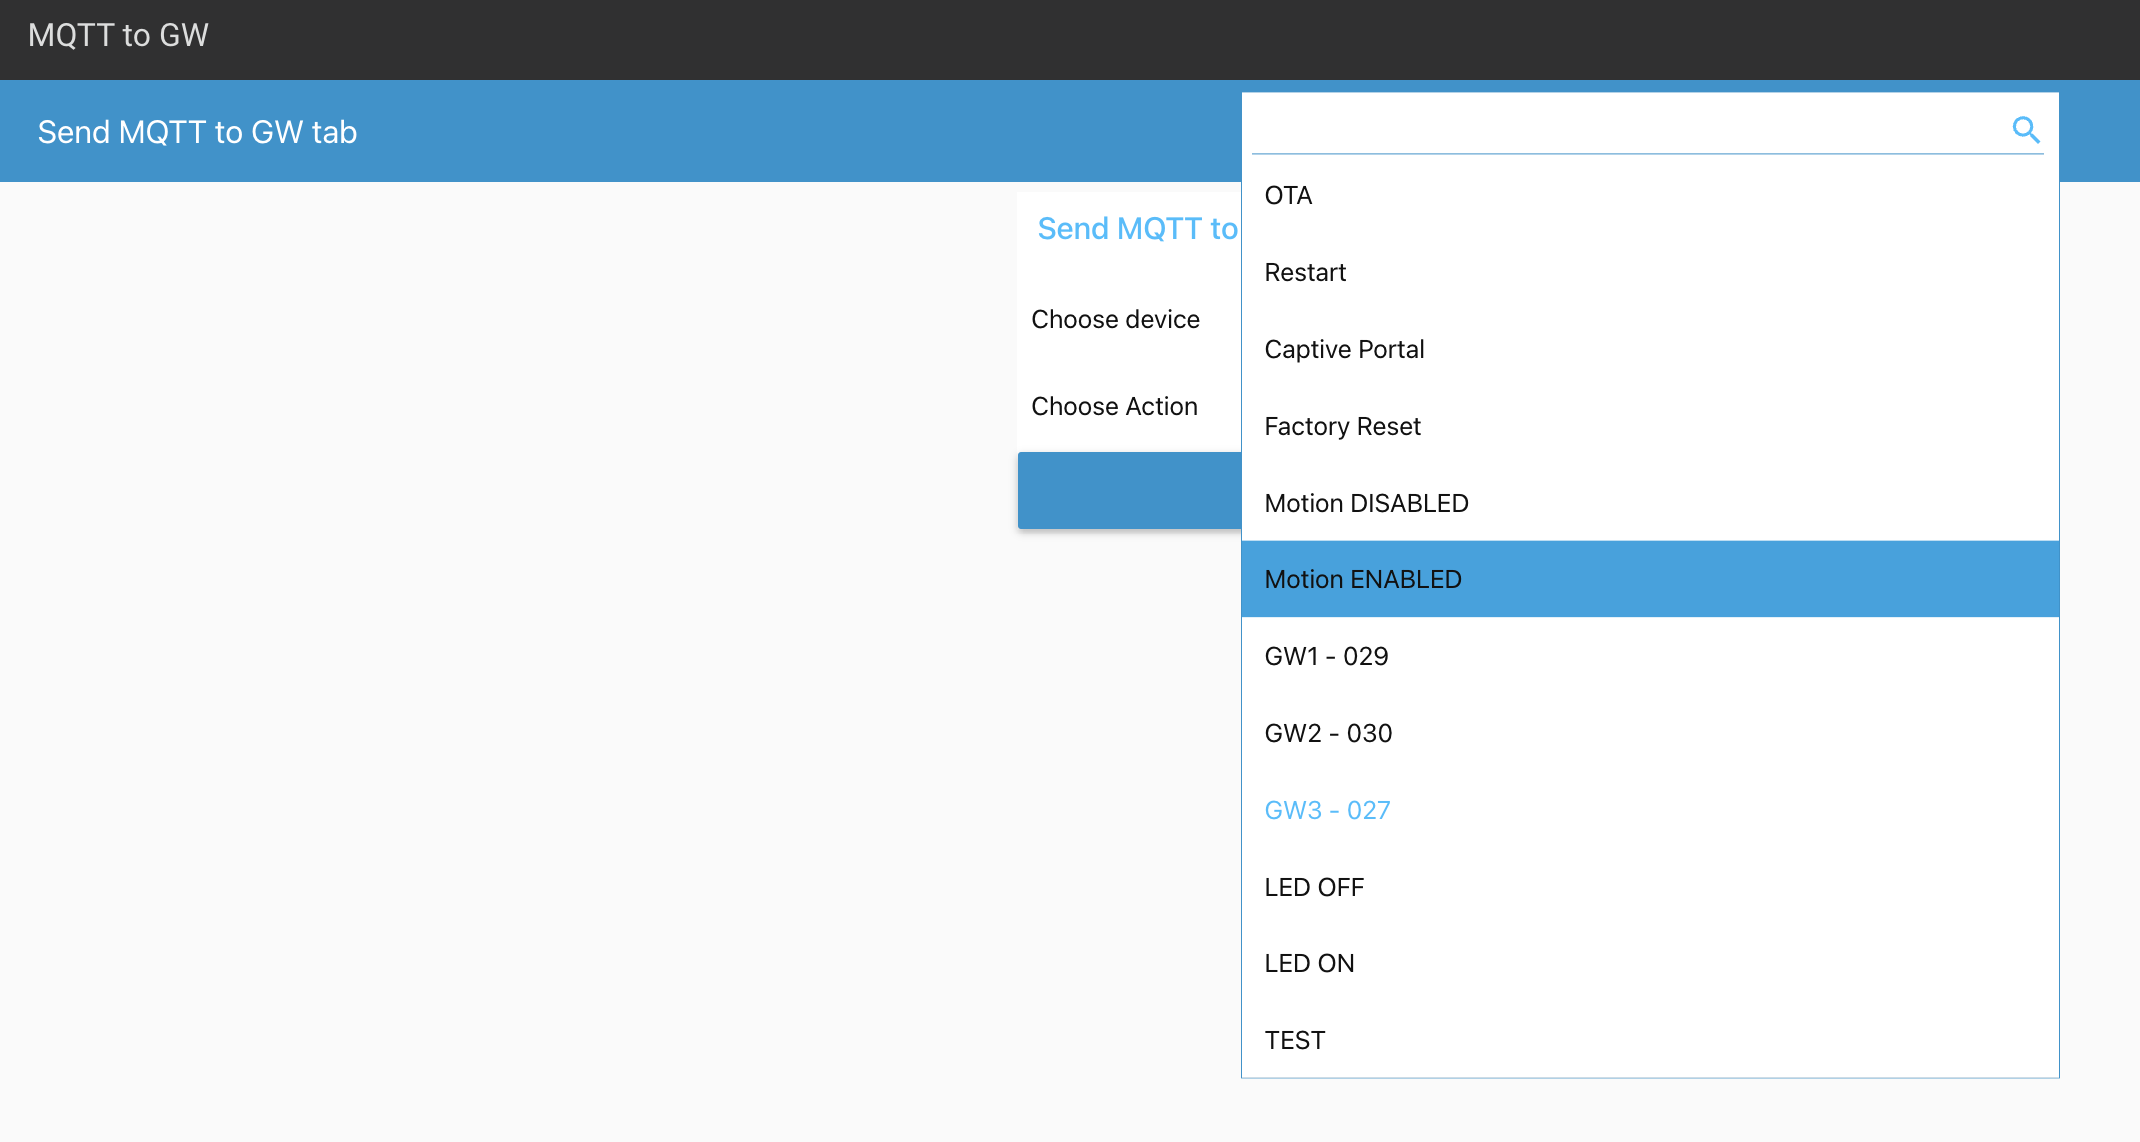
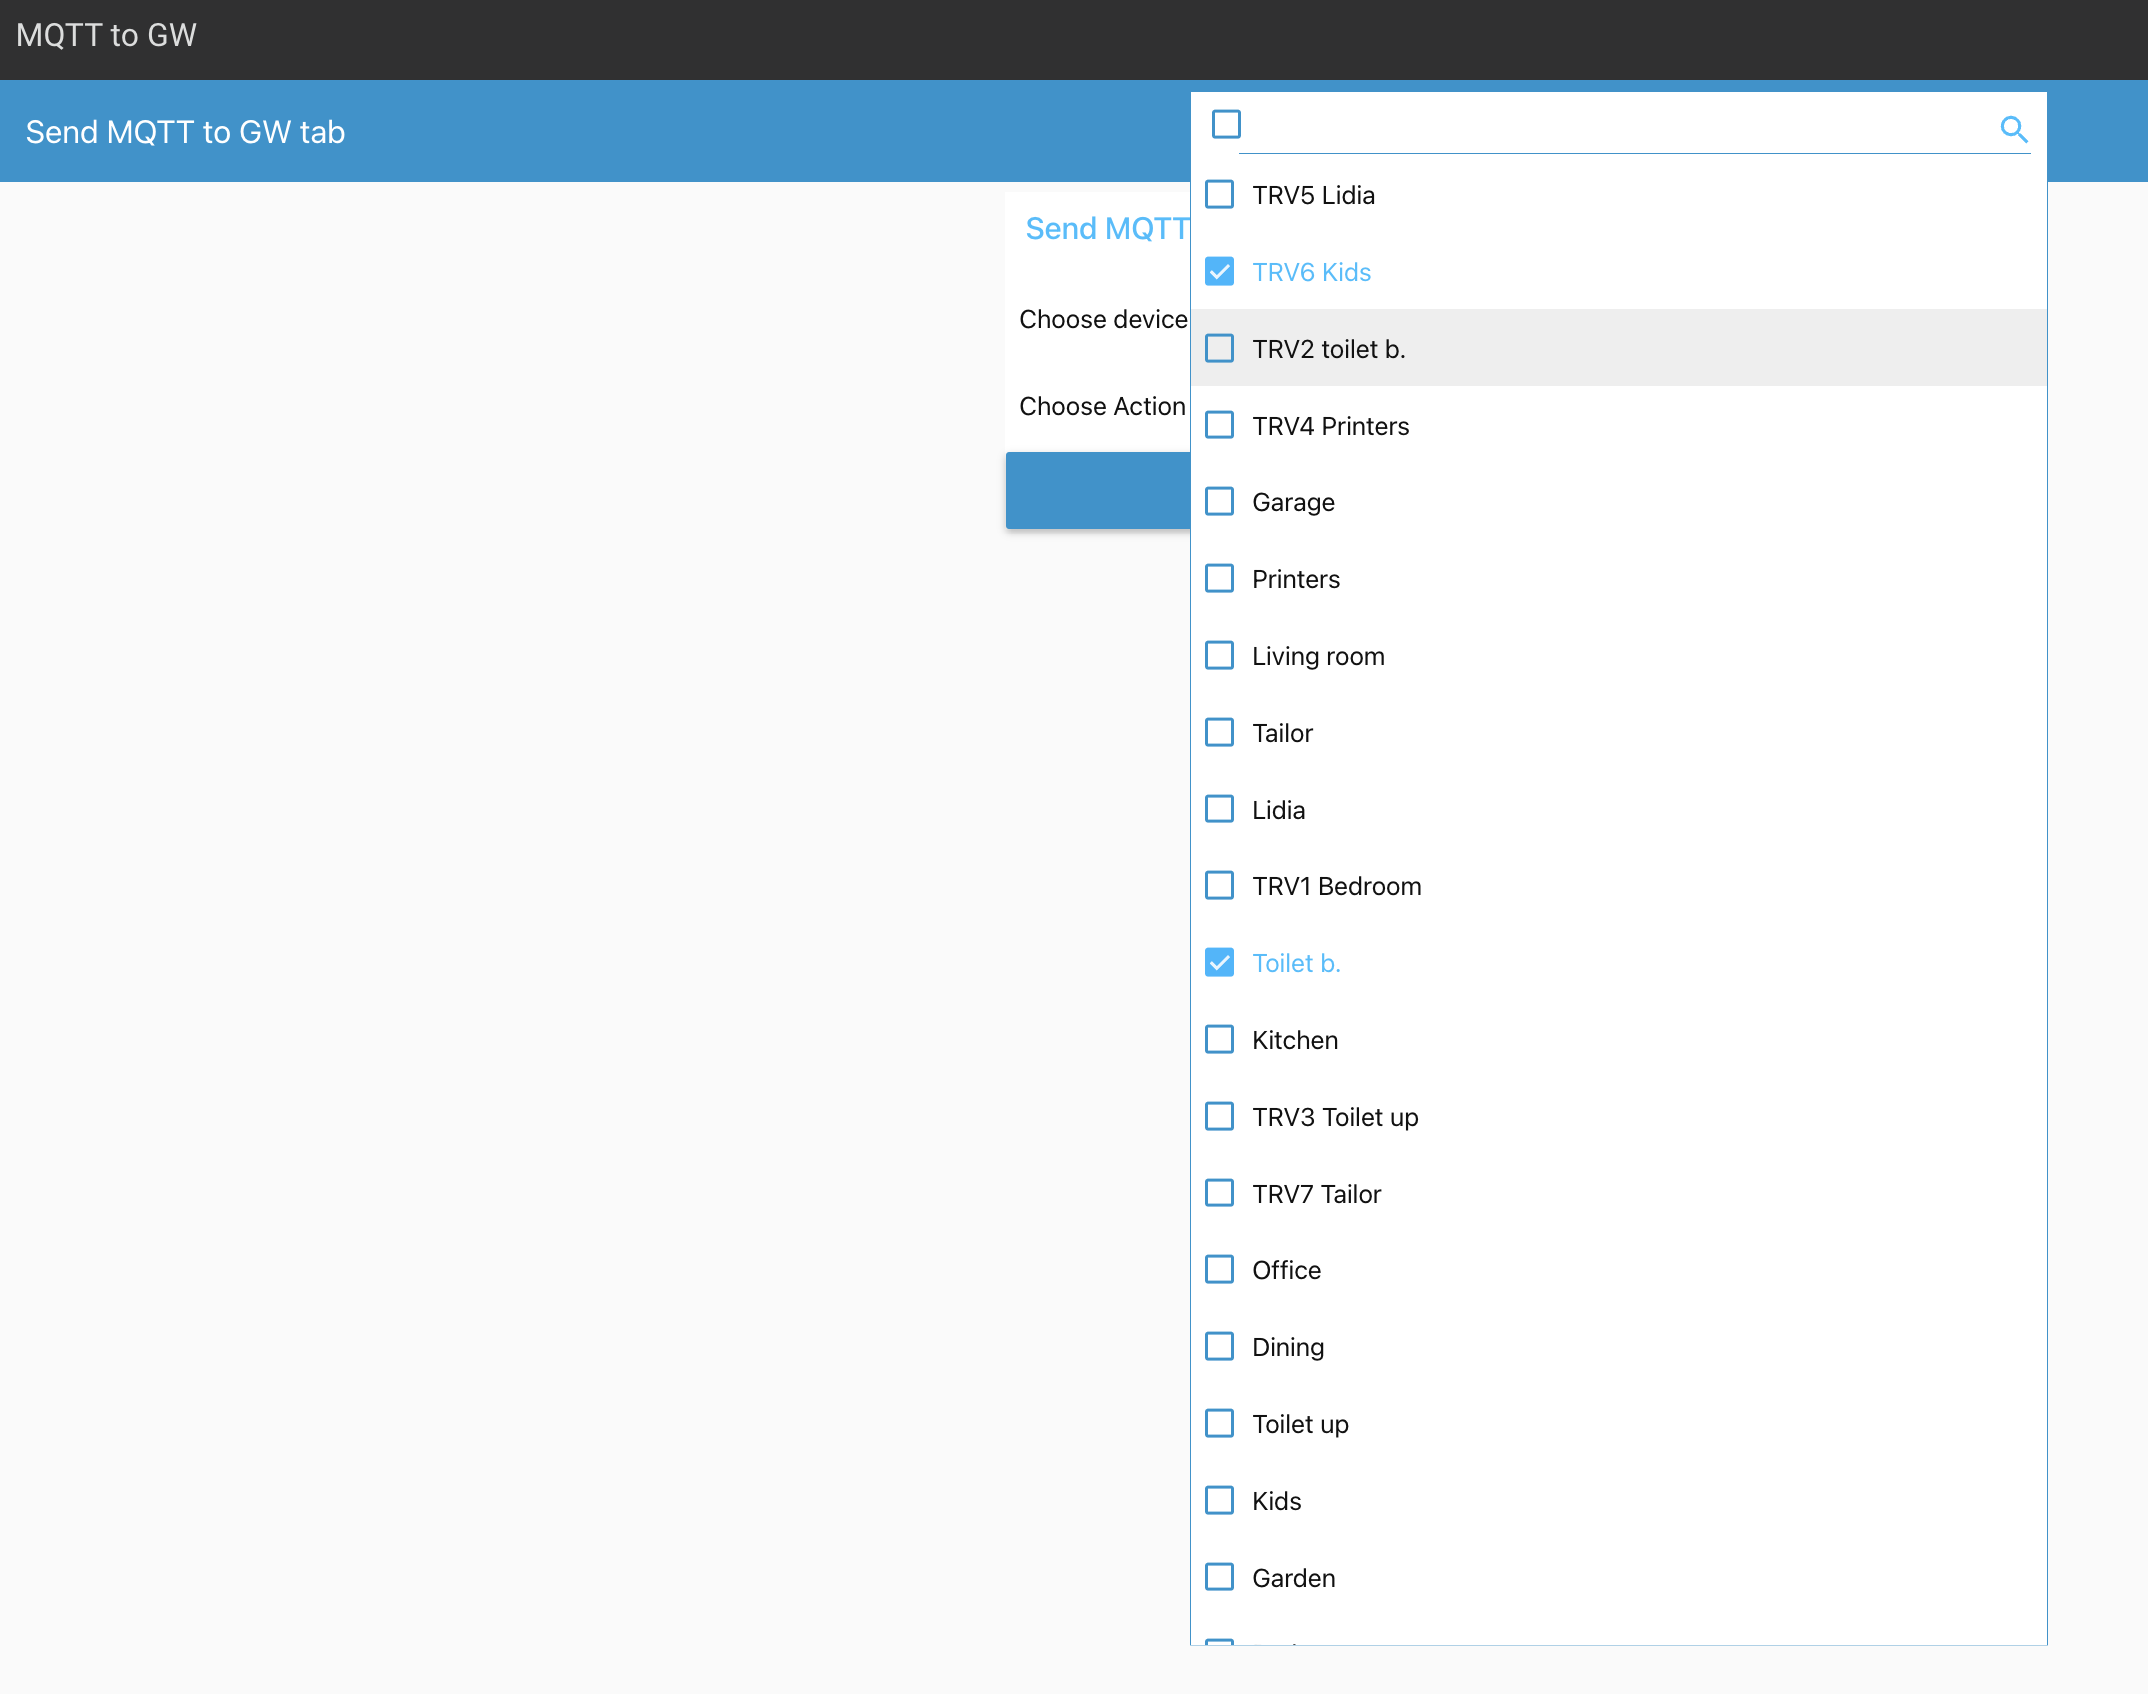
Update 2023-02-23:
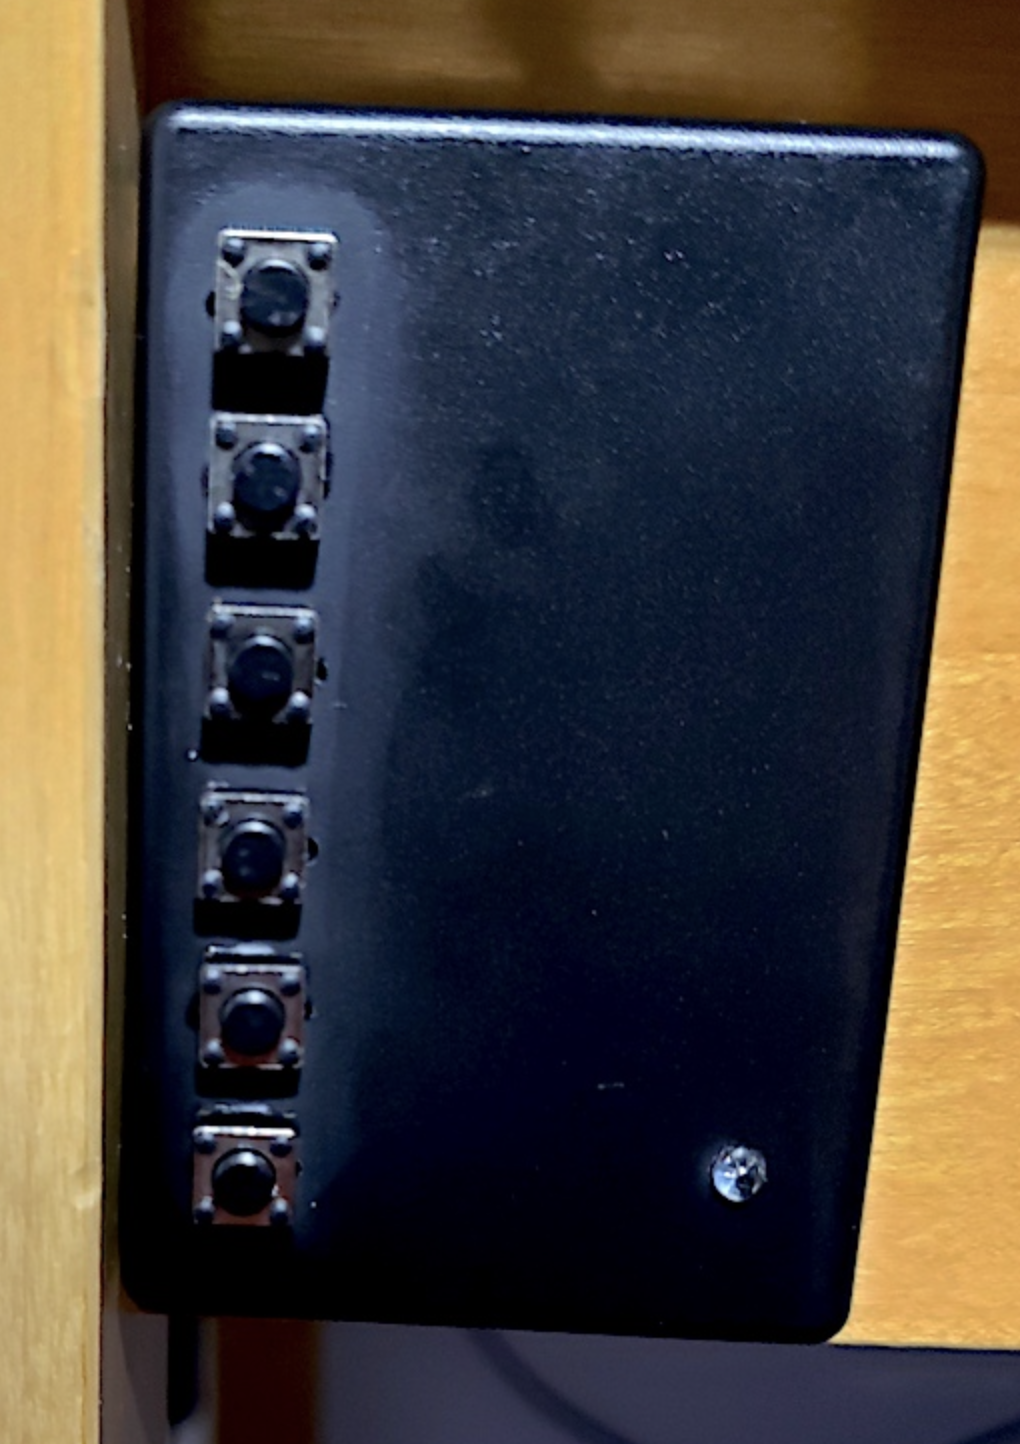
New end device - push buttons - implemented
Example: small box with 6 push buttons to control the devices around the house (i.e. switches, lights, etc.)
Powered with small 500mAh battery, sleeps all the time until button pressed.
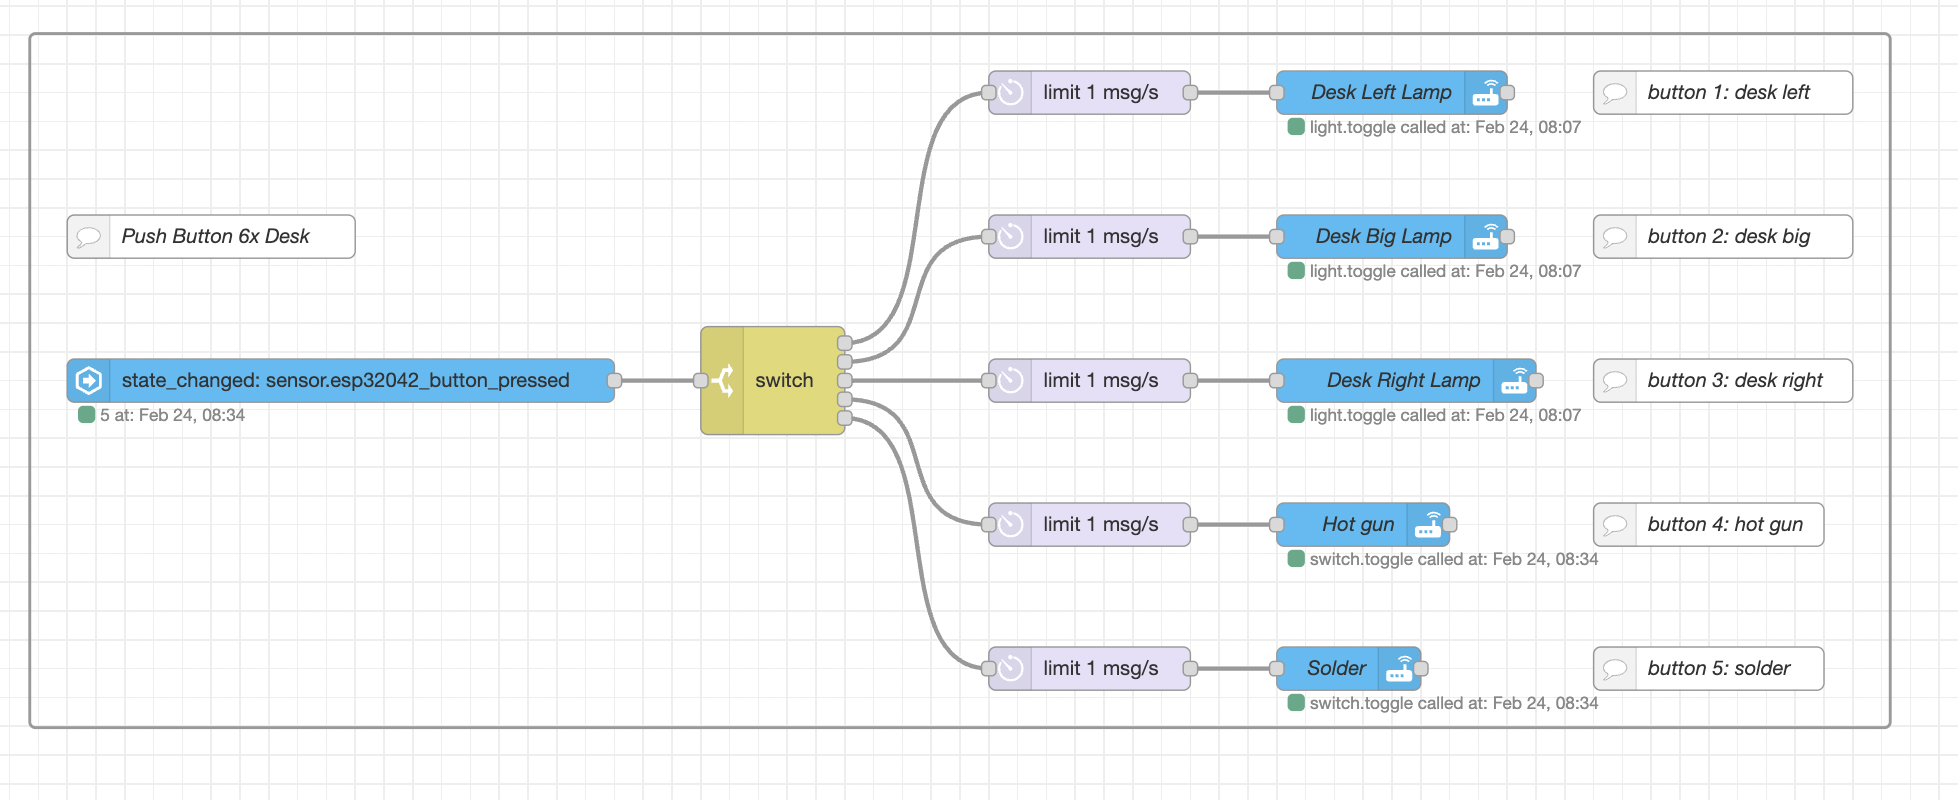
Sends button number (that was pushed) to Home Assistant and then Node Red acts accordingly
Still using ESPnow to send data to Home Assistant via gateway
ESP32 is too slow (600ms) - only ESP32-S2 does the job properly (100ms)
Update 2023-04-13:
Winner winner chicken dinner - sensor device in Living Room reports 3.73V (16.7%) after 185 days on - that is "OK for me" ;-)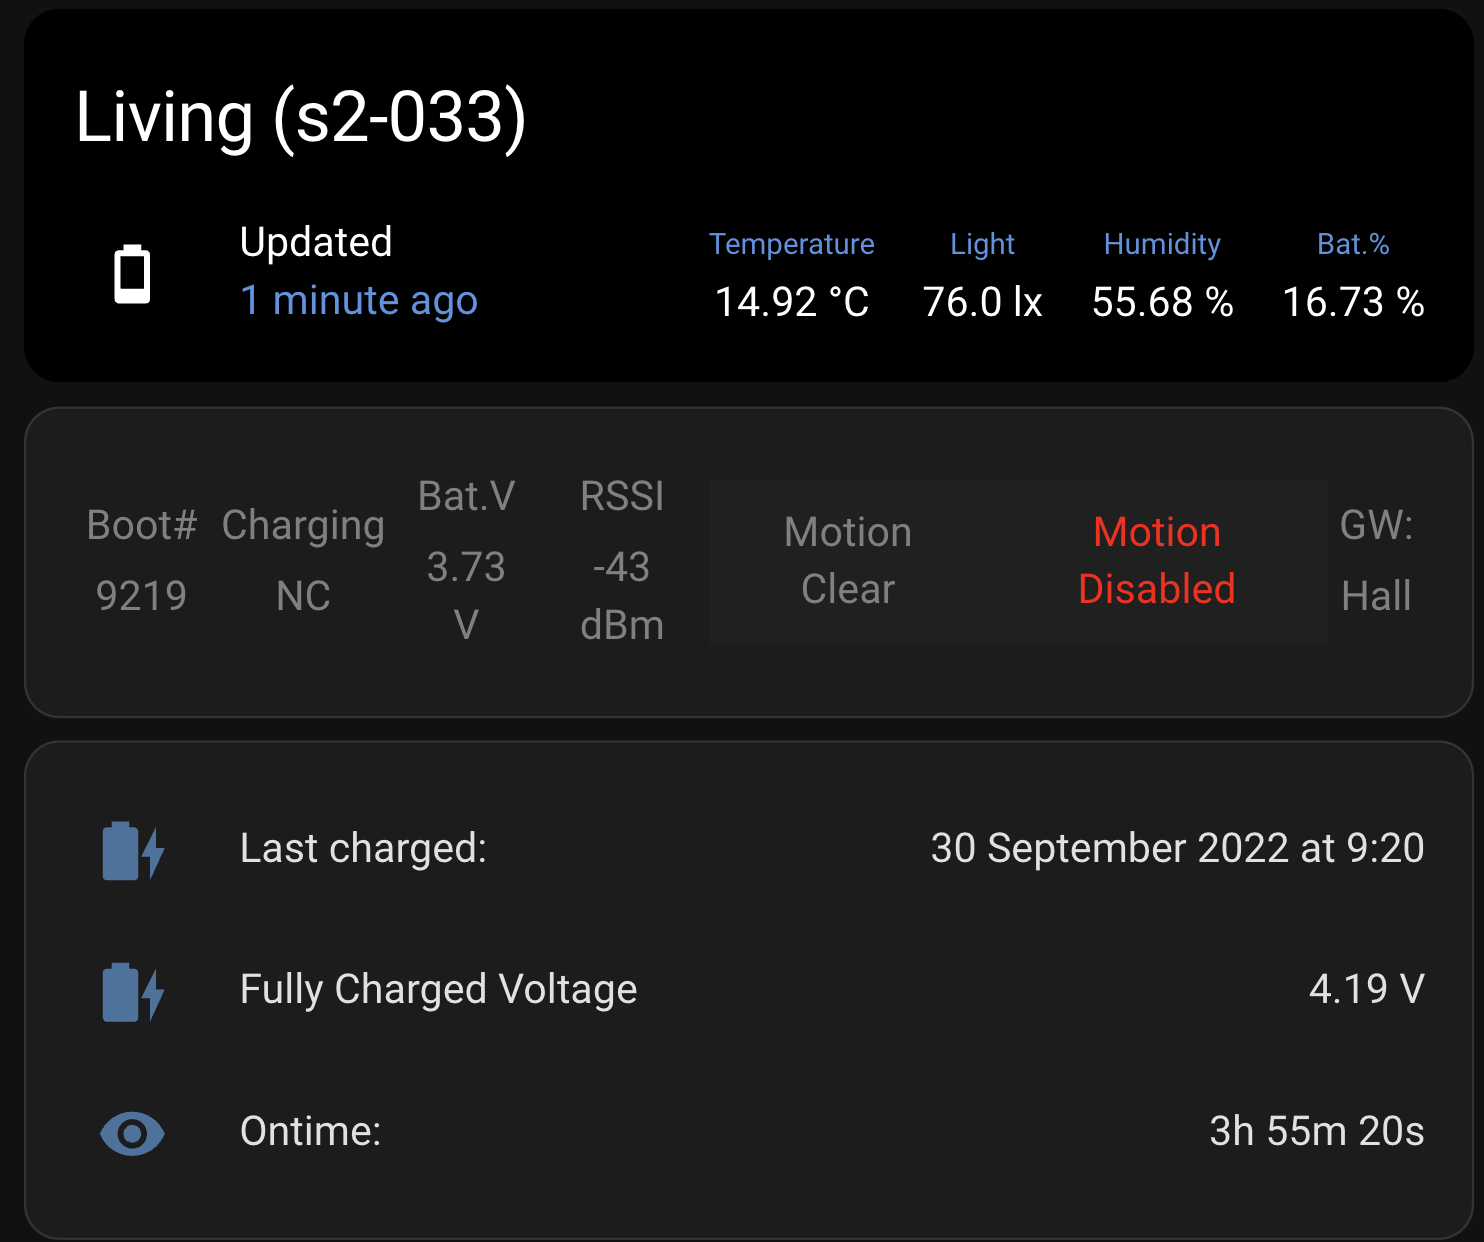
Update 2023-07-16:
LoRa is here!Sender can use ESPnow or/and LoRa for long range communication. Time/power penalty applies.
Receiver: it shall be separate device (gateway for LoRa) due to long time needed for communication with LoRa transciever
Update 2023-10-25:
Sensor device in Living room is finishing its life after 390 days on one charge: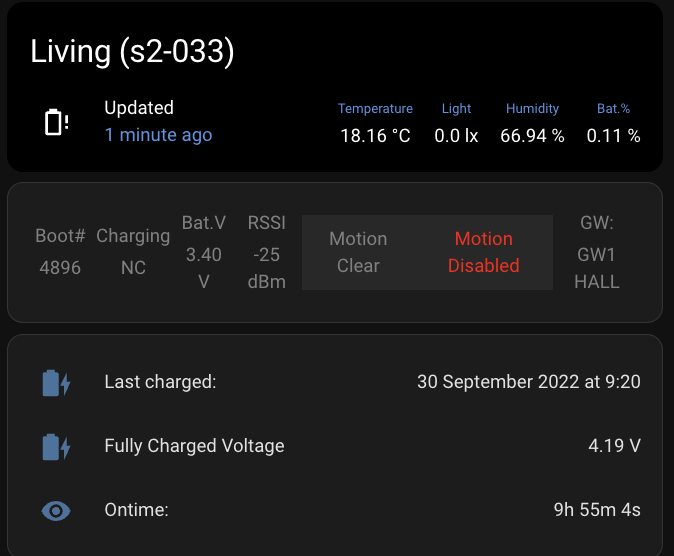
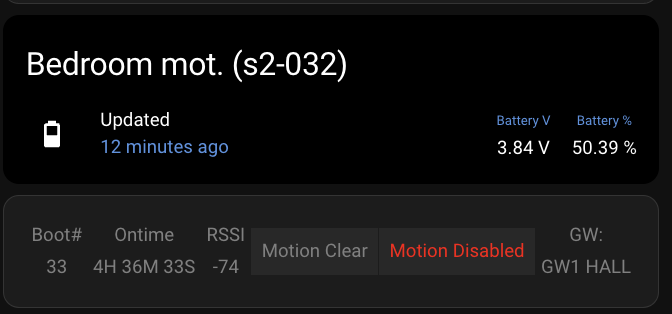
Sensor Bedroom Motion is still at 50% after 374 days... amazing performance - it shows "Motion disabled" as it is middle of the night, and apparently for the night we don't need the light to turn on in the bedroom just because we breathe in the bed - it will go to Enabled at 8am ;-)
Update 2023-11-10:
Sensor device in Living room died after 402 days on one charge - I call it SUCCESS ;-)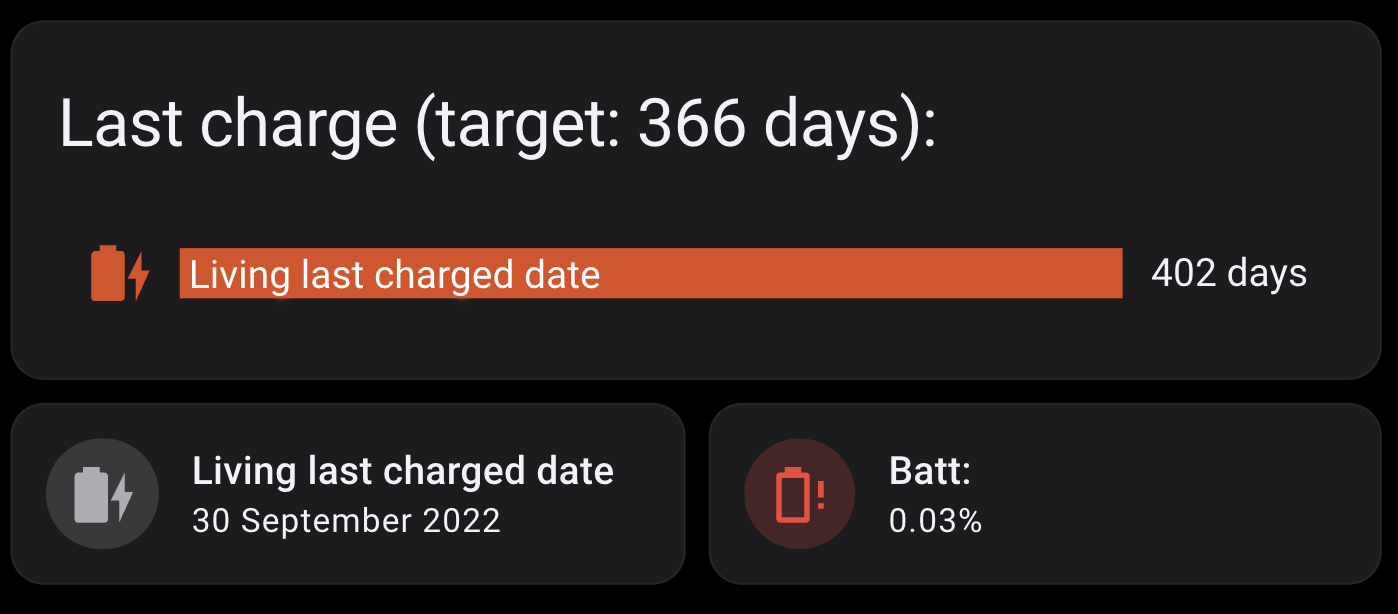
Update 2024-08-28:
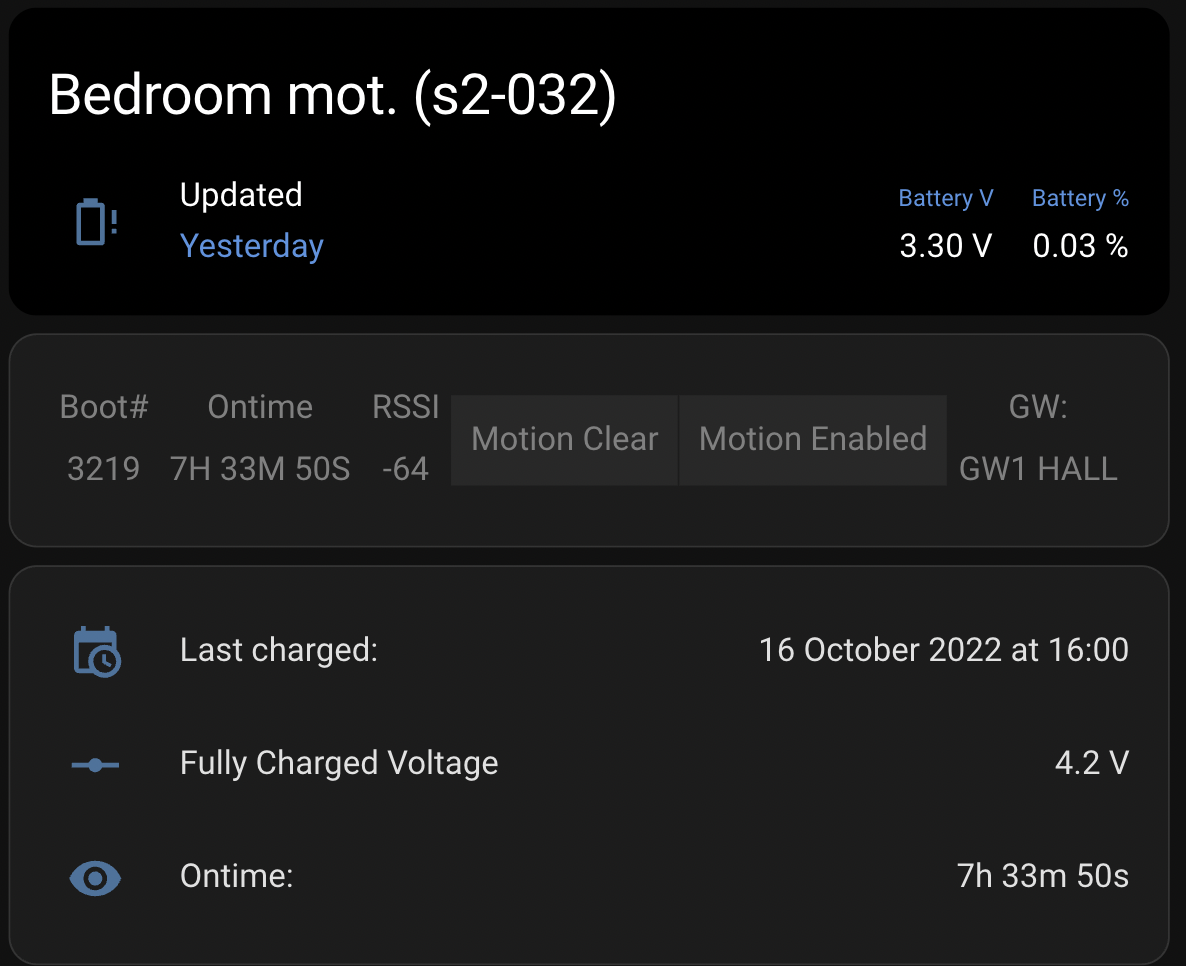
Sensor Bedroom Motion is almost dead - 3.7%, 3.63V - after 681 days - can it make up to 2 years? Lets see... (it shows "Motion disabled" as it is middle of the night, and apparently for the night we don't need the light to turn on in the bedroom just because we breathe in the bed - it will go to Enabled at 8am)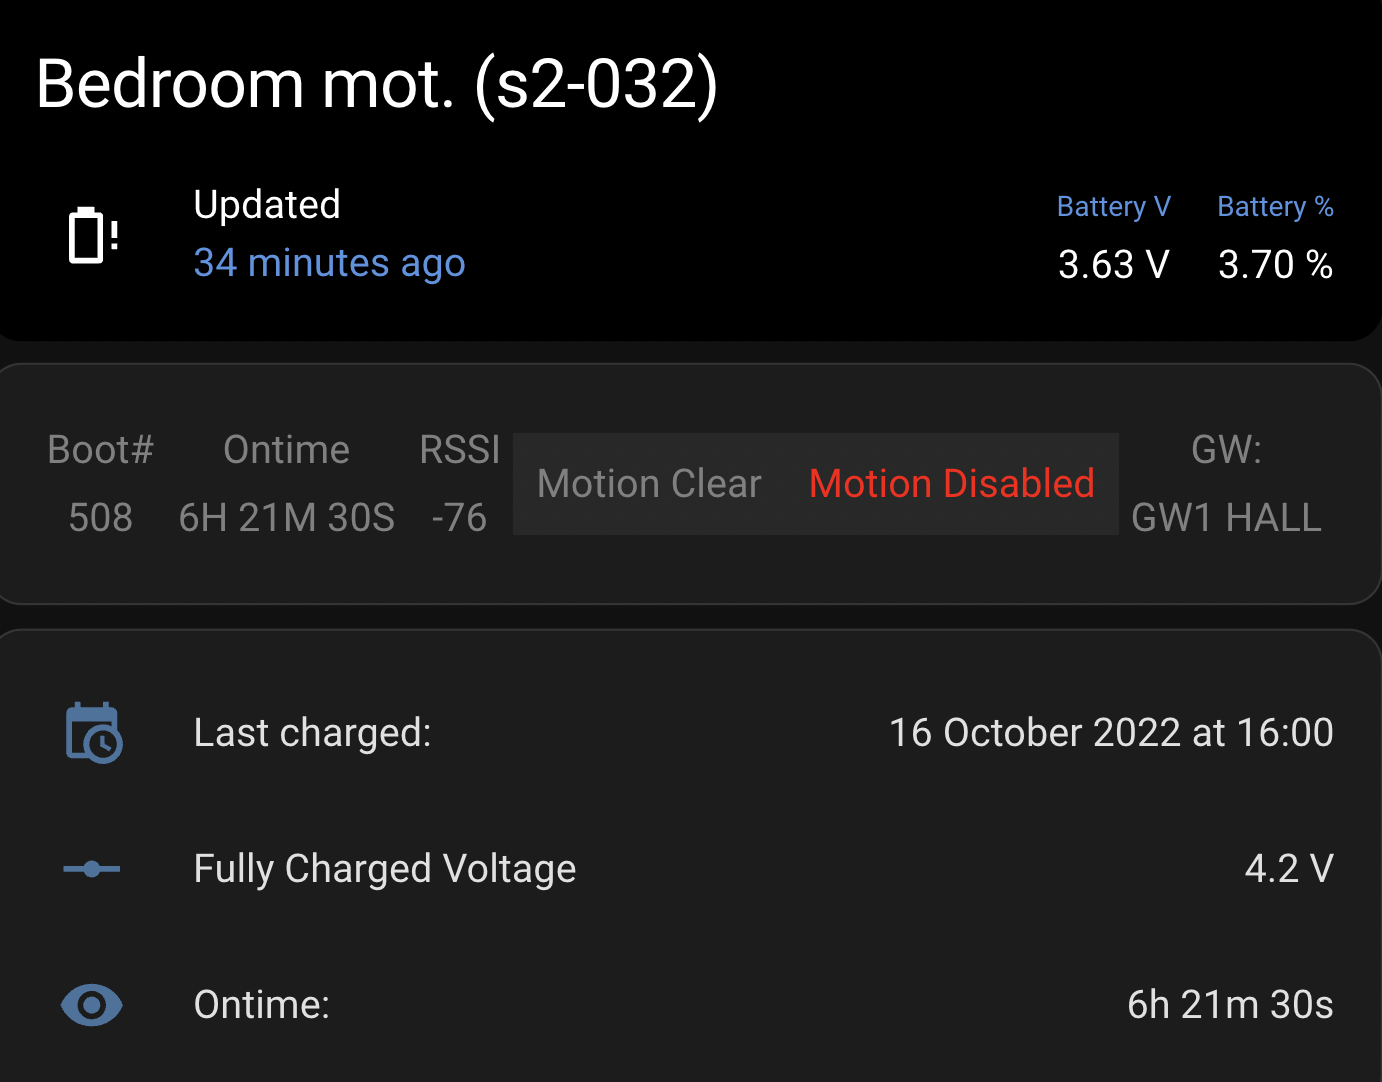
Update 2025-06-06:
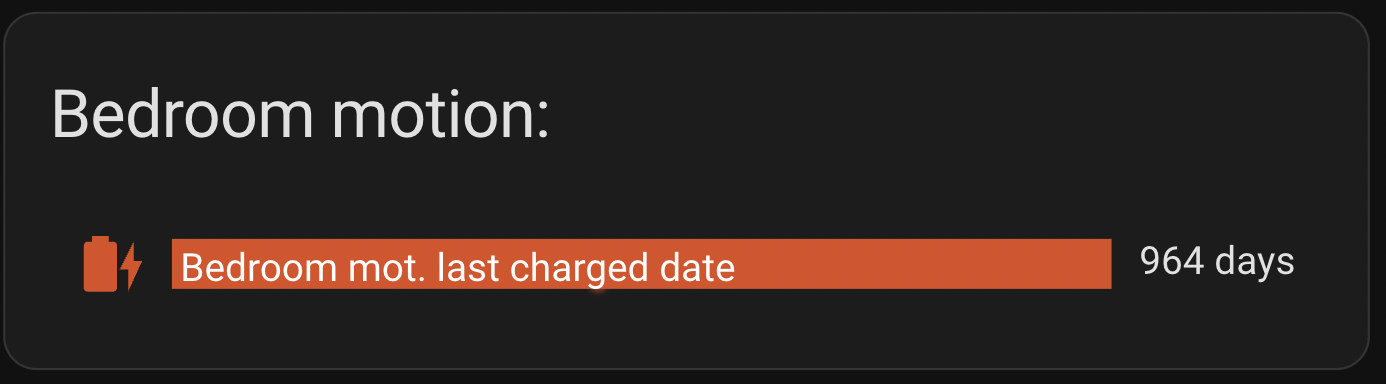
Sensor Bedroom Motion DIED after 964 days (2 years, 7 months, and 14 days)